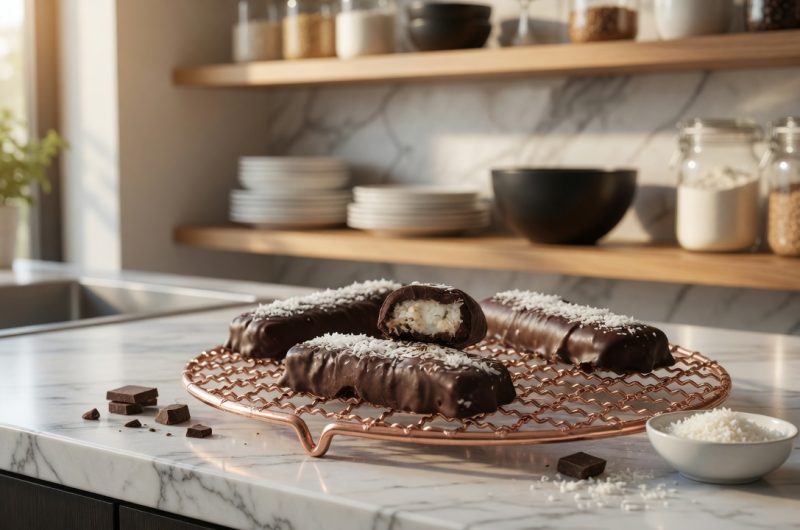
Low Carb Chocolate Coconut Bars are a simple homemade treat made with creamy coconut milk, coconut oil, unsweetened shredded coconut, sweetener, and dark chocolate. The coconut center becomes firm and chewy after chilling, while the chocolate coating gives every bar a rich finish. This easy chocolate coconut bars recipe is useful when you want a dessert with simple ingredients and a lower carbohydrate profile.
What Makes These Coconut Bars Special
These homemade coconut bars have two clear layers of texture. The inside is soft, moist, and packed with shredded coconut, while the outside becomes firm after being coated with melted dark chocolate. Coconut oil helps create a smooth filling, and full-fat coconut milk adds richness without requiring dairy cream. The result is a satisfying chocolate coconut dessert that can be prepared ahead.
A Simple Low Carb Dessert
If you are looking for an easy low carb dessert, these chocolate coconut bars are worth making. The recipe does not require complicated baking equipment or a long list of ingredients. Instead, the coconut mixture is cooked briefly, chilled until firm, cut into individual pieces, frozen, and then dipped in chocolate. This makes the recipe especially convenient for preparing several servings at one time.
Ingredients for the Coconut Filling
The coconut filling uses coconut oil, full-fat coconut milk, sweetener, and unsweetened shredded coconut. Coconut oil provides the fat needed to help the mixture firm up when chilled. Full-fat coconut milk gives the center a creamy consistency and a mild coconut flavor. The sweetener adds sweetness, while unsweetened shredded coconut provides the main texture and flavor of the filling.
Choosing Unsweetened Coconut
Unsweetened shredded coconut is important for keeping the sweetness under control. Sweetened coconut would change the flavor and could make the bars much sweeter than intended. Look for finely or moderately shredded unsweetened coconut, depending on the texture you prefer. The coconut should be fresh and free from any unusual smell, as stale coconut can affect the taste of the finished chocolate coconut bars.
Choosing the Dark Chocolate
Unsweetened dark chocolate forms the outer coating of these bars. Since chocolate is one of the main flavors, choose a good-quality variety that melts smoothly. The recipe specifically calls for 12 ounces of unsweetened dark chocolate, chopped before melting. Chopping the chocolate into smaller pieces allows it to melt more evenly and makes it easier to create a smooth coating around each chilled coconut bar.
Preparing the Pan
Start by preparing an 8-inch square pan with parchment paper. Covering the pan makes it easier to remove the chilled coconut filling later. Leave enough parchment extending slightly over the edges so you can lift the solid filling from the pan. A properly lined pan also helps keep the coconut mixture from sticking and makes cutting the finished slab into neat rectangles much easier.
Making the Coconut Mixture
The coconut base begins in a medium saucepan. Add the coconut oil, full-fat coconut milk, and sweetener, then cook the mixture until the coconut oil has completely melted and the liquid begins to boil. It is not necessary to cook the mixture for a long time. Once it reaches that stage, remove the saucepan from the heat and stir in the unsweetened shredded coconut.
Getting the Right Coconut Texture
Stir the shredded coconut thoroughly into the warm liquid so that it becomes evenly coated. Every portion of coconut should absorb some of the coconut milk and oil mixture. This helps the filling hold together once chilled. If the mixture looks evenly combined, transfer it to the prepared pan without delay. Spread it into an even layer so the finished bars have a consistent thickness.
Chilling the Coconut Filling
The coconut filling needs time to become firm enough to cut. Place the pan in the refrigerator and chill it for at least 2 hours. The exact setting time can vary slightly depending on the temperature of the refrigerator and the thickness of the mixture. Do not rush this stage because a soft filling can be difficult to cut cleanly and may break apart during the chocolate-dipping process.
Cutting the Bars
Once the coconut layer has become firm, remove it from the pan and place it on a suitable cutting surface. Use a sharp knife to divide the slab into approximately 20 rectangles. The original preparation suggests pieces measuring about 1 inch by 3 inches. You can aim for similar proportions while keeping the pieces as even as possible so they are easy to dip and look consistent when served.
Freezing Before Dipping
After cutting, arrange the coconut rectangles on a baking sheet lined with parchment paper. Cover the tray with plastic and place it in the freezer for 1 hour. Freezing makes the coconut centers much firmer, which helps them keep their shape when dipped into melted chocolate. This extra chilling step is particularly useful because the warm chocolate can otherwise soften the coconut filling too quickly.
Melting the Chocolate
The chocolate coating needs to be melted or tempered before the bars are dipped. Use your preferred chocolate-melting method and work carefully to prevent the chocolate from becoming overheated. Chopped chocolate generally melts more evenly than a large block. If you are tempering the chocolate, follow the method you normally use and make sure it is smooth before beginning the dipping process.
Dipping the Coconut Bars
When the chocolate is ready, dip each frozen coconut bar into the melted chocolate. Make sure the coconut center is covered well, then allow excess chocolate to drip away before placing the bar on parchment paper. Work with a few pieces at a time so the remaining bars stay cold. Keeping the coconut centers chilled makes the dipping process easier and helps the chocolate set more quickly.
Adding Coconut Decoration
For a simple finishing touch, sprinkle additional shredded coconut over the chocolate coating while it is still wet. The coconut will stick to the surface as the chocolate dries. This decoration also makes the bars immediately recognizable as chocolate coconut treats. Use only a small amount if you want a cleaner appearance, or add more if you enjoy a stronger coconut texture.
Letting the Chocolate Set
Place the dipped bars on parchment paper and allow them to dry until the chocolate coating has become firm. Avoid moving them too much while the chocolate is setting because this can leave marks or disturb the coating. If your kitchen is warm, the bars may take longer to become firm. Once the chocolate has set, transfer the bars to the refrigerator for storage.
Why Refrigeration Matters
Refrigeration is important because coconut oil becomes firm when cold. The chilled environment helps the coconut filling maintain its shape and keeps the chocolate coating firm. These are not bars that should be left sitting in a warm kitchen for an extended period. Store them refrigerated in a suitable covered container until you are ready to serve them.
How to Serve Chocolate Coconut Bars
These low carb chocolate coconut bars can be served directly from the refrigerator. Allowing them to sit for a short time before eating can make the coconut center slightly softer while keeping the chocolate coating firm. They work well as a small dessert, an afternoon sweet, or a make-ahead treat. Because the recipe makes about 20 to 25 pieces, it is also convenient for sharing.
Portioning the Bars
Cutting the filling into small rectangles gives you manageable individual servings. The suggested size of about 1 inch by 3 inches creates a narrow bar that is easy to coat in chocolate. You can keep the pieces close to this size for a consistent batch. Even cutting is helpful because pieces that vary greatly in size may require different amounts of chocolate and may not chill at the same rate.
Keeping the Recipe Low Carb
These bars are designed as a low carb chocolate dessert, but the exact carbohydrate content depends on the sweetener and chocolate used. The recipe calls for sweetener and unsweetened ingredients rather than sugar-sweetened coconut. If carbohydrate intake matters to you, check the labels of your specific ingredients, especially the sweetener and dark chocolate, because nutritional values can differ considerably between brands.
A Dairy-Free Chocolate Coconut Treat
The listed ingredients do not include butter, cream, or other dairy products. Full-fat coconut milk and coconut oil provide the rich texture needed for the filling. This makes the recipe useful for people looking for a dairy-free coconut dessert, provided the chosen chocolate and other packaged ingredients are also suitable for their dietary needs. Always check product labels if you need to avoid specific ingredients.
Preparing the Bars in Advance
One advantage of this recipe is that most of the preparation can be completed before serving. The coconut layer can be chilled, cut, frozen, and coated with chocolate ahead of time. Once the chocolate has set, the finished bars can remain refrigerated until needed. This makes them a practical choice when you want a homemade dessert ready without having to prepare everything immediately before serving.
Avoiding a Soft Coconut Center
A common problem with coconut bars is trying to cut or dip them before they are firm enough. The refrigerator stage should not be skipped, and the additional freezer time is especially useful before coating. If the coconut rectangles begin to soften while you are dipping them, return the remaining pieces to the freezer for a little longer and continue once they are firm again.
Keeping the Bars Neat
A sharp knife helps create cleaner edges when cutting the coconut slab. Wipe the blade between cuts if coconut mixture begins to build up on it. During dipping, use a fork or suitable dipping tool to lift each bar from the chocolate. Let excess chocolate drip away before transferring the bar to parchment. These small steps help produce a cleaner finish without adding extra ingredients or complicated techniques.
Storing Homemade Coconut Bars
Keep the completed chocolate coconut bars refrigerated in a covered container. If you stack them, parchment paper between layers can help prevent the chocolate coating from sticking. Keeping the container covered also protects the bars from absorbing refrigerator odors. For the best texture, take out only the amount you plan to serve and return the remaining bars to the refrigerator.
Using the Extra Shredded Coconut
The recipe includes additional shredded coconut for decorating the chocolate coating. You do not need to use a large amount. A light sprinkle is enough to add visible coconut flavor and texture. Add it immediately after dipping because the chocolate needs to be wet for the coconut to adhere properly. If the chocolate has already hardened, the decoration will not stick as easily.
Why Full-Fat Coconut Milk Works Well
Full-fat coconut milk is especially useful in this recipe because it gives the coconut filling a rich consistency. Lower-fat coconut milk may produce a different texture because it contains less coconut fat. The recipe specifically calls for full-fat coconut milk, so keeping that ingredient unchanged helps maintain the intended richness and structure of the coconut center.
Managing the Sweetness
The amount and type of sweetener can affect the final flavor. Since unsweetened coconut and unsweetened dark chocolate are used, the sweetener has an important role in balancing the bitterness of the chocolate and the natural flavor of coconut. Use the specified sweetener as provided in the recipe rather than adding extra sugar. The finished bars should have a clear coconut flavor with a rich chocolate coating.
Simple Equipment for the Recipe
You only need basic kitchen equipment to prepare these bars. An 8-inch square pan, parchment paper, a medium saucepan, a baking sheet, a knife, and equipment for melting or tempering chocolate are enough. A refrigerator and freezer are also essential for setting the coconut mixture and firming the cut bars. No oven is required, making this a convenient no-bake chocolate coconut dessert.
No-Bake Chocolate Coconut Bars
These bars are prepared without baking. The coconut mixture is heated briefly on the stovetop, then chilled until firm. The chocolate coating is melted separately before the chilled coconut pieces are dipped. Because there is no oven baking involved, the recipe is useful during warmer weather or whenever you want a homemade dessert without turning on the oven.
Making Consistent Chocolate Coating
For an even chocolate shell, make sure the coconut bars are thoroughly chilled before dipping. If the center is too soft, it can become difficult to handle and may leave coconut pieces in the melted chocolate. Dip each bar smoothly, allow excess chocolate to fall back into the bowl, and then place the coated bar directly onto parchment. A consistent dipping motion will give the batch a more uniform appearance.
Frequently Asked Recipe Questions
Can these coconut bars be made ahead?
Yes. The completed bars can be prepared ahead and kept refrigerated until serving.
Why does the filling need to be frozen?
Freezing makes the coconut rectangles firm enough to handle during chocolate dipping.
Can I skip the extra coconut decoration?
Yes, the decoration is optional.
How many bars does the recipe make?
The recipe yields approximately 20 to 25 bars, depending on how the filling is cut.
Serving and Storage Notes
For the best texture, keep these chocolate coconut bars refrigerated and serve them chilled or after a brief rest at room temperature. The coconut oil-based filling can soften when exposed to warmth, so refrigeration helps preserve the shape. Keep the bars covered when stored. If you are preparing them for guests, arrange them on a chilled serving plate shortly before serving.
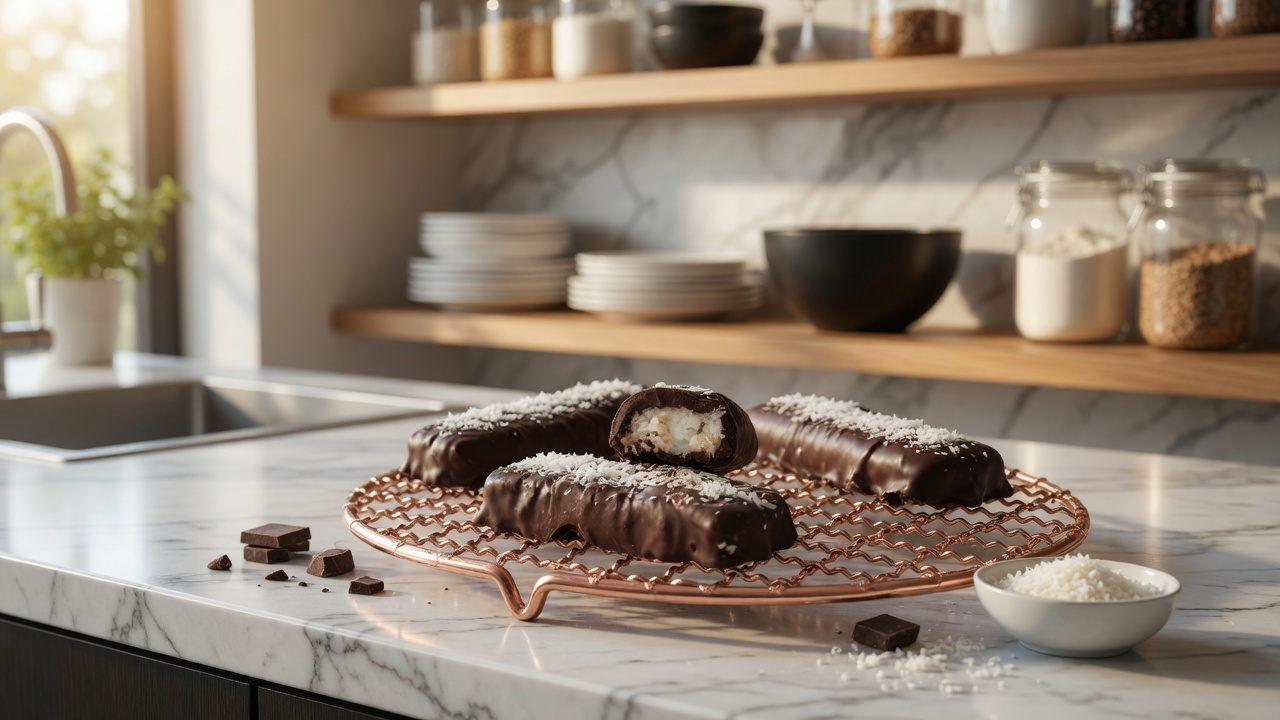
Low Carb Chocolate Coconut Bars
Creamy coconut filling made with coconut oil, full-fat coconut milk, sweetener, and unsweetened shredded coconut, covered with unsweetened dark chocolate. These no-bake chocolate coconut bars are chilled until firm and make an easy low carb dessert.
20-25
bars3
hours5
minutes3
hours5
minutesIngredients
2/3 cup coconut oil
2/3 cup full-fat coconut milk
2/3 cup sweetener
2 cups unsweetened shredded coconut, plus extra for decorating
12 ounces unsweetened dark chocolate, chopped
Directions
- Line an 8-inch square pan with parchment paper and set it aside. In a medium saucepan, combine the coconut oil, full-fat coconut milk, and sweetener. Cook until the coconut oil has melted and the mixture begins to boil. Remove the saucepan from the heat and stir in the shredded coconut.
- Transfer the coconut mixture to the prepared pan and spread it into an even layer. Refrigerate for at least 120 minutes, or until the filling is firm enough to cut.
- Remove the chilled coconut filling from the pan and cut it into approximately 20–25 rectangles. Arrange the pieces on a parchment-lined baking sheet, cover with plastic, and freeze for 60 minutes.
- Melt or temper the chopped dark chocolate using your preferred method. Dip each frozen coconut bar into the chocolate, allowing excess chocolate to drip away before placing each piece on parchment paper.
- Sprinkle additional shredded coconut over the chocolate while it is still wet, if desired. Allow the chocolate coating to dry and become firm.
- Refrigerate the finished chocolate coconut bars until ready to serve. Keep leftovers covered and refrigerated.