Fudgy brownie cookies combine the rich, intense chocolate flavor of brownies with the chewy edges and soft centers of cookies. These cookies develop shiny crackly tops, gooey interiors, and deep chocolate notes that make them taste like a cross between bakery brownies and homemade chocolate cookies. The recipe below is written in extreme detail so every step is clear and easy to follow.
Introduction to Fudgy Brownie Cookies
Brownie cookies are different from regular chocolate cookies because the texture depends heavily on the balance between melted chocolate, butter, sugar, eggs, and flour. The goal is not a cakey cookie. Instead, you want:
- Thin crackly tops
- Soft and chewy edges
- Thick fudgy centers
- Intense chocolate flavor
- Slightly gooey texture when warm
- Rich brownie-like density
To achieve this texture, the batter is usually softer than standard cookie dough. The sugar and eggs are whipped enough to create that signature shiny crust, while melted chocolate gives body and richness.
This recipe creates bakery-style brownie cookies with a deep chocolate flavor and beautiful texture.
Yield
This recipe makes approximately:
- 18 to 22 medium-large cookies
- Or 30 smaller cookies
Preparation Time
- Preparation: 30 minutes
- Chilling: 20 to 30 minutes
- Baking: 10 to 12 minutes per batch
- Cooling: 20 minutes
Ingredients
Dry Ingredients
- 1 cup all-purpose flour
- 1/4 cup unsweetened cocoa powder
- 1 teaspoon baking powder
- 1/2 teaspoon salt
- 1 tablespoon cornstarch
Chocolate Components
- 200 grams dark chocolate, chopped
- 1/2 cup semi-sweet chocolate chips
- 2 tablespoons cocoa powder for extra richness
Wet Ingredients
- 1/2 cup unsalted butter
- 3/4 cup brown sugar
- 1/2 cup white granulated sugar
- 2 large eggs
- 1 egg yolk
- 2 teaspoons vanilla extract
Optional Add-Ins
You may add any of the following depending on your preference:
- 1/2 cup chocolate chunks
- 1/2 cup walnuts
- 1/2 cup pecans
- 1/3 cup caramel bits
- Sea salt flakes for topping
- Espresso powder for stronger chocolate flavor
- Mini marshmallows
- White chocolate chips
Choosing the Best Chocolate
The chocolate used in this recipe matters greatly because it affects both flavor and texture.
Best Types of Chocolate
Use:
- Dark chocolate between 60% and 75% cocoa
- High-quality semi-sweet chocolate
- Baking chocolate bars instead of candy bars
Avoid:
- Cheap compound chocolate
- Chocolate with waxy texture
- Very sweet milk chocolate only
A combination of melted chocolate and cocoa powder gives the cookies a layered chocolate flavor. Melted chocolate creates richness while cocoa powder intensifies depth.
Why Brown Sugar Matters
Brown sugar contains molasses, which:
- Adds moisture
- Creates chewiness
- Enhances fudgy texture
- Gives slight caramel notes
White sugar helps create:
- Crackly tops
- Slight crispness
- Better spread
Using both sugars together creates balanced cookies.
Step-by-Step Instructions
Step 1: Prepare Baking Trays
Preheat your oven to 175°C or 350°F.
Line two baking trays with parchment paper. Avoid greasing directly because parchment helps prevent excessive spreading and sticking.
If your kitchen is very warm, place the lined trays in the refrigerator while preparing the dough.
Step 2: Mix Dry Ingredients
In a medium bowl combine:
- Flour
- Cocoa powder
- Additional cocoa powder
- Baking powder
- Salt
- Cornstarch
Whisk thoroughly for at least 1 minute.
This step distributes ingredients evenly and prevents lumps.
Cornstarch helps soften the cookies and contributes to a delicate fudgy center.
Set the bowl aside.
Step 3: Melt Chocolate and Butter
Place:
- Chopped dark chocolate
- Butter
into a heatproof bowl.
You can melt them using either a microwave or double boiler.
Microwave Method
Heat in 20-second intervals.
Stir after each interval.
Continue until smooth.
Do not overheat because chocolate burns easily.
Double Boiler Method
Place the bowl over simmering water.
Do not let the bowl touch the water.
Stir continuously until silky smooth.
Once melted:
- Add chocolate chips
- Stir until partially melted
The mixture should be glossy and smooth.
Allow it to cool for about 5 to 7 minutes before mixing with eggs.
If the chocolate is too hot, it may scramble the eggs.
Step 4: Beat Eggs and Sugars
In a large mixing bowl combine:
- Brown sugar
- White sugar
- Eggs
- Egg yolk
- Vanilla extract
Beat using an electric mixer for 4 to 5 minutes.
This step is extremely important.
The mixture should become:
- Lighter in color
- Thick
- Slightly fluffy
- Smooth
Whipping air into the eggs helps create shiny brownie-like tops.
If mixed insufficiently:
- Cookies may become dense
- Tops may not crackle properly
Step 5: Combine Chocolate with Egg Mixture
Slowly pour the melted chocolate mixture into the whipped egg mixture.
Mix gently but thoroughly.
The batter should become thick, shiny, and dark brown.
Scrape down the sides of the bowl to ensure even mixing.
Step 6: Add Dry Ingredients
Gradually fold dry ingredients into the wet mixture.
Do not overmix.
Use a spatula and fold carefully until no dry streaks remain.
At this stage the dough will be:
- Soft
- Thick
- Slightly sticky
- Similar to brownie batter
If adding nuts or extra chocolate chunks, fold them in now.
Step 7: Chill the Dough
Place the dough in the refrigerator for 20 to 30 minutes.
This step helps:
- Prevent excessive spreading
- Deepen flavor
- Improve texture
- Make scooping easier
Do not skip chilling unless your kitchen is very cold.
Step 8: Scoop the Dough
Use a cookie scoop or tablespoon.
Place dough portions on prepared trays with enough spacing because the cookies spread while baking.
For bakery-style cookies:
- Use 2 tablespoons dough per cookie
For smaller cookies:
- Use 1 tablespoon dough
Optional:
Press a few chocolate chunks on top before baking.
Step 9: Bake the Cookies
Bake at 175°C or 350°F for 10 to 12 minutes.
The cookies are ready when:
- Tops are shiny and crackly
- Edges are set
- Centers still appear slightly soft
Do not overbake.
The cookies continue cooking on the tray after removal from the oven.
Overbaking causes:
- Dry texture
- Loss of fudginess
- Hard centers
Step 10: Cooling Process
Allow cookies to rest on the tray for 10 minutes.
Then transfer to a cooling rack.
Fresh from the oven they may seem fragile, but they firm up while cooling.
Warm cookies will have gooey centers.
Fully cooled cookies become chewy and fudgy.
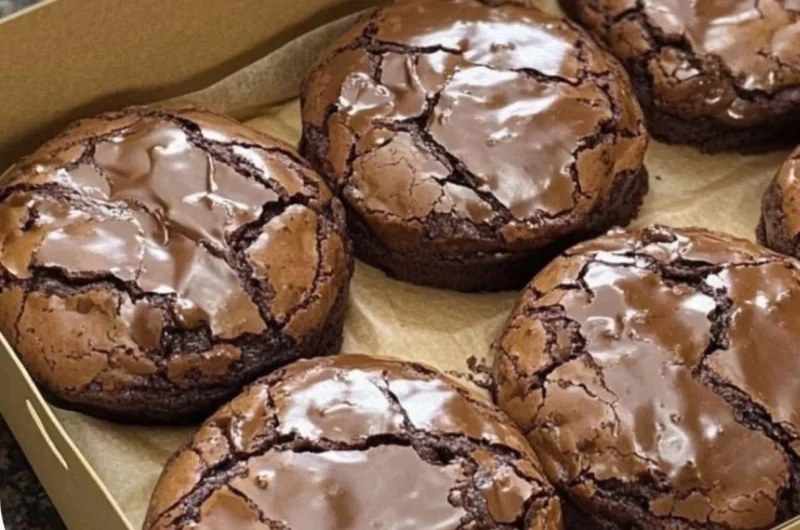
Understanding the Crackly Top
One of the most attractive features of brownie cookies is the shiny crackled surface.
This forms because:
- Sugar dissolves properly
- Eggs are beaten sufficiently
- Batter contains enough moisture
- Oven temperature is correct
For best crackly tops:
- Use room-temperature eggs
- Beat sugar and eggs thoroughly
- Bake immediately after scooping chilled dough
- Avoid reducing sugar too much
Texture Guide
If You Want Gooier Cookies
- Bake 1 minute less
- Add extra chocolate chunks
- Slightly reduce flour
If You Want Chewier Cookies
- Chill dough longer
- Add extra brown sugar
- Bake full 12 minutes
If You Want Thicker Cookies
- Increase flour by 2 tablespoons
- Chill dough 1 hour
- Use cold baking trays
Common Mistakes and Solutions
Problem: Cookies Spread Too Much
Possible reasons:
- Dough too warm
- Butter too hot
- Insufficient flour
- No chilling time
Solution:
- Chill dough longer
- Measure flour accurately
- Use parchment paper
Problem: No Crackly Tops
Possible reasons:
- Eggs not whipped enough
- Sugar not dissolved properly
- Batter sat too long before baking
Solution:
- Beat eggs and sugar thoroughly
- Bake immediately after scooping
Problem: Dry Cookies
Possible reasons:
- Overbaking
- Too much flour
- Oven too hot
Solution:
- Bake shorter time
- Use oven thermometer
- Spoon and level flour instead of packing it
Problem: Flat Dense Cookies
Possible reasons:
- Old baking powder
- Too much liquid
- Chocolate too warm
Solution:
- Use fresh baking powder
- Cool chocolate slightly before mixing
Flavor Variations
Double Chocolate Brownie Cookies
Add:
- Extra chocolate chips
- Chocolate chunks inside dough
This creates melted chocolate pockets.
Salted Brownie Cookies
Sprinkle flaky sea salt immediately after baking.
The salt balances sweetness and intensifies chocolate flavor.
Mocha Brownie Cookies
Add:
- 1 teaspoon espresso powder
Coffee enhances chocolate richness without making the cookies taste like coffee.
Nutty Brownie Cookies
Add:
- Toasted walnuts
- Pecans
- Hazelnuts
Toasting nuts first improves flavor significantly.
Peanut Butter Brownie Cookies
Swirl small spoonfuls of peanut butter into the dough before baking.
Mint Chocolate Brownie Cookies
Add:
- Mint extract
- Mint chocolate chunks
Caramel Brownie Cookies
Insert soft caramel pieces into the center of each dough ball.
The caramel melts into gooey centers.
Serving Suggestions
These cookies taste excellent:
- Warm with milk
- With coffee
- Alongside vanilla ice cream
- Drizzled with chocolate sauce
- Sandwiched with ice cream
- Crumbled over desserts
You can also use them in:
- Ice cream sandwiches
- Brownie trifles
- Cookie milkshakes
- Dessert platters
Storage Instructions
Room Temperature
Store in an airtight container for up to 5 days.
Place parchment between layers to prevent sticking.
Refrigerator
Store up to 1 week.
Warm slightly before serving for best texture.
Freezing Baked Cookies
Freeze in airtight containers up to 2 months.
Thaw at room temperature.
Freezing Dough
Scoop dough balls onto a tray and freeze.
Transfer frozen dough balls to freezer bags.
Bake directly from frozen:
- Add 1 to 2 extra minutes baking time
Professional Bakery Tips
Use Room Temperature Eggs
Cold eggs can seize melted chocolate and affect texture.
Weigh Ingredients if Possible
Baking becomes more accurate with a kitchen scale.
Use Good Cocoa Powder
High-quality cocoa dramatically improves flavor.
Avoid Overmixing Flour
Too much mixing develops gluten and creates tough cookies.
Rotate Baking Trays
Halfway through baking rotate trays for even cooking.
Use Light-Colored Baking Sheets
Dark trays may overbrown the bottoms.
Advanced Technique for Ultra-Fudgy Cookies
For even richer cookies:
- Brown the butter before melting chocolate
Brown butter adds:
- Nutty flavor
- Deeper caramel notes
- Greater complexity
How to Brown Butter
Heat butter in a saucepan over medium heat.
Stir continuously until:
- Golden brown bits form
- Butter smells nutty
Cool slightly before mixing with chocolate.
Creating Bakery-Style Appearance
To make cookies look professionally baked:
Immediately after baking:
- Use a round cutter larger than the cookie
- Swirl gently around the cookie
This shapes perfectly round cookies.
You can also:
- Add chocolate chunks on top before baking
- Sprinkle sea salt after baking
- Slightly underbake centers
Rich Chocolate Ganache Option
For extra indulgence prepare ganache.
Ingredients
- 1/2 cup heavy cream
- 100 grams dark chocolate
Method
Heat cream until steaming.
Pour over chopped chocolate.
Wait 2 minutes.
Stir until smooth.
Drizzle over cooled cookies.
Pairing Ideas
These cookies pair wonderfully with:
- Vanilla ice cream
- Cold milk
- Espresso
- Cappuccino
- Hot chocolate
- Salted caramel sauce
- Fresh strawberries
Making the Recipe for Parties
For large gatherings:
- Double the recipe
- Chill dough overnight
- Bake fresh before serving
You can create:
- Mini brownie cookies
- Giant bakery cookies
- Sandwich cookies
- Dessert platters
Kid-Friendly Version
Reduce dark chocolate bitterness by:
- Using semi-sweet chocolate
- Adding milk chocolate chips
Children often prefer softer sweeter flavors.
Extra Decadent Version
For intensely rich cookies:
- Add chunks of brownies into the dough
- Stuff centers with Nutella
- Add white chocolate drizzle
Final Texture Expectations
Perfect fudgy brownie cookies should have:
- Crisp edges
- Soft chewy middle
- Crackled tops
- Rich chocolate aroma
- Dense brownie-like bite
- Melted chocolate pockets
The center should remain slightly soft even after cooling.
Complete Ingredient Summary
- 1 cup flour
- 1/4 cup cocoa powder
- 2 tablespoons cocoa powder
- 1 tablespoon cornstarch
- 1 teaspoon baking powder
- 1/2 teaspoon salt
- 200 grams dark chocolate
- 1/2 cup chocolate chips
- 1/2 cup butter
- 3/4 cup brown sugar
- 1/2 cup white sugar
- 2 eggs
- 1 egg yolk
- 2 teaspoons vanilla
Optional:
- Nuts
- Caramel
- Sea salt
- Espresso powder
- Extra chocolate chunks
Final Baking Notes
The biggest secret to excellent brownie cookies is balancing baking time carefully. The cookies should look slightly underdone when removed from the oven. As they cool, the centers transform into a rich fudgy texture.
Every oven behaves differently, so testing one tray first can help determine the perfect baking time for your kitchen.
Freshly baked brownie cookies have the best flavor within the first 24 hours, but they remain delicious for several days when stored correctly.