Ingredients
Dry Ingredients
- 2 cups gluten-free all-purpose flour blend (store-bought or homemade)
- 1 cup brown rice flour
- 1/2 cup tapioca starch (or tapioca flour)
- 1/4 cup potato starch (not potato flour)
- 2 tablespoons sugar (or honey)
- 1 1/2 teaspoons salt
- 2 teaspoons xanthan gum (very important for structure)
- 2 1/4 teaspoons instant yeast (1 packet)
Wet Ingredients
- 1 1/2 cups warm water (around 40–45°C, not hot)
- 2 large eggs (room temperature)
- 1/4 cup oil (vegetable, olive, or sunflower oil)
- 1 teaspoon apple cider vinegar
Equipment
- Large mixing bowl
- Stand mixer or hand mixer (recommended)
- 9×5 inch loaf pan
- Measuring cups and spoons
- Spatula
- Plastic wrap or clean cloth
Step 1: Understanding the Flour Blend
A good gluten-free bread depends heavily on flour balance:
- Rice flour provides structure
- Tapioca starch adds chewiness
- Potato starch adds softness and moisture
- Xanthan gum replaces gluten elasticity
If you skip xanthan gum, your bread will crumble easily.
Step 2: Activate the Yeast (Optional but Recommended)
Even with instant yeast, this step ensures your yeast is active.
- Take the warm water in a bowl.
- Add sugar and stir.
- Sprinkle yeast on top.
- Let it sit for 5–10 minutes.
You should see foam forming. If not, your yeast may be inactive.
Step 3: Mix Dry Ingredients
In a large bowl:
- Add gluten-free flour blend
- Add rice flour, tapioca starch, potato starch
- Add salt and xanthan gum
Whisk thoroughly to evenly distribute everything.
This step is important because uneven xanthan gum leads to inconsistent texture.
Step 4: Mix Wet Ingredients
In another bowl:
- Beat eggs lightly
- Add oil
- Add vinegar
The vinegar helps improve texture and yeast activity.
Step 5: Combine Ingredients
- Pour yeast mixture into dry ingredients.
- Add wet mixture.
- Mix using a stand mixer (preferred) or hand mixer.
Mix for 3–5 minutes.
Unlike regular dough, gluten-free dough will look like thick batter, not kneadable dough.
Step 6: Check Consistency
The batter should be:
- Thick but spreadable
- Sticky
- Not dry or crumbly
If too thick → add 1–2 tablespoons water
If too thin → add 1–2 tablespoons flour
Step 7: Transfer to Pan
- Grease your loaf pan well
- Pour the batter into the pan
- Smooth the top with a wet spatula
Optional: sprinkle seeds (sesame, flax, sunflower) on top
Step 8: First Rise
- Cover with plastic wrap or cloth
- Let it rise in a warm place
Time: 30–60 minutes
The dough should rise to about 1.5 times its size (not double like wheat dough)
Step 9: Baking
- Preheat oven to 180°C
- Place loaf in middle rack
- Bake for 40–50 minutes
Check doneness:
- Top should be golden brown
- Tap bottom → hollow sound
- Internal temp ~95°C (if thermometer available)
Step 10: Cooling (Very Important)
- Remove from pan immediately
- Place on wire rack
- Let cool completely (at least 2 hours)
Cutting too early will make it gummy.
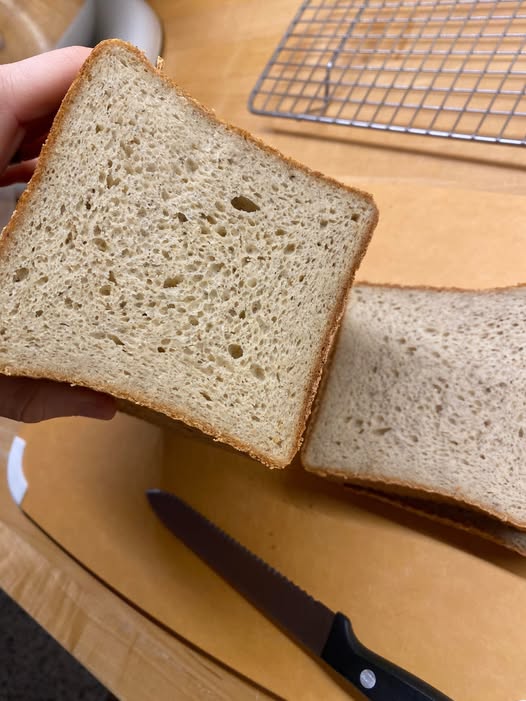
Texture and Taste Notes
- Soft crumb
- Slightly moist
- Mild flavor
- Best for sandwiches or toast
Common Mistakes and Fixes
1. Bread is Dense
Cause:
- Too little liquid
- Old yeast
Fix:
- Increase hydration slightly
- Use fresh yeast
2. Bread Collapses
Cause:
- Too much liquid
- Over-proofing
Fix:
- Reduce water slightly
- Shorten rise time
3. Gummy Inside
Cause:
- Underbaked
- Cut too early
Fix:
- Bake longer
- Cool fully
4. Crumbly Texture
Cause:
- Missing xanthan gum
Fix:
- Always include binder
Variations
Dairy-Free Version
This recipe is already dairy-free.
Vegan Version
Replace:
- Eggs → 2 tablespoons flaxseed + 6 tablespoons water (let sit 10 minutes)
Note: texture will be slightly denser.
Whole Grain Version
Replace part of rice flour with:
- Sorghum flour
- Buckwheat flour
Flavored Bread Ideas
Add:
- Garlic powder + herbs (savory)
- Cinnamon + raisins (sweet)
- Seeds and nuts for texture
Storage Tips
- Room temperature: 2–3 days (airtight)
- Fridge: up to 1 week
- Freezer: up to 2 months (slice before freezing)
To reheat:
- Toast slices
- Or warm in oven
Gluten-free bread takes practice. The key differences from regular bread are:
- No kneading required
- Batter-like dough
- Precise hydration is critical
- Cooling time is essential
Once you get the balance right, you can consistently make soft, delicious gluten-free bread at home.