No-bake chocolate peanut butter bars are one of the most beloved homemade desserts in the world of easy sweets. They are rich, creamy, deeply satisfying, and incredibly simple to prepare. The dessert combines two classic flavors that naturally complement one another: chocolate and peanut butter. The result is a layered treat with a buttery peanut base and a smooth chocolate topping that melts in your mouth.
These bars are often compared to homemade peanut butter cups because of their flavor profile, but they are thicker, softer, richer, and more filling. Unlike baked desserts, these bars do not require an oven, complicated baking skills, or advanced pastry techniques. This makes them ideal for beginners, busy families, students, office gatherings, celebrations, and anyone who wants an impressive dessert with minimal stress.
One of the greatest advantages of this dessert is flexibility. You can customize the sweetness level, texture, chocolate intensity, thickness, and even nutritional profile. Some people enjoy them soft and creamy, while others prefer firmer chilled bars with a crisp chocolate shell. Some recipes use graham crackers, while others use digestive biscuits, cookies, oats, or cereal crumbs.
The detailed guide below explores every possible aspect of making perfect no-bake chocolate peanut butter bars. It includes ingredient science, preparation methods, troubleshooting, advanced techniques, flavor variations, storage advice, serving ideas, texture control, presentation strategies, and professional-level tips.
This recipe is intentionally extremely detailed and extensive for readers who want a complete understanding of the dessert rather than a short summary.
History and Popularity of Chocolate Peanut Butter Desserts
Chocolate and peanut butter became a famous combination in North America during the early twentieth century. Peanut butter itself became commercially popular due to its affordability, nutritional value, and creamy texture. Chocolate, already widely loved, naturally paired well with the salty richness of peanuts.
Eventually, homemade peanut butter bars emerged as a practical dessert because they required:
Minimal ingredients
No expensive equipment
No advanced culinary skill
No baking
Fast preparation
Long shelf life
These bars became especially popular for:
School bake sales
Church gatherings
Holiday dessert tables
Picnics
Family parties
Potluck dinners
Lunchbox treats
Road trips
The no-bake version gained even more popularity because it allowed people to prepare desserts during hot weather without heating the kitchen.
Understanding the Structure of the Dessert
A classic no-bake chocolate peanut butter bar usually contains two main layers:
Layer One: Peanut Butter Base
This layer provides structure, sweetness, creaminess, and chewiness. It is made from crushed biscuits or crumbs combined with butter and peanut butter.
The texture should be:
Dense but soft
Creamy but sliceable
Rich but balanced
Stable enough to hold shape
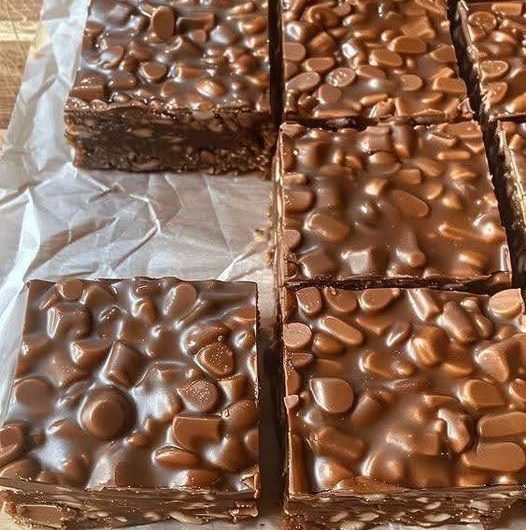
Layer Two: Chocolate Topping
This layer creates contrast in flavor and texture. It hardens slightly after chilling and provides a smooth finish.
The topping should be:
Glossy
Silky
Rich
Easy to bite
Not too hard
The balance between these layers determines whether the dessert feels luxurious or overly heavy.
Complete Ingredient List
Main Ingredients for the Peanut Butter Base
3 cups graham cracker crumbs or digestive biscuit crumbs
1 and 1/4 cups creamy peanut butter
1 cup unsalted butter, melted
2 cups powdered sugar
1 teaspoon vanilla extract
1/4 teaspoon salt
Main Ingredients for the Chocolate Layer
2 cups semi-sweet chocolate chips
1/2 cup creamy peanut butter
2 tablespoons butter
Optional Flavor Enhancers
1 teaspoon espresso powder
1 teaspoon sea salt flakes
1/2 teaspoon cinnamon
1 tablespoon honey
1 tablespoon maple syrup
1/2 cup crushed roasted peanuts
1/4 cup chopped dark chocolate
1/4 cup mini chocolate chips
Deep Ingredient Analysis
Peanut Butter
Peanut butter is the soul of this dessert. Different types produce different results.
Creamy Peanut Butter
Creates:
Smooth texture
Classic flavor
Easy mixing
Stable consistency
Crunchy Peanut Butter
Adds:
Crunch
Texture
Visible peanut pieces
More rustic appearance
Natural Peanut Butter
Natural peanut butter has separated oils and fewer stabilizers. It provides a more authentic roasted peanut flavor but may produce softer bars.
Processed Peanut Butter
Commercial brands often produce firmer and more predictable results because they contain stabilizers.
The Science Behind Butter
Butter acts as:
A binding ingredient
A flavor enhancer
A moisture source
A texture softener
Without enough butter, the bars become dry and crumbly.
Too much butter creates greasy bars that fail to set properly.
Why Powdered Sugar Works Best
Powdered sugar dissolves easily and creates smooth filling.
Granulated sugar causes:
Grittiness
Poor texture
Uneven sweetness
Powdered sugar also helps stabilize the peanut butter mixture.
Chocolate Selection Guide
Milk Chocolate
Sweeter
Creamier
Child-friendly flavor
Softer finish
Semi-Sweet Chocolate
Balanced sweetness
Classic dessert flavor
Best overall choice
Dark Chocolate
Intense cocoa flavor
Less sweet
Elegant taste
Pairs beautifully with sea salt
Equipment Guide
Essential Equipment
Large mixing bowl
Microwave-safe bowl
Rubber spatula
Measuring cups
Measuring spoons
9×13 inch pan
Parchment paper
Sharp knife
Helpful Additional Tools
Food processor
Offset spatula
Kitchen scale
Bench scraper
Silicone mat
Preparing the Workspace
Before beginning:
Wash and dry all equipment.
Measure all ingredients in advance.
Line the pan with parchment paper.
Clear enough counter space.
Prepare refrigeration space.
This organization improves workflow and reduces mistakes.
Step-by-Step Detailed Preparation Process
Step 1: Preparing the Pan
Take a 9×13 inch baking dish.
Cut parchment paper large enough to cover the bottom and sides.
Leave overhanging edges.
These edges create lifting handles later.
Lightly grease the parchment paper with butter or nonstick spray.
This prevents sticking and ensures smooth removal.
Step 2: Crushing the Biscuits
Place biscuits into a food processor.
Pulse until fine crumbs form.
The crumbs should resemble coarse sand.
Avoid over-processing into powder.
If no processor is available:
Place biscuits into a sealed bag.
Crush using a rolling pin.
Continue until evenly crushed.
Measure crumbs after crushing.
Accurate measurement matters for texture consistency.
Step 3: Melting the Butter
Place butter in a saucepan over low heat.
Alternatively use microwave intervals of 15 seconds.
Do not boil the butter.
Allow slight cooling before mixing.
Very hot butter can affect texture and melt sugar unevenly.
Step 4: Mixing the Peanut Butter Filling
In a large bowl combine:
Crushed crumbs
Melted butter
Peanut butter
Powdered sugar
Vanilla
Salt
Begin mixing slowly.
The mixture gradually thickens.
Eventually it should resemble soft dough.
The consistency should:
Hold shape when pressed
Feel smooth
Not appear oily
Not crumble apart
Texture Adjustment Techniques
If Too Dry
Add:
1 tablespoon melted butter
OR
1 tablespoon peanut butter
If Too Wet
Add:
Extra crumbs
OR
Extra powdered sugar
Step 5: Pressing the Filling Into the Pan
Transfer mixture into prepared pan.
Spread evenly using spatula.
Press firmly into corners.
Compacting is essential.
Loose filling leads to crumbling during slicing.
Professional tip:
Place parchment paper on top and flatten using a measuring cup.
This creates a smooth bakery-style surface.
Step 6: Chilling the Base Layer
Place pan into refrigerator for 30 to 45 minutes.
This allows fats to solidify.
A chilled base prevents chocolate from mixing into the peanut layer.
Step 7: Making the Chocolate Topping
Combine in bowl:
Chocolate chips
Peanut butter
Butter
Microwave in short intervals.
Stir between intervals.
Continue until fully melted.
Texture should be:
Glossy
Smooth
Pourable
Silky
Important Chocolate Handling Rules
Chocolate burns easily.
Avoid overheating.
Do not allow water contact.
Stir gently and continuously.
Step 8: Pouring the Chocolate Layer
Remove chilled base.
Pour chocolate mixture evenly across surface.
Spread carefully with spatula.
Tap pan gently to remove air bubbles.
Optional toppings may now be added.
Optional Decorative Toppings
Sea salt flakes
Chopped peanuts
Chocolate curls
Mini peanut butter cups
Crushed pretzels
Toasted coconut
Cookie crumbs
Step 9: Final Chilling
Refrigerate at least 3 hours.
Overnight chilling provides best structure.
The bars should feel firm yet slightly soft when pressed.
Step 10: Cutting Perfect Bars
Lift bars from pan using parchment handles.
Place on cutting board.
Use sharp knife.
Clean knife after each cut.
For cleaner slices:
Dip knife in hot water.
Dry before slicing.
Ideal Serving Temperature
The bars taste best slightly chilled.
Too cold:
Chocolate may crack.
Too warm:
Bars become soft.
Allow 5 minutes at room temperature before serving.
Understanding Texture Variations
Soft Bars
Use:
More peanut butter
Less chilling
Milk chocolate
Firm Bars
Use:
More crumbs
Longer chilling
Dark chocolate
Less butter
Flavor Variations in Extreme Detail
Dark Chocolate Sea Salt Bars
Use dark chocolate topping.
Sprinkle flaky sea salt.
Creates sophisticated sweet-salty balance.
Crunchy Peanut Explosion Bars
Add:
Crushed peanuts
Crunchy peanut butter
Pretzel pieces
Creates intense texture contrast.
Triple Chocolate Peanut Butter Bars
Add melted chocolate into base.
Use chocolate cookies as crumbs.
Top with dark chocolate ganache.
Caramel Peanut Butter Bars
Spread caramel sauce between layers.
Chill before adding chocolate.
Creates gooey center.
Coconut Chocolate Peanut Bars
Add shredded coconut into filling.
Top with toasted coconut flakes.
Espresso Chocolate Peanut Bars
Add espresso powder.
Enhances chocolate depth dramatically.
Honey Roasted Peanut Version
Use honey roasted peanuts.
Adds sweet roasted complexity.
Cookies and Cream Peanut Butter Bars
Use crushed sandwich cookies instead of graham crackers.
Mix white chocolate into topping.
Peanut Butter Oat Bars
Replace some crumbs with oats.
Produces heartier texture.
Protein-Packed Fitness Bars
Reduce powdered sugar.
Add vanilla protein powder.
Use dark chocolate.
Can function as post-workout treat.
Vegan Version
Replace butter with coconut oil or vegan butter.
Use dairy-free chocolate.
Ensure cookies are vegan-friendly.
Gluten-Free Version
Use gluten-free biscuits.
Verify chocolate ingredients.
Low-Sugar Version
Use sugar-free chocolate.
Reduce powdered sugar.
Add natural sweeteners carefully.
Professional Bakery Techniques
Double Layer Chocolate Coating
Apply one thin chocolate layer.
Chill briefly.
Add second glossy layer.
Produces luxurious appearance.
Marble Effect
Drizzle white chocolate into dark chocolate.
Swirl with toothpick.
Layer Stability Secrets
Proper chilling between stages is critical.
Warm layers blend together.
Cold layers remain distinct and beautiful.
Why Refrigeration Matters
Refrigeration:
Solidifies fats
Improves slicing
Enhances texture
Prevents collapse
Extends shelf life
Freezing Instructions
Wrap bars individually.
Store in airtight container.
Freeze up to 3 months.
Thaw gradually in refrigerator.
Serving Ideas
Serve with:
Coffee
Tea
Cold milk
Espresso
Vanilla ice cream
Chocolate milkshake
Salted caramel latte
Dessert Platter Pairings
Pair alongside:
Brownies
Mini cheesecakes
Fruit tarts
Chocolate truffles
Cookies
Large Batch Party Preparation
Double recipe for large events.
Use sheet pan.
Pre-cut before serving.
Store chilled until needed.
Holiday Presentation Ideas
Eid Dessert Tray
Cut into diamonds.
Decorate with gold edible dust.
Christmas Version
Use crushed candy canes.
Drizzle white chocolate.
Birthday Party Version
Add colorful sprinkles.
Wedding Dessert Table
Cut into elegant bite-size squares.
Top with gold leaf.
Common Problems and Solutions
Problem: Chocolate Cracks While Cutting
Cause:
Bars too cold.
Solution:
Wait 5 minutes before slicing.
Problem: Bars Too Soft
Cause:
Too much butter or insufficient chilling.
Solution:
Add crumbs and chill longer.
Problem: Filling Crumbles
Cause:
Too dry.
Solution:
Add peanut butter or butter.
Problem: Chocolate Looks Dull
Cause:
Overheating.
Solution:
Melt gently.
Problem: Oily Surface
Cause:
Natural peanut butter separation.
Solution:
Mix peanut butter thoroughly beforehand.
Storage Guide
Refrigerator Storage
Store airtight.
Keeps fresh for 7 days.
Freezer Storage
Freeze individually wrapped portions.
Prevents sticking and freezer burn.
Nutritional Discussion
These bars are indulgent and calorie-dense.
However, peanuts provide:
Protein
Healthy fats
Minerals
Energy
Chocolate contains antioxidants, especially dark chocolate.
Approximate Nutrition Per Serving
Calories: 350
Fat: 24g
Carbohydrates: 30g
Protein: 8g
Sugar: 22g
Why People Love This Dessert
No oven required
Simple ingredients
Rich flavor
Easy to customize
Perfect for gatherings
Beginner-friendly
Comforting texture
Long shelf life
Psychological Comfort of Chocolate and Peanut Butter
Chocolate often creates feelings of comfort and satisfaction due to its rich aroma and creamy texture.
Peanut butter contributes warmth, saltiness, and fullness.
Together they create an intensely satisfying dessert experience.
Advanced Texture Engineering
Professional bakers often balance:
Fat ratio
Sugar ratio
Crumb size
Chocolate firmness
Chilling duration
These factors influence:
Chewiness
Creaminess
Sliceability
Mouthfeel
Homemade Gourmet Version
For luxury-style bars:
Use imported dark chocolate.
Use freshly roasted peanuts.
Brown the butter first.
Add Maldon sea salt.
Use vanilla bean paste instead of extract.
Brown Butter Peanut Bars
Cook butter until golden and nutty.
Cool slightly before mixing.
Adds caramelized flavor complexity.
Salt Balance Importance
Tiny amounts of salt dramatically improve sweetness balance.
Without salt:
Dessert may taste flat.
Choosing the Right Pan
Metal pans chill faster.
Glass pans hold temperature longer.
Ceramic pans provide attractive serving presentation.
Temperature and Climate Effects
Hot climates may soften bars quickly.
Store chilled before serving.
Humid weather can slightly affect texture.
Picnic and Travel Tips
Transport in cooler bag.
Keep away from direct sunlight.
Pre-cut for easier serving.
Children-Friendly Preparation
Kids can help with:
Crushing biscuits
Mixing ingredients
Spreading chocolate
Decorating toppings
This recipe is excellent for family cooking activities.
Budget-Friendly Nature of the Recipe
The dessert uses affordable pantry staples.
No specialized ingredients required.
Can feed large groups economically.
Final Thoughts
No-bake chocolate peanut butter bars are one of the greatest examples of how simple ingredients can create an incredibly luxurious dessert. The balance between salty peanut butter and sweet chocolate creates depth, comfort, richness, and satisfaction in every bite.
Whether prepared for family gatherings, celebrations, holiday trays, casual snacking, gifts, or personal cravings, these bars consistently deliver outstanding results with very little effort. Their versatility allows endless experimentation while their classic flavor combination guarantees universal appeal.
Once mastered, this recipe often becomes a permanent favorite because it is dependable, adaptable, visually attractive, and irresistibly delicious.