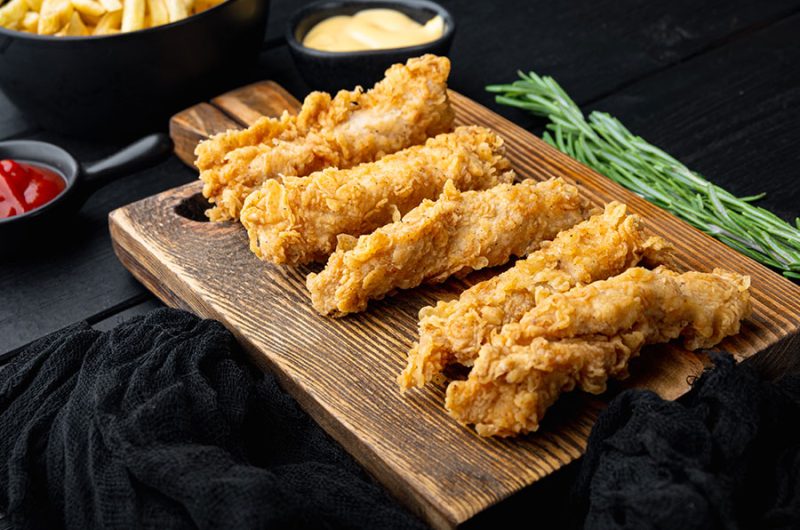
Thermomix Krispy Fried Chicken is a deeply flavorful, extra-crunchy fried chicken recipe designed to take advantage of the precision and convenience of the Thermomix system. The Thermomix helps create smooth marinades, perfectly blended spice mixtures, evenly crushed coatings, and consistent preparation steps that produce restaurant-style fried chicken at home. This recipe focuses on building layers of flavor through marination, seasoned flour, double coating, and controlled frying technique. The result is juicy chicken with a crisp golden crust that stays crunchy for a long time after frying.
This recipe is intentionally detailed and extended so every part of the process is explained thoroughly, including ingredient functions, preparation methods, frying science, texture tips, serving ideas, reheating guidance, storage advice, and troubleshooting.
Yield
Serves 6 to 8 people
Preparation Time
Marination Time: 8 to 24 hours
Preparation Time: 1 hour
Cooking Time: 30 to 40 minutes
Chicken Pieces
You may use a whole chicken cut into pieces or any combination of:
- Drumsticks
- Thighs
- Wings
- Breast pieces
Bone-in chicken is strongly recommended because it stays juicy during frying and develops richer flavor.
Approximate total chicken weight:
2.5 kilograms chicken pieces
Ingredients for the Chicken Marinade
- 2.5 kilograms chicken pieces
- 750 ml buttermilk
- 2 large eggs
- 2 tablespoons salt
- 2 tablespoons white pepper
- 1 tablespoon black pepper
- 2 tablespoons paprika
- 1 tablespoon smoked paprika
- 1 tablespoon garlic powder
- 1 tablespoon onion powder
- 2 teaspoons cayenne pepper
- 1 tablespoon mustard powder
- 1 tablespoon chicken seasoning powder
- 2 tablespoons hot sauce
- 1 tablespoon sugar
Ingredients for the Crispy Flour Coating
- 700 grams all-purpose flour
- 150 grams cornflour
- 100 grams potato starch
- 2 tablespoons baking powder
- 1 tablespoon baking soda
- 3 tablespoons salt
- 2 tablespoons black pepper
- 2 tablespoons white pepper
- 2 tablespoons paprika
- 1 tablespoon smoked paprika
- 2 tablespoons garlic powder
- 2 tablespoons onion powder
- 1 tablespoon celery salt
- 1 tablespoon dried oregano
- 1 tablespoon dried thyme
- 1 tablespoon dried basil
- 2 teaspoons cayenne pepper
- 1 teaspoon ground ginger
- 1 teaspoon mustard powder
- 1 teaspoon MSG optional
- 2 tablespoons chicken seasoning powder
Additional Ingredients for Extra Crunch
- 200 grams cornflakes
- 100 grams panko breadcrumbs
- 2 tablespoons oil
For Frying
- 2 to 3 liters vegetable oil
- Peanut oil or canola oil also works well
Optional Honey Butter Glaze
- 100 grams butter
- 3 tablespoons honey
- 1 teaspoon chili flakes
- Pinch of salt
Thermomix Preparation Steps
Step 1: Prepare the Cornflake Crunch Mixture
Place the cornflakes into the Thermomix bowl.
Add:
- Panko breadcrumbs
- 2 tablespoons oil
Blend for 6 seconds on speed 5.
The mixture should remain coarse, not powdered. Small irregular pieces create a rugged crunchy texture after frying.
Transfer the mixture to a large tray or bowl.
Step 2: Prepare the Spice Blend
Place into the Thermomix bowl:
- Salt
- Peppers
- Paprika
- Garlic powder
- Onion powder
- Herbs
- Cayenne
- Mustard powder
- Ginger
- Chicken seasoning
Blend for 10 seconds on speed 4.
This creates a perfectly even spice distribution which is one of the greatest advantages of using the Thermomix. Uniform seasoning means every bite tastes balanced.
Separate the spice blend into two equal portions:
- One portion for marinade
- One portion for coating flour
Step 3: Make the Marinade
Into the Thermomix bowl add:
- Buttermilk
- Eggs
- Hot sauce
- Sugar
- One portion of spice blend
Mix for 20 seconds on speed 4.
The marinade should appear smooth and creamy with evenly distributed spices.
Why Buttermilk Matters
Buttermilk contains acidity which tenderizes the chicken slowly without making it mushy. The proteins break down gently while maintaining structure. This gives fried chicken its juicy interior.
Eggs help the coating cling firmly to the chicken while adding richness.
Sugar promotes better browning during frying.
Step 4: Marinate the Chicken
Place chicken into a large container or zip bag.
Pour marinade over the chicken.
Massage thoroughly so every surface is coated.
Cover and refrigerate:
- Minimum 8 hours
- Best result: 24 hours
Long marination deeply seasons the chicken internally instead of only flavoring the crust.
Preparing the Coating
Step 5: Make the Crispy Flour
Place into a very large bowl:
- Flour
- Cornflour
- Potato starch
- Baking powder
- Baking soda
- Remaining spice blend
Whisk thoroughly.
Why Multiple Starches Are Used
All-purpose flour creates structure.
Cornflour adds crispness and lightness.
Potato starch creates shattering crunch and helps the crust remain crispy for longer.
Baking powder creates tiny bubbles during frying which form craggy crunchy ridges.
Baking soda assists browning and enhances color.
Step 6: Create Texture Clusters
Take 6 to 8 tablespoons of the marinade and drizzle them into the flour mixture.
Mix lightly using fingertips.
Small clumps will form throughout the flour.
These little clusters become extra crunchy flakes once fried and give the chicken its famous textured crust.
Coating the Chicken
Step 7: First Coating
Remove chicken from marinade one piece at a time.
Allow excess marinade to drip slightly.
Press chicken firmly into the flour mixture.
Coat aggressively.
Squeeze flour into every crevice.
Rest coated chicken on a tray for 10 minutes.
This resting time hydrates the flour and creates better adhesion.
Step 8: Double Dredging
Dip coated chicken lightly back into marinade.
Then coat again in flour mixture.
Finally press into the cornflake crunch mixture.
This triple-layer method produces exceptionally crunchy chicken.
Important Coating Tips
Never rush the dredging process.
Use one wet hand and one dry hand to avoid coating buildup on fingers.
Press coating onto chicken rather than sprinkling.
Thicker uneven surfaces fry into crunchy ridges.
Do not stack coated chicken pieces.
Frying Instructions
Oil Temperature
Heat oil to 170°C.
Maintaining proper oil temperature is essential.
Too hot:
- Outside burns before inside cooks
Too cold:
- Chicken absorbs oil and becomes greasy
Use a thermometer whenever possible.
Step 9: Frying the Chicken
Carefully lower chicken into hot oil.
Do not overcrowd the pot.
Fry in batches.
Approximate cooking times:
- Wings: 10 to 12 minutes
- Drumsticks: 14 to 16 minutes
- Thighs: 15 to 18 minutes
- Breasts: 16 to 20 minutes
Turn pieces occasionally for even browning.
Finished chicken should be:
- Deep golden brown
- Extremely crisp
- Internal temperature 75°C
Place cooked chicken on a wire rack instead of paper towels.
A wire rack prevents steam from softening the crust.
Step 10: Optional Honey Butter Finish
Place butter, honey, chili flakes, and salt into Thermomix bowl.
Heat for 3 minutes at 60°C on speed 2.
Brush lightly over fried chicken for sweet spicy glossy coating.
This creates a Korean-style flavor variation while preserving crunch.
Advanced Techniques for Maximum Crispiness
Air Drying Before Frying
After coating, refrigerate uncovered for 30 to 60 minutes.
This dries the exterior slightly and improves crust adhesion.
Professional kitchens often use this technique.
Double Frying Method
For extreme crispness:
First fry:
- 150°C for initial cooking
Rest chicken 10 minutes.
Second fry:
- 190°C for final crisping
This method creates incredibly crunchy crust while keeping meat juicy.
Resting After Frying
Allow chicken to rest 5 minutes before serving.
This helps juices redistribute throughout the meat.
Cutting immediately may release moisture and soften the coating.
Flavor Variations
Spicy Nashville Style
Add to flour mixture:
- Extra cayenne
- Chili powder
- Brown sugar
Brush fried chicken with spicy oil sauce.
Garlic Parmesan Version
After frying toss chicken with:
- Melted butter
- Parmesan
- Garlic powder
- Parsley
Smoky BBQ Version
Add:
- Chipotle powder
- Smoked paprika
- Brown sugar
Serve with barbecue glaze.
Extra Pepper Version
Increase:
- White pepper
- Black pepper
This creates a classic pepper-forward Southern fried chicken taste.
Serving Suggestions
Serve with:
- Mashed potatoes
- Coleslaw
- Biscuits
- Cornbread
- Fries
- Macaroni and cheese
- Pickles
- Honey mustard
- Garlic mayo
- Spicy ranch
- Gravy
Thermomix can also easily prepare many side sauces and mashed potato variations.
Homemade Gravy Using Thermomix
Ingredients
- 50 grams butter
- 50 grams flour
- 500 ml chicken stock
- Salt
- Pepper
- Garlic powder
Method
Add butter and flour to Thermomix bowl.
Cook for 3 minutes at 120°C on speed 2.
Add stock and seasonings.
Cook for 7 minutes at 100°C on speed 4.
The gravy becomes silky and smooth.
Storage Instructions
Allow chicken to cool completely before storing.
Refrigerate in airtight container up to 4 days.
Avoid sealing while hot because trapped steam softens the crust.
Reheating Instructions
Oven Method
Best method.
Reheat at 200°C for 15 to 20 minutes on wire rack.
This restores crispness.
Air Fryer Method
Cook at 190°C for 6 to 8 minutes.
Excellent for maintaining crunch.
Avoid Microwave Reheating
Microwaves soften crispy coatings and create soggy texture.
Freezing Instructions
Freeze fried chicken individually on tray first.
Once frozen transfer to freezer bags.
Keeps well for 2 months.
Reheat directly from frozen in oven at 200°C for 25 to 30 minutes.
Common Problems and Solutions
Coating Falling Off
Possible causes:
- Chicken too wet
- Oil temperature unstable
- Skipping resting step
Solution:
- Rest coated chicken before frying
- Press coating firmly
Greasy Chicken
Cause:
- Oil too cold
Solution:
- Maintain 170°C
Burnt Outside Raw Inside
Cause:
- Oil too hot
Solution:
- Lower frying temperature
- Use thermometer
Soft Crust
Cause:
- Steam buildup
- Using paper towels
Solution:
- Cool on wire rack
Understanding the Science of Crispy Fried Chicken
Perfect fried chicken depends on moisture control.
Inside the chicken:
- Moisture must remain trapped
Outside the chicken:
- Moisture must rapidly evaporate
The coating becomes crispy when starches gelatinize and proteins harden during frying.
Cornflour and potato starch create brittle crisp layers.
Bubbles from baking powder create airy structure.
The rough textured coating increases surface area which creates more crunch.
Professional Restaurant Tips
Many restaurants:
- Marinate overnight
- Use pressure fryers
- Double fry
- Rest chicken before serving
Home cooks can achieve similar results with patience and temperature control.
Full Thermomix Workflow Summary
- Blend spices
- Prepare marinade
- Marinate chicken overnight
- Crush cornflakes
- Prepare seasoned flour
- Add marinade droplets into flour
- Coat chicken
- Double dredge
- Rest coated chicken
- Fry carefully in batches
- Drain on rack
- Serve hot
Final Serving Experience
When done correctly, Thermomix Krispy Fried Chicken should have:
- Loud crunchy exterior
- Deep golden color
- Juicy flavorful meat
- Well-seasoned crust
- Crunch that lasts even after cooling slightly
The combination of Thermomix precision and traditional frying technique creates a fried chicken experience that rivals many restaurants.