Whenever I want to make a dessert that looks attractive without spending hours in the kitchen, this no-bake strawberry cheesecake box dessert is one of my favorite choices. It has everything I enjoy in a classic cheesecake, but it comes together without turning on the oven. The combination of a buttery graham cracker base, smooth cheesecake filling, and sweet strawberry topping creates a dessert that feels homemade and satisfying from the very first bite.
I also like serving it in individual jars or dessert boxes because everyone gets their own portion. It makes serving easier, keeps the presentation neat, and works well whether I’m preparing dessert for family, guests, or simply making a few portions to enjoy over the next couple of days.
Since this recipe is prepared ahead of time, it is especially convenient on busy days. Once everything is assembled, the refrigerator does the rest of the work while the layers become firm and the flavors blend together.
Why This Recipe Works So Well
- One of the things I appreciate most about this dessert is how each layer brings something different. The graham cracker crust adds a buttery crunch, the cheesecake layer is rich and creamy, and the strawberries provide freshness along with a fruity sweetness.
- There is no complicated equipment or advanced baking experience needed. If you can mix, whip, fold, and layer ingredients, you’ll have a beautiful dessert that looks like it came from a bakery.
- Another reason I return to this recipe is that it can easily be prepared before guests arrive. Instead of rushing to finish dessert after dinner, I simply remove the chilled containers from the refrigerator when it’s time to serve.
Gathering the Ingredients
- Before starting, I like placing every ingredient on the counter so everything is ready when I need it. Allowing the cream cheese to soften at room temperature is an important step because it blends into a smooth filling much more easily.
- The heavy whipping cream should remain cold until it is time to whip. Cold cream creates better volume and produces a light, fluffy texture that helps the cheesecake filling stay airy instead of becoming dense.
- Fresh strawberries are washed, dried well, and diced into small pieces. Keeping the pieces fairly even helps distribute the fruit nicely across each dessert container.
- For the crust, I combine graham cracker crumbs with melted butter. Sometimes I include the optional tablespoon of granulated sugar if I want the base to have a slightly sweeter flavor, but the crust tastes wonderful either way.
Making the Graham Cracker Base
- The first layer may be simple, but it plays an important role in the finished dessert. After stirring the graham cracker crumbs with melted butter and the optional sugar, the mixture should resemble damp sand. Every crumb should be lightly coated so the crust holds together after chilling.
- I divide the crumb mixture evenly between my dessert containers instead of pouring everything into one large dish. Individual portions are easier to serve later, and they also create attractive layers that can be seen through clear jars or cups.
- Using the back of a spoon, I gently press the crumbs into place. I avoid pressing too firmly because a tightly packed crust can become quite hard after refrigeration. A gentle press is enough to create a stable base while keeping the texture pleasantly crumbly.
- Before moving on, I always save a small amount of the crumb mixture. Those reserved crumbs make a simple garnish that adds both texture and color once the dessert is finished.
Preparing the Cream for the Filling
- A light cheesecake filling starts with properly whipped cream. I pour the cold heavy whipping cream into a chilled mixing bowl and beat it until stiff peaks form. This usually takes just a few minutes, but I keep an eye on it because overwhipping can make the cream grainy.
- Using a chilled bowl and beaters helps the cream whip faster and develop a stable structure. It is a small step that makes a noticeable difference.
- If I’m using whipped topping instead of heavy cream, this step becomes even quicker because the topping is already prepared. Either option creates a creamy filling, although freshly whipped cream gives a slightly richer homemade taste.
Mixing the Cheesecake Filling
- With the whipped cream ready, I prepare the cheesecake mixture. Softened cream cheese is beaten together with powdered sugar and vanilla extract until the mixture becomes completely smooth. I pause once or twice to scrape the bowl so every bit of cream cheese blends evenly.
- This step shouldn’t be rushed. Any small lumps left behind will remain in the finished dessert, so I continue mixing until the texture is silky and creamy.
- Once the cream cheese mixture is smooth, I gently fold in the whipped cream a little at a time using a rubber spatula. Folding instead of stirring helps keep the mixture light and fluffy. I continue just until everything is fully combined and no streaks remain.
- The finished filling should be thick enough to hold its shape while still looking soft, creamy, and easy to spread. At this stage, it already has the rich flavor of classic cheesecake and is ready to become the center of each dessert cup.
Assembling the Dessert
- Once the cheesecake filling is ready, it’s time to build the final layers. This is the part I enjoy most because everything starts coming together and the dessert begins to look complete.
- I spoon the cheesecake filling evenly over each prepared graham cracker crust. Sometimes I use a piping bag if I want especially neat layers, but a regular spoon works just as well. After filling each container, I smooth the surface with the back of the spoon so the next layer sits evenly on top.
- Next comes the strawberry layer. I drop small spoonfuls of strawberry jam or strawberry pastry filling across the cheesecake mixture instead of spreading it all over at once. This makes it much easier to create soft swirls without blending everything together.
- Using a butter knife or a toothpick, I gently pull the strawberry filling through the cheesecake in a few slow motions. I avoid stirring too much because the goal is to leave beautiful ribbons of strawberry running through the creamy filling. Those visible swirls make every serving look more inviting.
- Once the marbled effect is finished, I scatter the diced fresh strawberries evenly over each dessert. The fresh fruit adds a juicy texture and bright flavor that balances the richness of the cheesecake layer.
- To finish, I sprinkle the reserved graham cracker crumbs over the top. Even a small amount adds a pleasant crunch and ties the dessert together by repeating the flavors of the crust.
- If I’m serving these for a gathering, I sometimes add a whole strawberry, a small mint leaf, or an extra drizzle of strawberry sauce just before serving. These simple finishing touches make the dessert look festive without requiring extra work.
The Importance of Chilling
- Although the dessert comes together quickly, the chilling time should not be skipped. After assembling each serving, I cover the containers with lids or plastic wrap and place them in the refrigerator.
- A minimum of two hours is enough for the filling to begin setting, but I usually leave the desserts to chill for four to six hours whenever possible. If I prepare them the night before, the texture becomes even better and the flavors have more time to blend.
- During this time, the cheesecake filling firms up while remaining smooth and creamy. The crust also settles into place, making each spoonful hold together nicely from top to bottom.
- Serving the dessert well chilled gives it the best flavor and texture, especially on warm days.
Helpful Tips for Great Results
- A few simple habits make this recipe turn out consistently well.
- The first is making sure the cream cheese has softened before mixing. Soft cream cheese blends much more smoothly and creates a filling without lumps.
- Keeping the heavy whipping cream cold until the last minute is equally important. Cold cream whips more easily and holds stiff peaks, giving the cheesecake filling a light and fluffy texture.
- Fresh strawberries provide the nicest flavor and appearance. If frozen strawberries are the only option available, I thaw and drain them thoroughly before using them so they don’t add extra moisture to the dessert.
- When swirling the strawberry jam into the filling, I remind myself not to overmix. Just a few gentle passes with the knife create a much prettier marbled pattern than excessive stirring.
- One of my favorite tips is preparing the dessert a day ahead. The extra resting time improves both the flavor and consistency, making it an ideal dessert for entertaining.
Serving Ideas
- These cheesecake dessert boxes are ready to enjoy straight from the refrigerator.
- Because they’re already portioned into individual containers, serving couldn’t be easier. I simply remove them from the refrigerator a few minutes before dessert and place them on the table.
- For a slightly more decorative presentation, I sometimes add sliced fresh strawberries, a spoonful of whipped cream, or another light drizzle of strawberry sauce right before serving. These additions are optional but give the desserts an extra touch of color and freshness.
- The combination of creamy filling, buttery crumbs, and juicy strawberries makes every bite balanced without feeling overly heavy.
Storing Leftovers
- If there are leftovers, I keep each dessert covered in the refrigerator. They stay fresh for up to three days and remain just as enjoyable for a quick treat later.
- Whenever possible, I wait to sprinkle the reserved graham cracker crumbs over the top until shortly before serving. This keeps the garnish crisp instead of allowing it to soften in the refrigerator.
- The dessert can also be frozen for longer storage. I freeze the assembled cheesecake for up to one month, then thaw it overnight in the refrigerator before serving. If freezing, I prefer adding the fresh strawberries after thawing so they keep their best texture and appearance.
Frequently Asked Questions
- This dessert is an excellent make-ahead option and can easily be prepared up to a day before serving. Keeping it covered in the refrigerator allows the filling to set properly while giving the flavors time to develop.
- If fresh strawberries aren’t available, frozen strawberries may be used after thawing and draining them well to remove excess liquid.
- For the crust, graham crackers aren’t the only choice. Digestive biscuits, vanilla wafers, shortbread cookies, or crushed golden sandwich cookies all make excellent alternatives while following the same preparation method.
- If I want a quicker version, I simply replace the whipped heavy cream with one and a half cups of whipped topping. The filling remains creamy and delicious.
- When stored in an airtight container, the dessert stays fresh in the refrigerator for up to three days.
- Instead of preparing individual dessert boxes, everything can also be layered into an eight-inch square dish or another similarly sized serving dish before chilling.
- If the cheesecake filling seems too soft, it usually means the whipped cream wasn’t beaten to stiff peaks or the dessert needs more chilling time. Giving it additional time in the refrigerator usually solves the problem.
- Although strawberry is the classic choice, raspberry, blueberry, cherry, peach, or mixed berry preserves can also be used for a different fruit flavor while keeping the same creamy cheesecake base.
- For anyone who prefers a less sweet dessert, slightly reducing the powdered sugar or choosing a lower-sugar strawberry jam creates a milder sweetness without changing the overall texture of the recipe.
No-Bake Healthy Strawberry Cheesecake Box Dessert
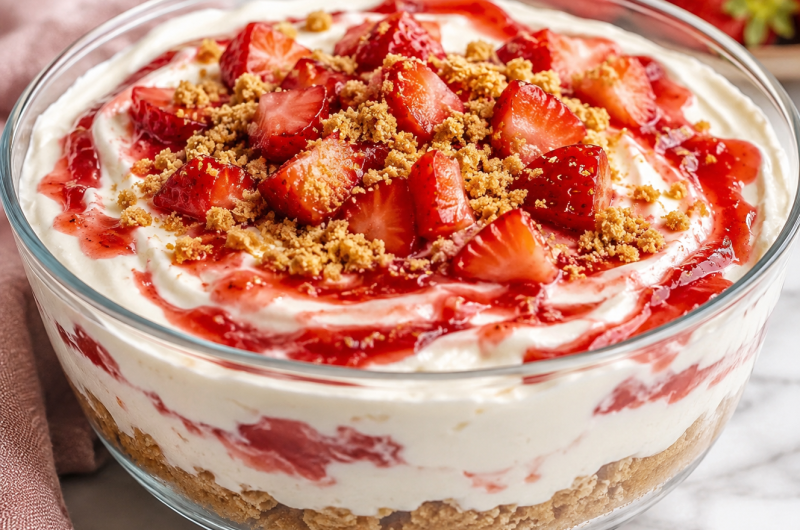
This No-Bake Strawberry Cheesecake Box Dessert is a creamy, refreshing treat made with a buttery graham cracker crust, a smooth cheesecake filling, and sweet strawberry swirls. Served in individual dessert boxes, jars, or bowls, it’s an easy make-ahead dessert that’s perfect for parties, family gatherings, or whenever you’re craving a simple no-bake sweet.
6
servings20
minutes0
minutes320
kcal20
minutesIngredients
1 cup graham cracker crumbs
3 tablespoons unsalted butter, melted
1 tablespoon granulated sugar (optional)
8 ounces (225g) cream cheese, softened
½ cup powdered sugar
1 teaspoon vanilla extract
1 cup heavy whipping cream
1½ cups whipped topping
½ cup strawberry jam or strawberry pastry filling
1 cup fresh strawberries, diced
Directions
- In a medium bowl, combine the graham cracker crumbs, melted butter, and optional granulated sugar. Mix until the crumbs are evenly coated and resemble damp sand
- Divide the crumb mixture evenly among 4 to 6 dessert bowls, jars, or meal-prep containers. Lightly press the crumbs into an even layer using the back of a spoon. Reserve 1 to 2 tablespoons of crumbs for garnish.
- Pour the cold heavy whipping cream into a chilled mixing bowl and beat until stiff peaks form. If using whipped topping, skip this step.
- In a separate bowl, beat the softened cream cheese, powdered sugar, and vanilla extract until smooth and creamy.
- Gently fold the whipped cream into the cream cheese mixture in two or three additions until fully combined and fluffy
- Spoon or pipe the cheesecake filling evenly over the prepared crusts.
- Add small spoonfuls of strawberry jam or pastry filling over the cheesecake layer. Use a butter knife, skewer, or toothpick to gently swirl it into the filling without overmixing.
- Evenly sprinkle the diced fresh strawberries over each dessert.
- Finish with the reserved graham cracker crumbs.
- Cover and refrigerate for at least 2 hours. For the best flavor and texture, chill for 4 to 6 hours or overnight before serving.
Notes
- Use room-temperature cream cheese for a smooth filling.
- Keep the heavy whipping cream cold before whipping.
- Chill the mixing bowl and beaters for about 10 minutes before whipping the cream for best results.
- Fresh strawberries provide the best flavor, but thawed and well-drained frozen strawberries can be used if needed.
- Avoid over-swirling the strawberry jam to keep the marbled appearance.
- This dessert can be prepared up to one day in advance.
- Store covered in the refrigerator for up to 3 days.
- Freeze for up to 1 month. Thaw overnight in the refrigerator and add fresh strawberries after thawing for the best presentation.
Nutrition Facts
- Calories: 320kcal
- Fat: 23g
- Saturated Fat: 14g
- Sodium: 180mg
- Carbohydrates: 25g
- Fiber: 1g
- Sugar: 18g
- Protein: 4g