A Simple Make-Ahead Breakfast or Snack
Some recipes become regular favorites because they are quick, reliable, and easy to customize. This 3-Ingredient Chia Pudding is one of those recipes. It takes only a few minutes to prepare, requires no cooking, and can be made ahead for busy mornings or healthy afternoon snacks.
With only chia seeds, almond milk, and a sweetener, this pudding transforms into a thick, creamy dish after resting in the refrigerator. The chia seeds naturally absorb the liquid, creating a soft pudding-like texture without any starches or gelatin. Once the base is prepared, it can be enjoyed on its own or dressed up with fresh fruit, nuts, granola, or your favorite toppings.
One of the best things about this recipe is how flexible it is. The ingredients stay simple while the finished pudding can taste completely different depending on what you add before serving. Whether you like berries, tropical fruit, chocolate, or crunchy toppings, the same base recipe works beautifully every time.
Why This Recipe Works
Simple recipes are often the ones that get made most often. Since this pudding only requires three basic ingredients, there is very little preparation involved.
Some reasons this recipe deserves a place in your weekly meal plan include:
- No cooking required.
- Only a few minutes of preparation.
- Naturally rich in fiber.
- A good source of plant-based protein.
- Contains healthy fats from chia seeds.
- Easy to prepare several servings at once.
- Stores well for days in the refrigerator.
- Can be customized with different flavors and toppings.
Because everything is mixed in one jar or bowl, cleanup is also minimal.
The Three Main Ingredients
Although this recipe is incredibly simple, each ingredient has an important purpose.
- Chia Seeds
- Chia seeds are the key ingredient that gives this pudding its texture. Once mixed with liquid, they absorb moisture and expand, creating a thick and creamy consistency.
- Black chia seeds, white chia seeds, or a mixture of both work equally well. Their nutritional value and thickening ability are the same.
- Fresh chia seeds always produce the best results because they absorb liquid properly. Older seeds may not swell as much, leaving the pudding thinner than expected.
- Almond Milk
- Unsweetened almond milk creates a light, creamy pudding while keeping the recipe dairy-free.
- If almond milk is unavailable, other milk options work just as well. Oat milk creates a slightly thicker pudding, coconut milk gives a richer flavor, and regular dairy milk also produces excellent results.
- Even though almond milk is used in this recipe, the method remains exactly the same regardless of which milk you choose.
- Honey
- A small amount of honey adds gentle sweetness without overpowering the flavor of the pudding.
- The amount can easily be adjusted depending on personal preference.
- Other sweeteners such as maple syrup, agave syrup, stevia, or regular sugar can also be used while keeping the recipe simple.
- If naturally sweet toppings such as ripe bananas or sweet berries are added later, less sweetener may be needed.
The Secret to Perfect Texture
The biggest secret to making great chia pudding is using the proper ratio of chia seeds to liquid.
For every:
- 2 tablespoons chia seeds
- ½ cup milk
- you’ll get a pudding that is thick, creamy, and easy to eat with a spoon.
- Using more liquid creates a thinner consistency, while adding extra chia seeds makes the pudding much firmer.
- After preparing it a few times, adjusting the ratio to suit your personal preference becomes very easy.
Mixing the Ingredients Properly
Making chia pudding is incredibly simple, but one extra step makes a noticeable difference.
First, combine the almond milk, chia seeds, and honey in a jar or bowl.
- Stir everything thoroughly until the seeds are evenly distributed.
- Allow the mixture to sit for about two or three minutes.
- Then stir again.
- This second stir helps break apart any clumps that may have formed as the chia seeds begin absorbing the liquid.
- Once everything is smooth and evenly mixed, cover the container and refrigerate.
Let Time Do the Work
- Unlike many breakfast recipes, chia pudding doesn’t require cooking.
- Instead, the refrigerator does all the work.
- As the pudding rests, the chia seeds slowly absorb the liquid and develop their signature gel-like coating.
- After at least two hours, the pudding becomes noticeably thicker.
- For the creamiest texture, leaving it overnight is ideal.
- By morning, the mixture will have transformed into a rich pudding that’s ready to enjoy straight from the refrigerator.
Choosing the Best Toppings
- While the pudding itself is simple, toppings allow you to create endless flavor combinations.
- Fresh fruit is always one of the easiest additions.
- Some excellent choices include:
- Strawberries
- Blueberries
- Raspberries
- Blackberries
- Banana slices
- Mango
- Pineapple
- Adding fruit gives the pudding natural sweetness while providing extra freshness and color.
- If you enjoy a little crunch, chopped almonds, walnuts, pecans, pumpkin seeds, sunflower seeds, or shredded coconut all pair beautifully with the creamy texture.
- For something a little more filling, sprinkle granola over the top just before serving. Keeping crunchy toppings separate until serving time helps them stay crisp.
- You can also finish the pudding with a light drizzle of honey, maple syrup, or your favorite nut butter for even more flavor without changing the simple preparation method.
Easy Ways to Change the Flavor
One of the best parts about this recipe is that the basic pudding stays the same while the flavor can be changed with just a few extra ingredients. Instead of making a completely different recipe, you simply build on the original mixture of chia seeds, almond milk, and sweetener.
Here are a few simple ideas that work well.
- Chocolate Version
- For a rich chocolate flavor, whisk cocoa powder into the milk before adding the chia seeds. A small splash of vanilla extract makes the chocolate taste even better, and a little extra honey or maple syrup balances the cocoa. If you’re serving it as a dessert, a handful of mini chocolate chips can be stirred in or sprinkled over the top.
- Vanilla Version
- Vanilla is one of the easiest ways to give the pudding a warm, comforting flavor. Add a little vanilla extract or the seeds from a vanilla bean before mixing everything together. The result is smooth, lightly sweet, and pairs well with almost any fruit.
- Berry Version
- Fresh or frozen berries can completely change both the color and flavor. Blend strawberries, blueberries, raspberries, or a mixture of berries with the almond milk before combining everything with the chia seeds. The pudding becomes naturally fruity and requires very little additional sweetener.
- Matcha Version
- For a unique twist, whisk matcha powder into the milk until completely smooth. Once mixed with the chia seeds, the pudding develops a mild earthy flavor and a beautiful green color. A little honey helps balance the slight bitterness of the matcha.
- Tropical Version
- Replace almond milk with coconut milk for a richer texture. Stir in crushed pineapple or diced mango before chilling the pudding. The combination creates a refreshing tropical flavor that’s perfect for warm weather.
- Peanut Butter Version
- Whisk creamy peanut butter into the milk before adding the chia seeds. This creates an extra creamy pudding with a rich, nutty flavor. Top with sliced bananas and a drizzle of peanut butter before serving for an even more satisfying snack.
- Coffee Version
- Coffee lovers can replace half of the milk with chilled brewed coffee. The coffee blends beautifully with the chia seeds and creates a lightly sweet breakfast that tastes similar to an iced coffee dessert.
Helpful Tips for Better Results
Although the recipe is very forgiving, a few simple habits help produce the best texture every time.
Although the recipe is very forgiving, a few simple habits help produce the best texture every time.
- Stir Twice
- After combining the ingredients, let the mixture sit for two or three minutes before stirring again. This prevents clumps and keeps the seeds evenly distributed throughout the pudding.
- Give It Enough Time
- While the pudding begins to thicken after about two hours, resting overnight produces the smoothest and creamiest texture.
- Use Fresh Ingredients
- Fresh chia seeds absorb liquid much better than older ones. If the seeds have been stored for a long time, they may not thicken the pudding properly.
- Add Toppings Later
- Fresh fruit, granola, nuts, and coconut stay crisp when added just before serving instead of during storage.
- Adjust the Thickness
- If the pudding feels too thick after chilling, stir in a small splash of milk until it reaches your preferred consistency.
- If it’s thinner than expected, mix in another teaspoon of chia seeds and allow it to rest for another 20–30 minutes.
Making It Ahead for the Week
- This recipe is excellent for meal prep because several servings can be prepared at the same time.
- Simply multiply the ingredients while keeping the same ratio of chia seeds to milk. After mixing everything together, divide the pudding into individual jars or airtight containers.
- Having ready-made portions in the refrigerator makes breakfast or snacks much more convenient during busy days.
- Preparing different flavors at the same time also keeps things interesting. One jar can be chocolate, another vanilla, while another is topped with fresh berries. Even though the base recipe stays the same, each serving feels different.
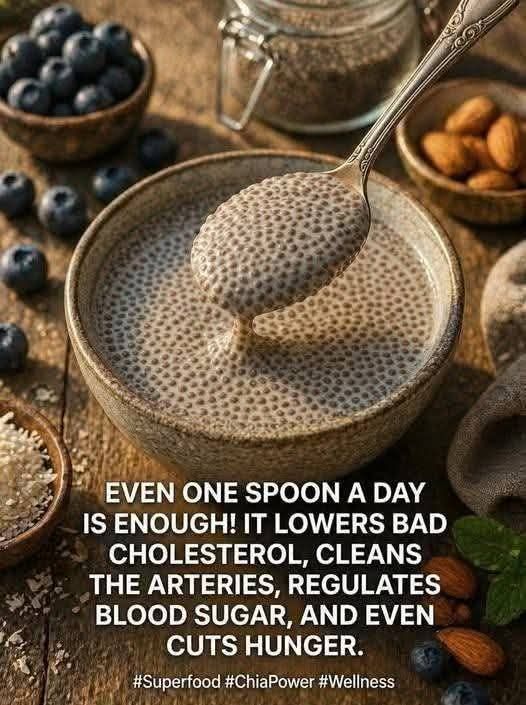
Nutritional Benefits
- Besides being easy to prepare, chia pudding is packed with nutrients.
- Chia seeds are naturally high in dietary fiber, helping keep you feeling satisfied for longer periods. They also provide plant-based protein, making this pudding a filling breakfast or snack.
- Another advantage is their healthy omega-3 fats, which support overall wellness and add richness to the pudding without making it heavy.
- Chia seeds also supply minerals such as calcium, magnesium, phosphorus, and iron, while almond milk contributes additional nutrients depending on the variety used.
- Because the recipe contains only a few simple ingredients, it’s easy to adjust the sweetness and toppings according to your own preferences.
A Simple Recipe You’ll Make Again and Again
This 3-Ingredient Chia Pudding proves that healthy eating doesn’t have to be complicated. With only a few pantry staples and a few minutes of preparation, you can create a creamy, satisfying breakfast, snack, or light dessert.
The basic recipe is delicious on its own, but it’s also incredibly versatile. Fresh fruit, crunchy nuts, granola, chocolate, coffee, tropical fruits, or nut butters can all give it a completely new flavor without changing the simple preparation method.
Whether you’re preparing breakfast for tomorrow, stocking the refrigerator with healthy snacks, or looking for a quick dessert, this pudding is a dependable choice. Once you make a batch and see how easy it is, it quickly becomes one of those recipes you’ll want to keep ready throughout the week.
3-Ingredient Chia Pudding
Description
This 3-Ingredient Chia Pudding is a simple, no-cook recipe made with chia seeds, almond milk, and honey. After a few hours of chilling, the mixture becomes thick, creamy, and perfect for breakfast, a healthy snack, or a light dessert. Enjoy it as is or finish with fresh fruit and your favorite toppings.
Recipe Details
- Prep Time: 5 minutes
- Cook Time: 0 minutes
- Resting Time: 2 hours (or overnight for best texture)
- Total Time: 2 hours 5 minutes
- Servings: 1
Equipment
- Half-pint mason jar or airtight container
- Measuring cups
- Measuring spoons
- Spoon or small whisk
Ingredients
- 2 tablespoons chia seeds
- ½ cup unsweetened almond milk (or milk of your choice)
- 1 tablespoon honey or preferred sweetener (optional)
- Fresh strawberries or other fruit, for serving
Instructions
- Add the chia seeds, almond milk, and honey to a mason jar or small bowl.
- Stir thoroughly until the ingredients are evenly combined and the chia seeds are well distributed.
- Let the mixture rest for 2–3 minutes, then stir again to break up any clumps.
- Cover the jar or container with a lid.
- Refrigerate for at least 2 hours or overnight until the pudding becomes thick and creamy.
- Before serving, give the pudding a quick stir if needed.
- Top with fresh strawberries or your favorite fruit and serve chilled.
Notes
- For the creamiest consistency, chill the pudding overnight.
- Stirring the mixture twice helps prevent chia seeds from clumping together.
- Any milk can be used, including oat, coconut, soy, or dairy milk.
- Honey may be replaced with maple syrup, agave, stevia, or another sweetener.
- Add toppings just before serving to keep them fresh and crunchy.
- If the pudding becomes too thick, stir in a splash of milk before serving.
- Store in an airtight container in the refrigerator for up to 5 days.
- Freeze individual portions for up to 1 month and thaw overnight in the refrigerator before serving.
Nutrition (Per Serving)
- Calories: 198 kcal
- Carbohydrates: 28 g
- Protein: 5 g
- Fat: 9 g
- Saturated Fat: 1 g
- Polyunsaturated Fat: 6 g
- Monounsaturated Fat: 1 g
- Trans Fat: 0.03 g
- Fiber: 9 g
- Sugar: 17 g
- Sodium: 167 mg
- Potassium: 109 mg
- Calcium: 303 mg
- Iron: 2 mg
- Vitamin A: 13 IU
- Vitamin C: 0.5 mg