Making good gluten-free bread at home can seem difficult at first. Many gluten-free loaves turn out dry, crumbly, or too dense, especially when you want something soft enough for everyday sandwiches. This recipe takes a much simpler approach. The dough comes together in a stand mixer, rises once in the pan, and then goes straight into the oven.
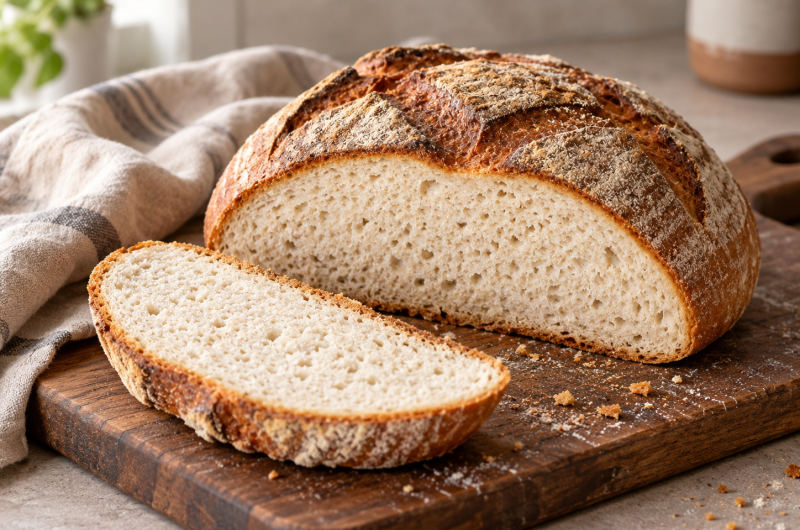
The finished loaf has a soft, fluffy center with enough structure to slice neatly. It can bend and squish without immediately falling apart, which makes it especially useful for sandwiches, toast, or simple slices served alongside a meal.
Another useful feature is that this bread is naturally dairy-free. Instead of relying on milk or butter for moisture, the recipe uses extra virgin olive oil, warm water, honey, and egg whites. Together, these ingredients create a dough with a texture that is closer to thick cake batter than traditional wheat-bread dough.
That difference is important. Gluten-free dough does not behave like ordinary bread dough, so there is no reason to knead it until it becomes stretchy. Once the ingredients are mixed properly, the dough can be transferred directly into the prepared pan.
What Makes This Gluten-Free Bread Different?
- Traditional wheat bread depends on gluten to give the loaf elasticity and structure. Gluten-free bread needs another combination of ingredients to provide that support.
- Here, the all-purpose gluten-free flour forms the base, while xanthan gum helps provide structure if the flour blend does not already contain it. Baking powder and instant yeast help with the rise, while egg whites contribute structure to the finished loaf.
- Olive oil adds moisture, and honey provides sweetness while working with the yeast. Apple cider vinegar is also included in the mixture, while warm water brings everything together.
- The result is a dough that is easy to work with. Rather than handling a firm dough with your hands, you simply mix it, transfer it to the pan, let it rise, and bake.
Choosing the Right Gluten-Free Flour
- The flour you use can make a noticeable difference in the final loaf. The recipe calls for 2 1/2 cups of all-purpose gluten-free flour.
- When measuring gluten-free flour, use the spoon-and-level method. Instead of dipping the measuring cup directly into the flour bag, use a spoon to place the flour into the measuring cup. Once the cup is full, use the back of a knife to level the top.
- This prevents you from accidentally packing too much flour into the measuring cup.
- The recipe notes that different gluten-free flour blends can produce different baking results. Some blends are designed specifically for yeast baking, while others may not perform as well in this type of recipe.
- If the gluten-free flour already contains xanthan gum, there is no need to add the additional teaspoon listed in the ingredient list.
Why Warm Water Matters
- Temperature is particularly important when working with yeast.
- The recipe uses 1 1/2 cups of warm water at 100–110°F. This range gives the yeast a warm environment in which it can work properly.
- Water that is too hot can damage the yeast, while water that is too cold may not activate it effectively. Keeping the water within the recommended temperature range gives the bread a better chance of rising properly.
- The ingredients should also be at room temperature where specified. The recipe specifically recommends allowing the egg whites and water to sit on the counter for about five minutes before using them.
Preparing the Pan
- For this bread, the recommended pan is a 9-inch x 4-inch small Pullman loaf pan.
- A 9-inch x 5-inch bread pan can also be used, but the loaf will not rise as tall. For a taller sandwich-style loaf, the smaller Pullman pan is the preferred choice.
- Before preparing the dough, spray the pan with gluten-free cooking spray. This helps prevent the bread from sticking and makes removing the baked loaf easier.
- The oven rack should be moved to the middle position before preheating the oven to 350°F.
Mixing the Dry Ingredients
- Start with the gluten-free flour, baking powder, and instant yeast.
- Place them into a large bowl and stir until they are evenly combined. If your flour blend does not already contain xanthan gum, add the xanthan gum according to the ingredient list.
- Because rapid-rise or instant yeast is being used, it can be incorporated directly into the dry ingredients. There is no need for a traditional proofing step before mixing the dough.
- This keeps the preparation straightforward and saves time.
Adding the Wet Ingredients
- Once the dry mixture is combined, add the extra virgin olive oil, honey, apple cider vinegar, and warm water.
- Mix everything on low speed for one minute.
- If using a stand mixer, use the paddle attachment rather than the dough hook. Gluten-free bread dough does not need the same kneading process as conventional wheat dough, and the paddle attachment is better suited to the thick batter-like mixture.
- At this point, the mixture begins to come together into a thick dough.
Adding the Egg Whites and Salt
- Next, add the room-temperature egg whites and salt.
- Mix the dough on medium speed for one minute.
- Do not expect the mixture to resemble traditional bread dough. Instead, it should look like a thick cake batter. This consistency is completely intentional for this style of gluten-free bread.
- Since there is no wheat gluten to develop, the dough does not need to become stretchy or elastic. Once everything is evenly mixed, it is ready for the pan.
Getting the Dough Into the Pan
- Transfer the prepared dough into the greased loaf pan.
- Use the recommended 9-inch x 4-inch small Pullman loaf pan if you want the taller result described in the recipe. A 9-inch x 5-inch pan can still be used, but the loaf will be shorter.
- Once the dough is in the pan, spray a piece of plastic wrap with gluten-free cooking spray and place it over the top.
- Cover the pan with a kitchen towel.
- The covered dough now needs time to rise before baking.
Letting the Bread Rise
- Place the covered pan in a warm location and allow the dough to rise for about 30 minutes.
- A warm environment helps yeast bread rise more effectively. If your oven has a bread-proofing setting, the recipe notes that a setting around 100°F is suitable.
- The most important thing is not to let the gluten-free dough become excessively over-proofed. Once it has doubled in size, it is ready for the oven.
- This is one of the easiest ways to judge readiness instead of relying only on the clock.
Baking the Loaf
- Once the dough has risen, remove the towel and plastic wrap and place the loaf in the preheated oven.
- Bake at 350°F for 30 minutes.
- Position the loaf horizontally on the middle oven rack. As it bakes, the exterior should become golden brown.
- The finished loaf should have an internal temperature between 205–210°F.
- Using an internal thermometer can be helpful because the outside color alone does not always tell you whether the center has finished baking.
Cooling the Bread Properly
- Cooling is an important part of getting the right texture.
- When the loaf comes out of the oven, allow it to cool in the pan for 10 minutes.
- After that, remove it from the pan and place it on a cooling rack.
- Avoid allowing the bread to cool completely inside the pan. Steam can become trapped underneath the loaf, which may leave the bottom soggy.
- Give the loaf enough time to cool completely before slicing.
- Although it can be tempting to cut into warm bread immediately, waiting helps the crumb settle and makes slicing much easier.
The Best Way to Slice Gluten-Free Bread
- A serrated knife works best for slicing this loaf.
- Use gentle, even movements rather than pressing down hard. A smooth-blade knife can compress the soft bread and make the slices look squashed.
- Once completely cooled, the loaf should be soft enough to slice into sandwich-friendly pieces.
- The recipe makes approximately 16 servings, making it convenient for everyday use.
Storing the Finished Bread
- Once the bread has completely cooled, place the leftover portion in an airtight container.
- It can be kept at room temperature on the counter.
- It is better not to pre-slice the entire loaf before storing it. Instead, keep the remaining portion whole and slice pieces as needed. This helps protect the texture and keeps the exposed interior from drying out unnecessarily.
Freezing the Bread
- This gluten-free bread can also be frozen.
- Make sure the loaf is completely cool before wrapping it. Wrap it tightly in plastic wrap, then add a second layer using foil or freezer paper.
- Place the wrapped bread into a freezer bag and store it in the freezer for up to 3 months.
- When you are ready to use it, thaw the bread in the refrigerator overnight.
- Freezing the loaf this way gives you the option of preparing it ahead of time rather than needing to bake a fresh loaf every few days.
A Simple Yeast Check
- The rapid-rise yeast used in this recipe does not require traditional proofing and can be mixed directly into the dry ingredients.
- However, if you want to check whether the yeast is still active, there is an optional method.
- Dissolve the honey in the warm water, add the yeast, and allow the mixture to sit for about five minutes. If the yeast is active, the mixture should become bubbly.
- Remember that the water should remain within the 100–110°F range. Water that is too hot can harm the yeast.
Important Temperature and Ingredient Tips
- Room-temperature ingredients are helpful when making this bread. The egg whites and water should be left at room temperature for about five minutes before using them.
- The warm environment created by the proper water temperature and rising location helps the yeast perform as expected.
- The flour measurement is equally important. Gluten-free flour should be spooned into the measuring cup and leveled rather than scooped directly from the bag.
- These small preparation details can have a noticeable effect on the finished loaf.
Why This Bread Works Well for Sandwiches
- A gluten-free loaf needs enough structure to hold fillings without immediately crumbling.
- This recipe creates a soft texture while still producing slices that can be handled. The combination of gluten-free flour, xanthan gum when needed, egg whites, yeast, baking powder, olive oil, and the other ingredients creates a loaf that is flexible enough for everyday sandwich use.
- The bread is also dairy-free, making it useful for anyone who needs a bread recipe without dairy ingredients.
- Because the loaf can be stored at room temperature or frozen for longer storage, it is practical for regular meal preparation.
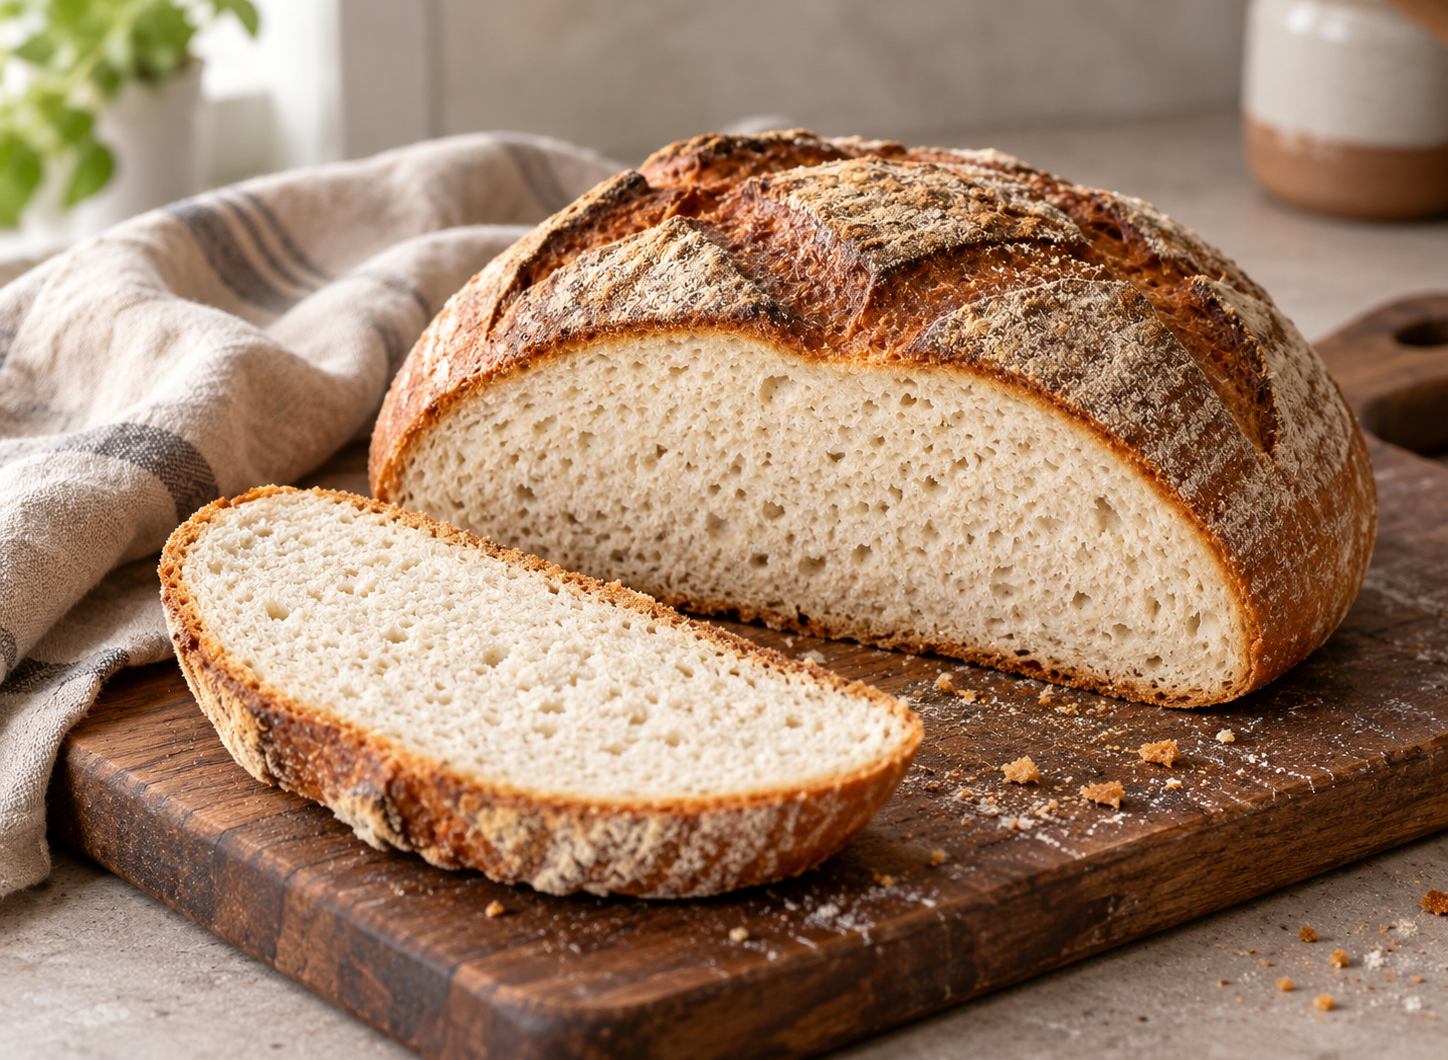
Gluten Free Bread
Description: Soft, fluffy, and tender gluten-free white sandwich bread made in the oven. This homemade loaf is naturally dairy-free, easy to slice, and perfect for sandwiches, toast, and everyday meals.
34
minutes30
minutes114
kcal1
hour4
minutesIngredients
2 1/2 cups all-purpose gluten-free flour
1 teaspoon xanthan gum, leave out if your flour already has it in it
1 teaspoon gluten-free baking powder
1 packet rapid rise/instant yeast (2 1/4 teaspoons)
1/4 cup extra virgin olive oil
1/4 cup honey
1 teaspoon apple cider vinegar
1 1/2 cups warm water, 100–110°F
3 egg whites, from large eggs and room temperature
1 teaspoon salt
Directions
- Prepare the Oven and Loaf Pan: Preheat the oven to 350°F and position the oven rack in the middle. Grease a 9-inch x 5-inch bread pan or a 9-inch x 4-inch small Pullman loaf pan with gluten-free cooking spray.
- Combine the Dry Ingredients: In a large mixing bowl, combine the gluten-free flour, gluten-free baking powder, and instant yeast. Stir thoroughly to distribute the ingredients evenly.
- Add the Wet Ingredients: Add the extra virgin olive oil, honey, apple cider vinegar, and warm water to the dry mixture. Using a stand mixer fitted with a paddle attachment, mix on low speed for approximately 1 minute.
- Mix the Dough: Add the room-temperature egg whites and salt. Mix on medium speed for 1 minute, until the ingredients are fully incorporated. The mixture should resemble thick cake batter rather than traditional kneadable bread dough.
- Transfer to the Pan: Pour the prepared gluten-free bread dough into the greased loaf pan. Spread it evenly to create a level surface.
- Allow the Bread to Rise: Lightly spray plastic wrap with gluten-free cooking spray and cover the loaf pan. Place a kitchen towel over the top and leave the dough in a warm place for about 30 minutes, or until it has doubled in size.
- Bake the Bread: Place the loaf pan horizontally on the middle oven rack. Bake at 350°F for approximately 30 minutes, until the bread is golden brown and its internal temperature reaches 205–210°F.
- Cool in the Pan: Remove the bread from the oven and let it rest in the pan for 10 minutes. Carefully remove the loaf and transfer it to a wire cooling rack.
- Slice the Loaf: Allow the bread to cool completely before slicing. Use a serrated bread knife to cut even slices without compressing the soft texture.
- Store for Freshness: Keep completely cooled bread in an airtight container at room temperature. For longer storage, wrap the loaf tightly in plastic wrap, followed by foil or freezer paper, and place it in a freezer bag. Freeze for up to 3 months and thaw overnight in the refrigerator.
Nutrition Facts
4 servings per container
- Amount Per ServingCalories114
- % Daily Value *
- Total Fat
4g
6%
- Total Carbohydrate
18g
7%
- Total Sugars 5g
- Protein 3g 6%
* The % Daily Value tells you how much a nutrient in a serving of food contributes to a daily diet. 2,000 calories a day is used for general nutrition advice.