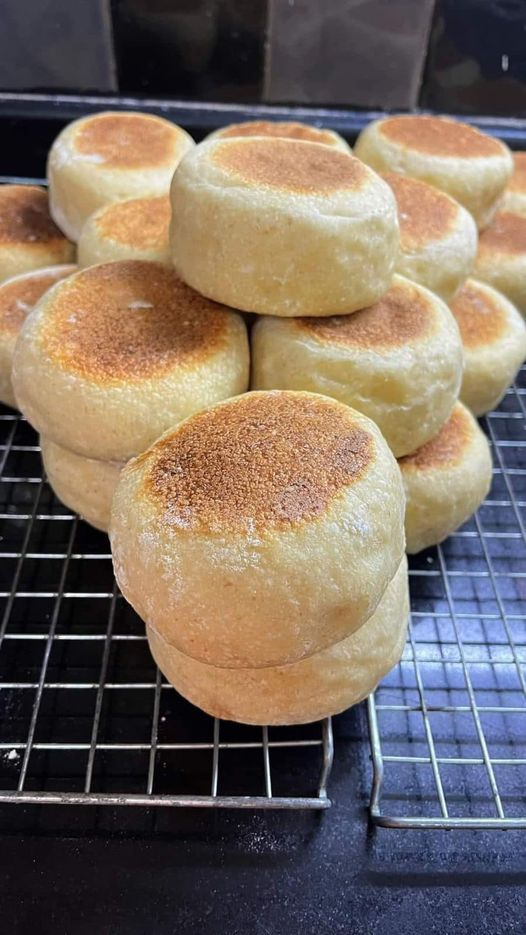
These gluten-free English muffins are incredibly soft, boasting the perfect nooks and crannies of a classic English muffin. The dough is easy to handle, knead, and shape, and they’re cooked entirely on the stovetop—no oven required! This recipe is simple and practically foolproof, delivering exceptional results every time.
Why This Recipe is a Game Changer
- Perfect Texture: Soft, golden brown, and filled with the signature nooks and crannies.
- Easy to Make: Minimal effort required, perfect for beginners and experienced bakers alike.
- Stovetop Cooking: No need to turn on the oven, making them quick and convenient.
- Foolproof Recipe: Simple instructions and clear guidance ensure success.
Understanding English Muffins
Despite the name, English muffins are an American invention, a twist on the British crumpet created by Samuel Bath Thomas. These round, flat, yeast-leavened breads are a breakfast staple, traditionally split horizontally with a fork to reveal their distinctive texture.
Crafting the Perfect Gluten-Free English Muffin
This recipe is remarkably simple. The dough comes together easily, whether mixed by hand or with a stand mixer. Divide the dough, shape it into balls, and flatten them slightly on a cornmeal-dusted baking sheet. After proofing for about an hour, they’re ready to be cooked.
Stovetop Cooking: The Key to Perfection
Cooking these muffins entirely on the stovetop is a breeze. The secret is low and slow cooking: 11-12 minutes per side over low heat in a cast iron skillet, griddle, or frying pan. This ensures they’re cooked through and achieve a beautiful golden-brown color.
The Cooling Period: Patience is Key
Resist the temptation to eat them hot! Allow the muffins to cool completely (at least 1 hour) before splitting and enjoying them. This allows the crumb to set properly, preventing a sticky interior.
The Science Behind the Success
- Psyllium Husk: Acts as a gluten substitute, providing structure and elasticity to the dough.
- High Hydration: Creates an open crumb with those coveted nooks and crannies.
- Custom Flour Blend: A specific blend of gluten-free flours, low in starches, ensures a non-sticky, non-gummy texture. Avoid using a store-bought 1-to-1 gluten-free flour.
- Water and Milk: A 3:1 ratio of water to milk optimizes the psyllium gel formation and prevents dense muffins.
- Oil: Results in a lighter, fluffier crumb and keeps the muffins softer for longer.
- Low and Slow Cooking: Ensures even cooking and a beautiful golden-brown exterior.
Storage and Substitutions
Store leftover muffins in a closed container at room temperature for 2-3 days. Toast before serving.
- Instant Yeast: Active dry yeast can be substituted (activate it first with milk and sugar).
- Psyllium Husk: No direct substitute. If using psyllium husk powder instead of whole, use 85% of the listed weight.
- Tapioca Starch: Cornstarch, potato starch, or arrowroot starch can be used.
- Millet Flour: Finely ground brown rice flour is a suitable alternative.
- Sorghum Flour: White teff flour, light buckwheat flour, or oat flour (if not sensitive to oats) can be used.
A Note on Measurements
While cup and spoon measurements are provided, using a kitchen scale with metric gram measurements is highly recommended for greater accuracy and more consistent results.
Enjoy Your Homemade Gluten-Free English Muffins!
These English muffins are a delight, even for those who aren’t gluten-free. The simple recipe and delicious results make them a must-try. The most challenging part is waiting for them to cool!
