When I want something sweet without spending much time in the kitchen, this healthy protein banana pudding is one of the first recipes I make. It comes together in just a few minutes, requires no baking, and uses a handful of simple ingredients that create a creamy, satisfying dessert. The combination of Greek yogurt, vanilla protein powder, banana pudding mix, crunchy vanilla wafers, and fresh banana slices gives this pudding a classic banana cream flavor while keeping it light and protein-rich.
Unlike traditional banana pudding recipes that often rely on condensed milk, heavy cream, or large amounts of sugar, this version stays simple. The creamy texture comes from Greek yogurt, while the protein powder adds both sweetness and extra protein. The instant banana cream pudding mix enhances the familiar banana flavor without making the recipe complicated.
Because there is no cooking involved, this dessert is perfect for busy weekdays, meal prep, or whenever I want a quick homemade treat.
Why This Recipe Works
- One of the reasons I enjoy making this pudding is that every ingredient has a purpose. The Greek yogurt creates a rich, creamy base while adding plenty of protein. Vanilla protein powder naturally sweetens the mixture, reducing the need for extra sugar. A small amount of almond milk helps loosen the mixture until it reaches the perfect pudding consistency.
- Layering everything with crushed vanilla wafers and fresh banana slices creates a dessert that looks impressive despite being incredibly easy to prepare.
- The contrast between creamy pudding, soft bananas, and slightly crunchy cookies makes every spoonful enjoyable.
Ingredients You’ll Need
This recipe uses only a few ingredients, making it easy to prepare at any time.
- Non-Fat Greek Yogurt
- Greek yogurt forms the creamy base of the pudding. Its naturally thick texture helps create a smooth custard-like consistency while increasing the protein content. Using non-fat Greek yogurt keeps the dessert lighter without sacrificing creaminess.
- Whey Vanilla Protein Powder
- Vanilla whey protein powder provides sweetness and structure. It blends smoothly into the yogurt and creates a rich pudding texture while significantly boosting the protein content.
- Sugar-Free Banana Cream Instant Pudding Mix
- The instant pudding mix is responsible for the classic banana pudding flavor. Even a small amount transforms the yogurt mixture into a creamy banana-flavored filling.
- Unsweetened Almond Milk
- Only a small splash of almond milk is needed. Adding it gradually allows complete control over the consistency so the pudding stays thick rather than becoming runny.
- Sugar-Free Vanilla Wafers
- Crushed vanilla wafers add texture between each layer. As the pudding chills, they soften slightly while still providing a pleasant bite.
- Fresh Banana
- Fresh banana slices complete the dessert with natural sweetness and a soft texture that pairs perfectly with the creamy pudding
Making the Protein Pudding Base
- The first step is preparing the creamy protein filling.
- I begin by adding the Greek yogurt to a mixing bowl. Next comes the vanilla protein powder followed by the banana cream pudding mix. Everything is stirred together before slowly adding the almond milk.
- Rather than pouring all of the milk in at once, I add a little at a time while whisking continuously. This helps keep the mixture thick and smooth. After a minute or two of mixing, the pudding becomes creamy with no lumps remaining.
- The finished mixture should be thick enough to hold its shape when spooned into serving jars.
Preparing the Layers
- While the pudding rests for a minute, I prepare the remaining ingredients.
- The vanilla wafers are crushed into small pieces. They don’t need to become fine crumbs because slightly larger pieces provide better texture.
- The banana is peeled and sliced into even rounds so each layer contains fresh fruit.
- Keeping everything prepared before assembly makes the layering process quick and neat.
Building the Dessert
- Layering is what gives this pudding its beautiful appearance.
- I start by spooning some of the protein pudding into the bottom of a serving jar or dessert glass.
- Next comes a layer of crushed vanilla wafers followed by fresh banana slices.
- The process is repeated one more time to create two complete layers.
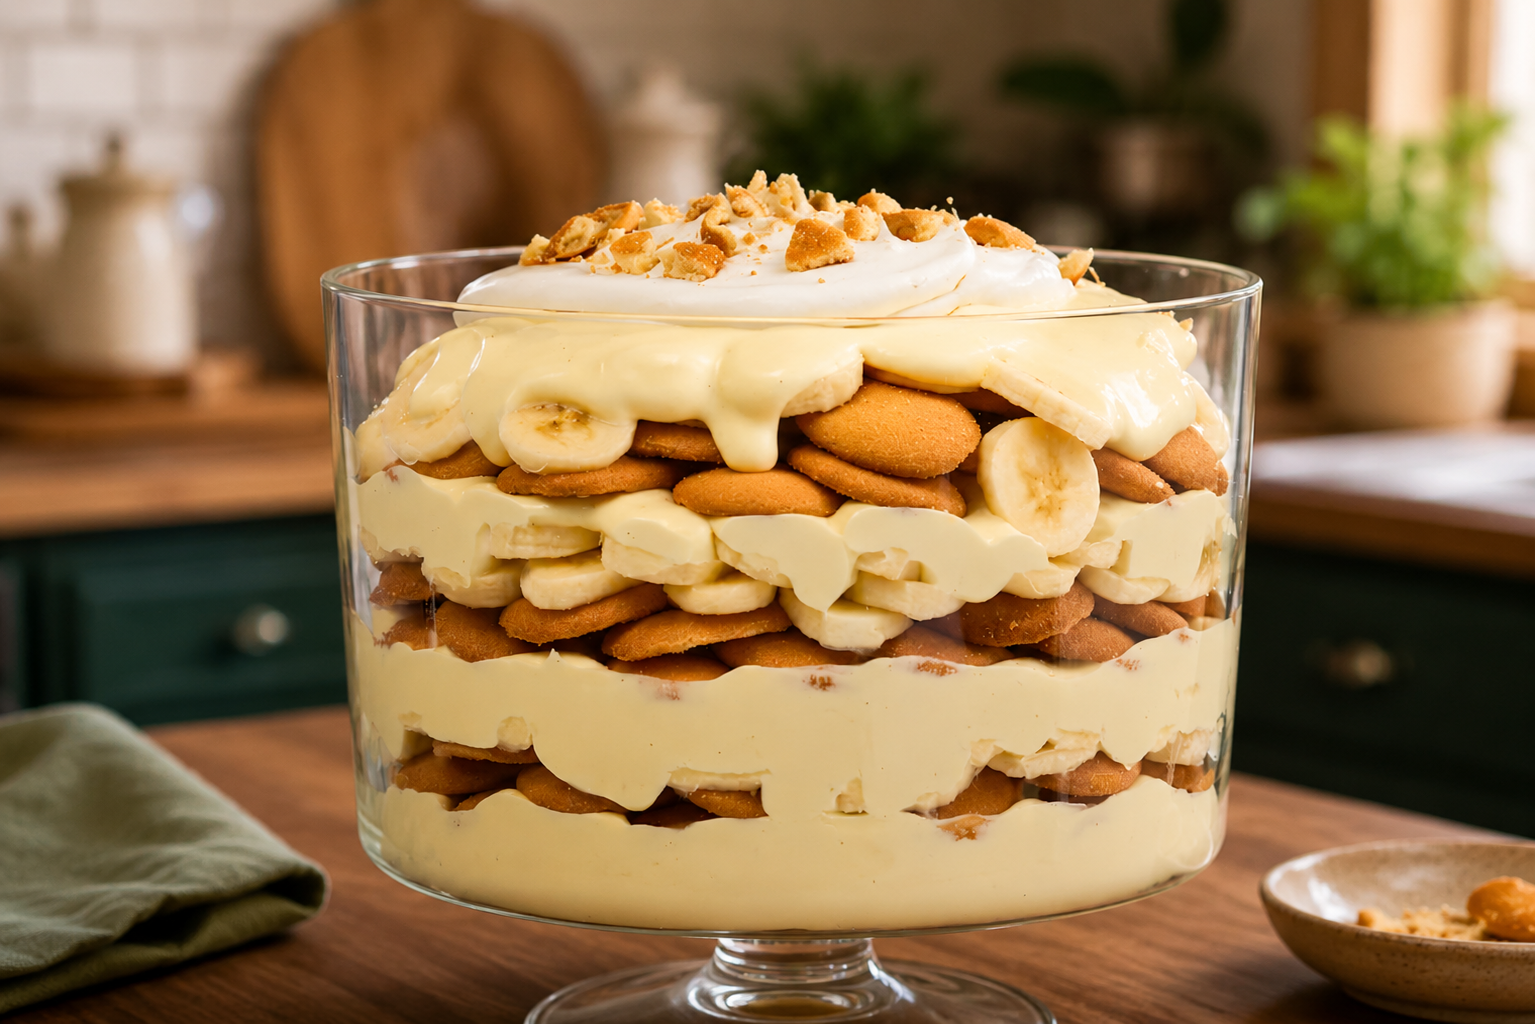
- The finished jar shows distinct layers of creamy pudding, crunchy cookies, and fresh bananas, making it as attractive as it is delicious.
Chill Before Serving
- Although the pudding can be enjoyed immediately, chilling it improves both flavor and texture.
- A short rest in the refrigerator allows the pudding to firm slightly while the vanilla wafers soften just enough to resemble classic banana pudding.
- About 15 to 30 minutes of chilling is usually enough before serving.
- The dessert becomes even creamier after refrigeration while the banana flavor develops further.
Helpful Tips for the Best Results
- Keeping a few simple tips in mind helps achieve the best texture every time.
- Always use cold Greek yogurt and cold almond milk. Cold ingredients help the pudding stay thick.
- Add the almond milk gradually instead of all at once. Every protein powder absorbs liquid differently, so adjusting slowly prevents the mixture from becoming too thin.
- Whisk thoroughly until completely smooth. A little extra mixing removes any small lumps from the protein powder.
- Choose ripe bananas that are yellow and firm. Very ripe bananas with many brown spots become overly soft and may release extra moisture.
- Taste the pudding after mixing. Depending on the sweetness of the protein powder, a little stevia can be added if desired without changing the consistency.
Storage Tips
- This protein banana pudding stores surprisingly well.
- Cover the jars or transfer the pudding to an airtight container before refrigerating.
- It stays fresh for up to one week when stored properly in the refrigerator.
- Because fresh bananas are included, it is best enjoyed within the first few days for the freshest appearance.
- The pudding should not remain at room temperature for more than a couple of hours.
Ingredient Alternatives
- Although I usually prepare the recipe exactly as written, a few substitutions can work if necessary.
- Regular vanilla wafers or graham crackers can replace the sugar-free wafers.
- Coconut yogurt may be used instead of Greek yogurt if preferred.
- Any milk can replace almond milk.
- Regular banana-flavored instant pudding mix can be substituted for the sugar-free version if needed.

High Protein Banana Pudding
This Healthy Protein Banana Pudding is a creamy, no-bake dessert made with Greek yogurt, vanilla whey protein powder, sugar-free banana cream pudding mix, fresh banana slices, and crushed vanilla wafers. It delivers the classic flavor of banana pudding without condensed milk or added sugar, making it a great choice for a high-protein snack or light dessert.
2
25
minutes0
minutes177
kcal5
minutesIngredients
⅔ cup non-fat Greek yogurt (150g)
⅓ cup whey vanilla protein powder (30g)
4 teaspoons sugar-free banana cream instant pudding mix (11g)
2 teaspoons unsweetened almond milk (10ml)
3–4 sugar-free vanilla wafers, crushed (14g)
½ medium banana, sliced (60g)
Directions
- In a medium mixing bowl, combine the non-fat Greek yogurt, vanilla whey protein powder, and sugar-free banana cream instant pudding mix. Stir until the ingredients are evenly blended.
- Gradually add the unsweetened almond milk, mixing continuously after each small addition. Continue whisking until the mixture becomes thick, smooth, and creamy with no lumps.
- Crush the vanilla wafers into small pieces and slice the banana into thin, even rounds.
- Spoon a layer of the protein pudding into the bottom of a serving jar or dessert glass.
- Sprinkle a layer of the crushed vanilla wafers over the pudding
- Arrange a layer of fresh banana slices on top of the wafers
- Repeat the layers in the same order—protein pudding, crushed vanilla wafers, and banana slices—until all the ingredients have been used
- Cover the jars and refrigerate for 15–30 minutes. Chilling allows the pudding to thicken slightly and softens the wafers for the best texture.
- Serve chilled and enjoy immediately, or store any leftovers in an airtight container in the refrigerator for up to one week.
Notes
- Use cold Greek yogurt and almond milk for the creamiest consistency.
- Add the almond milk gradually until the desired pudding thickness is reached.
- Whisk well to remove any lumps from the protein powder.
- Choose ripe bananas that are yellow and firm rather than overripe.
- If you prefer a sweeter pudding, add a small amount of stevia without changing the texture.
- Store leftovers in an airtight container in the refrigerator for up to 1 week.
- The pudding should not remain at room temperature for more than a few hours.
Nutrition Facts
- Serving Size: 1 g
- Total number of serves: 2
- Calories: 177kcal
- Fat: 1.9g
- Saturated Fat: 1g
- Carbohydrates: 20.9g
- Fiber: 1.2g
- Sugar: 7.9g
- Protein: 19.4g