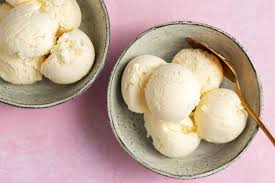
Vanilla ice cream is one of the most famous and loved desserts in the world. It is creamy, smooth, sweet, cold, refreshing, and comforting at the same time. Although many people think vanilla ice cream is simple, making truly delicious vanilla ice cream requires patience, attention to detail, proper ingredients, and careful preparation. A good vanilla ice cream should have a rich creamy texture, balanced sweetness, soft aroma, and deep vanilla flavor that melts smoothly in the mouth.
This very detailed recipe explains every step of making homemade vanilla ice cream from scratch. It includes ingredient explanations, preparation techniques, cooking methods, freezing methods, troubleshooting tips, flavor variations, serving ideas, and storage advice. By following this guide carefully, you can create rich and creamy vanilla ice cream that tastes better than many store-bought versions.
Part 1: Understanding Vanilla Ice Cream
Vanilla ice cream is made from a mixture called a custard base. The base usually contains:
- Milk
- Heavy cream
- Sugar
- Egg yolks
- Vanilla
- Salt
These ingredients work together to create texture and flavor.
Milk gives structure and lightness.
Heavy cream provides richness and smoothness.
Sugar adds sweetness and helps prevent the ice cream from becoming too hard.
Egg yolks create a creamy custard texture.
Vanilla gives aroma and flavor.
Salt balances sweetness and enhances flavor.
The process of making ice cream involves heating, cooling, churning, and freezing. Every stage affects the final result.
Part 2: Ingredients
Main Ingredients
4 cups heavy cream
2 cups whole milk
1 and 1/2 cups white granulated sugar
8 large egg yolks
2 tablespoons pure vanilla extract
1 whole vanilla bean
1/4 teaspoon salt
Part 3: Ingredient Details
Heavy Cream
Heavy cream is one of the most important ingredients because it creates richness and smooth texture. Ice cream made with low-fat cream may become icy instead of creamy.
The fat in heavy cream coats ice crystals and helps produce a smooth mouthfeel.
For best results, use fresh heavy cream with high fat content.
Whole Milk
Whole milk helps balance the richness of the cream. Using only cream can make ice cream too heavy. Whole milk keeps the texture smooth while reducing excessive heaviness.
Avoid skim milk because it contains too little fat.
Sugar
Sugar does more than sweeten the ice cream. It also affects texture. Sugar lowers the freezing point, helping the ice cream remain scoopable instead of becoming solid like ice.
Too little sugar creates hard ice cream.
Too much sugar creates overly soft ice cream.
Balance is very important.
Egg Yolks
Egg yolks are responsible for the luxurious custard texture.
Egg yolks:
- Add richness
- Improve smoothness
- Help stabilize the mixture
- Reduce ice crystals
Custard-based ice cream is often called French-style ice cream.
Vanilla Bean
Real vanilla bean creates deep natural flavor.
The tiny black specks inside vanilla bean pods give authentic appearance and stronger aroma.
To use a vanilla bean:
- Slice it lengthwise
- Scrape out seeds
- Add both seeds and pod into the milk mixture
Vanilla Extract
Vanilla extract boosts flavor further.
Pure vanilla extract is better than artificial vanilla flavoring because it contains more complex flavor notes.
Salt
Salt may seem unusual in desserts, but a small amount improves flavor balance and enhances sweetness.
Part 4: Equipment Needed
You do not need professional equipment, but some tools make the process easier.
Required equipment:
- Large saucepan
- Mixing bowls
- Whisk
- Fine strainer
- Wooden spoon
- Measuring cups
- Measuring spoons
- Ice cream machine
- Airtight freezer container
- Plastic wrap
Optional equipment:
- Thermometer
- Silicone spatula
- Fine vanilla scraper
Part 5: Preparing the Custard Base
Step 1: Combine Milk and Cream
Pour:
- 4 cups heavy cream
- 2 cups whole milk
into a large saucepan.
Add:
- Half of the sugar
- Salt
Mix gently.
Step 2: Prepare Vanilla Bean
Take the vanilla bean and place it on a cutting board.
Using a sharp knife:
- Slice the bean lengthwise
- Open it carefully
- Scrape out tiny seeds
Add:
- Seeds
- Empty vanilla pod
into the milk mixture.
Step 3: Heat the Mixture
Place saucepan over medium heat.
Do not boil.
Heat slowly while stirring occasionally.
The goal is:
- Warm mixture
- Dissolve sugar
- Infuse vanilla flavor
Heat until steam rises gently.
Small bubbles may appear around edges.
Avoid rapid boiling.
Part 6: Preparing Egg Yolks
Step 1: Separate Eggs
Separate 8 egg yolks from egg whites.
Place yolks in a mixing bowl.
Step 2: Add Sugar
Add remaining sugar into egg yolks.
Step 3: Whisk Thoroughly
Whisk mixture until:
- Pale yellow
- Thick
- Smooth
This step helps dissolve sugar and prepare yolks for tempering.
Part 7: Tempering the Egg
Tempering prevents scrambled eggs.
Step 1: Slowly Add Warm Liquid
Take one ladle of warm milk mixture.
Slowly pour into egg yolks while whisking constantly.
Continue adding warm liquid gradually.
This slowly raises egg temperature.
Step 2: Return Mixture to Saucepan
Pour tempered egg mixture back into saucepan.
Whisk continuously.
Part 8: Cooking the Custard
Cook over low to medium heat.
Stir constantly using wooden spoon or spatula.
Custard thickens slowly.
Do not rush.
Do not boil.
The custard is ready when:
- It coats the back of a spoon
- Finger swipe leaves clean line
- Temperature reaches around 170–175°F
Overheating causes curdling.
Part 9: Straining the Custard
Place fine strainer over bowl.
Pour custard through strainer.
This removes:
- Egg bits
- Vanilla pod pieces
- Lumps
Smooth custard creates smooth ice cream.
Part 10: Cooling the Custard
Cooling is extremely important.
Step 1: Ice Bath
Place bowl inside larger bowl filled with ice water.
Stir occasionally.
Step 2: Refrigerate
Cover mixture with plastic wrap touching surface.
Refrigerate at least:
- 6 hours
or preferably: - Overnight
Long chilling improves flavor and texture.
Part 11: Churning the Ice Cream
Using Ice Cream Machine
Pour chilled custard into machine.
Churn according to manufacturer instructions.
Usually takes:
20–30 minutes
During churning:
- Air incorporates
- Texture thickens
- Ice crystals stay small
Finished texture resembles soft serve ice cream.
Part 12: Final Freezing
Transfer churned ice cream into airtight container.
Smooth top with spatula.
Cover surface with plastic wrap.
Seal container.
Freeze:
4–8 hours
This hardens ice cream properly.
Part 13: Serving Vanilla Ice Cream
Remove from freezer.
Let sit:
5–10 minutes
before scooping.
This softens texture slightly.
Use warm ice cream scoop for smooth servings.
Part 14: Topping Ideas
Vanilla ice cream pairs beautifully with many toppings.
Popular toppings include:
- Chocolate syrup
- Caramel sauce
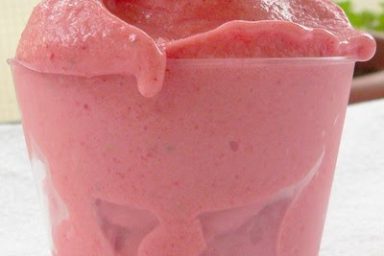
- Strawberries
- Blueberries
- Mango slices
- Crushed cookies
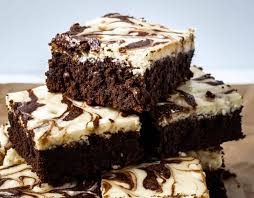
- Brownie pieces
- Nuts
- Honey
- Cinnamon
- Sprinkles
- Wafers
- Coconut flakes
Part 15: Dessert Pairings
Vanilla ice cream works with countless desserts.
Serve with:
- Apple pie
- Chocolate cake
- Brownies
- Pancakes
- Waffles
- Crepes
- Peach cobbler
- Fruit tart
- Banana bread
- Cookies
Part 16: Homemade Caramel Vanilla Ice Cream Variation
To create caramel vanilla ice cream:
- Melt sugar separately
- Create caramel sauce
- Add into custard
This gives deeper flavor and golden color.
Part 17: Vanilla Bean Deluxe Version
For stronger flavor:
- Use 2 vanilla beans
- Add extra vanilla extract
The flavor becomes richer and more aromatic.
Part 18: Soft Serve Style Version
For softer texture:
- Add slightly more sugar
- Churn less time
Soft serve texture stays lighter.
Part 19: No Egg Version
If avoiding eggs:
Replace custard with:
- Cornstarch
or - Condensed milk
Texture changes slightly but remains creamy.
Part 20: No Machine Method
If no ice cream machine:
- Freeze mixture in shallow container.
- Stir every 30 minutes.
- Break ice crystals repeatedly.
- Continue for several hours.
Texture may be less smooth but still delicious.
Part 21: Common Mistakes
Overheating Custard
This causes scrambled eggs.
Always cook slowly.
Skipping Chilling Step
Warm mixture churns poorly.
Always chill thoroughly.
Using Low-Fat Dairy
Low fat creates icy texture.
Freezing Without Covering
Ice cream absorbs freezer odors easily.
Always seal container tightly.
Part 22: Professional Texture Tips
Professional ice cream makers use several techniques.
More Fat
Higher fat equals smoother texture.
More Air
Churning incorporates air called overrun.
Balanced overrun improves mouthfeel.
Stable Temperature
Frequent melting and refreezing damages texture.
Part 23: Storage Tips
Homemade vanilla ice cream lasts:
2–3 weeks
Store in coldest freezer section.
Avoid freezer door because temperature changes often.
Part 24: Why Homemade Vanilla Ice Cream Tastes Better
Homemade ice cream often tastes richer because:
- Fresher ingredients
- Real vanilla
- No artificial preservatives
- Better control of sweetness
- Higher quality dairy
Part 25: Flavor Science
Vanilla contains hundreds of aroma compounds.
These create:
- Floral notes
- Creamy notes
- Sweet aroma
- Warm fragrance
Real vanilla flavor is extremely complex.
Part 26: Ice Crystal Science
Smooth ice cream requires tiny ice crystals.
Large crystals create grainy texture.
Factors affecting crystals:
- Churning
- Fat content
- Sugar
- Freezing speed
Part 27: Different Vanilla Types
Madagascar Vanilla
Rich and creamy.
Tahitian Vanilla
Floral and fruity.
Mexican Vanilla
Spicy and deep.
Part 28: Restaurant Style Vanilla Ice Cream
Restaurants often use:
- Extra cream
- More egg yolks
- Premium vanilla beans
This creates luxurious texture.
Part 29: Serving Presentation Ideas
Serve vanilla ice cream:
- In bowls
- In waffle cones
- In glass cups
- With fresh mint
- With fruit decorations
- With chocolate drizzle
Part 30: Making Ice Cream for Parties
For large groups:
- Double recipe
- Prepare one day early
- Store in multiple containers
Part 31: Kid-Friendly Version
Children enjoy:
- Rainbow sprinkles
- Cookie crumbles
- Chocolate chips
Vanilla base works perfectly.
Part 32: Luxury Gourmet Version
For gourmet vanilla ice cream:
- Use organic cream
- Use premium vanilla pods
- Add extra egg yolks
- Age custard overnight
This creates extraordinary flavor depth.
Classic Vanilla Ice-cream
This versatile vanilla ice cream recipe is designed for your Thermomix and ice cream machine, providing the perfect foundation for countless flavor combinations.
10
servings250
kcalIngredients
120 120 -150g sugar (caster sugar recommended; coconut sugar, raw sugar, or xylitol can be substituted for low-carb variations. 1Lighter-colored sugars produce the best color.)
600 g 600 pure or pouring cream (without gelatin)
230 g 230 milk
6 large 6 egg yolks
2 tsp 2 vanilla extract
Directions
- Thermomix Method (Custard Base):
- If using granulated sugar, mill it in the Thermomix bowl for 30 seconds/speed 9/MC on. Scrape down the bowl.
- Add the remaining ingredients to the bowl. Cook for 9 minutes/90°C/speed 3/MC on.
- Ice Cream Machine Method:
- Pour the custard base into a container, cover the surface directly with cling wrap, and refrigerate for several hours until chilled.
- Churn the chilled mixture in your ice cream maker according to the manufacturer’s instructions.
- Thermomix Method (No Ice Cream Machine):
- Pour the custard base into standard ice cube trays and freeze until solid.
- Once frozen, blend the ice cubes in the Thermomix for 1 minute/speed 9/MC on, or until smooth, using a spatula to help combine. (Note: If it’s a hot day, the mixture may melt quickly. If needed, stop blending early and return the mixture to the freezer.)
- Dairy-Free/Paleo Variation:
- Replace the cream and milk with 800g of Ayam light coconut milk.
- Egg-Free Variation:
- Omit the eggs and follow only the Thermomix method (no ice cream machine).
- Lower-Fat Variation:
- Use low-fat cream
Nutrition Facts
10 servings per container
- Amount Per ServingCalories250
- % Daily Value *
- Total Fat
25g
33%
- Saturated Fat 15g 75%
- Total Carbohydrate
15g
6%
- Total Sugars 15g
- Protein 4g 8%
* The % Daily Value tells you how much a nutrient in a serving of food contributes to a daily diet. 2,000 calories a day is used for general nutrition advice.