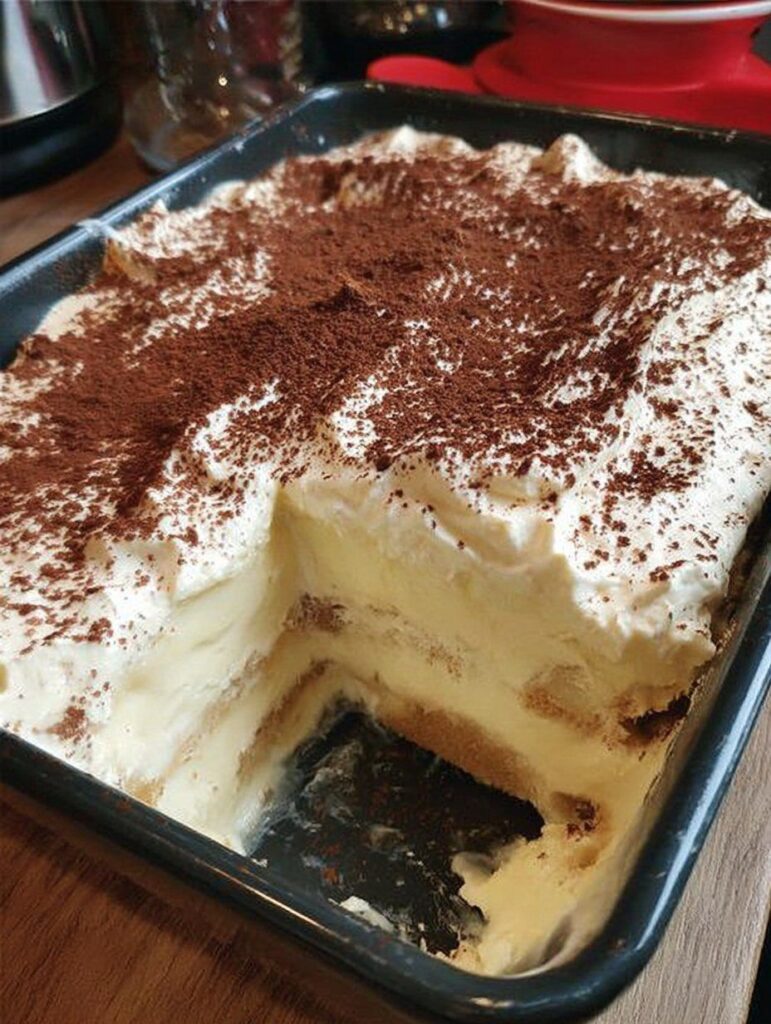
Keto Tiramisu Cake is the perfect dessert for anyone who loves the classic Italian flavors of tiramisu but wants to maintain a low-carbohydrate lifestyle. This luxurious cake combines delicate almond flour sponge layers, rich espresso flavor, silky mascarpone cream, and a generous dusting of cocoa powder to create a dessert that feels completely indulgent while remaining keto-friendly. Unlike traditional tiramisu, which relies on ladyfinger cookies soaked in coffee and contains a substantial amount of sugar, this version uses a homemade keto sponge cake and sugar-free sweeteners to achieve the same rich flavor profile with a fraction of the carbohydrates.
The result is an elegant dessert suitable for birthdays, dinner parties, holiday gatherings, or simply as a special weekend baking project. Every bite offers soft coffee-infused cake, creamy mascarpone filling, and the unmistakable flavor combination that has made tiramisu one of the world’s most beloved desserts.
Yield
12 to 14 generous servings
Preparation Time
Preparation: 1 hour
Baking Time: 25 minutes
Cooling Time: 1 hour
Assembly Time: 30 minutes
Chilling Time: 6 to 12 hours
Total Time: Approximately 9 to 14 hours
Ingredients for the Cake Layers
2 cups finely ground almond flour
½ cup coconut flour
2 teaspoons baking powder
½ teaspoon fine sea salt
8 large eggs, separated
¾ cup granulated erythritol or monk fruit sweetener
¼ cup unsalted butter, melted and cooled
⅓ cup unsweetened almond milk
2 teaspoons pure vanilla extract
1 teaspoon almond extract
Ingredients for the Espresso Soak
1½ cups freshly brewed espresso or very strong coffee
2 tablespoons instant espresso powder
3 tablespoons powdered keto sweetener
1 teaspoon vanilla extract
Ingredients for the Mascarpone Filling
16 ounces mascarpone cheese, softened
8 ounces cream cheese, softened
2½ cups heavy whipping cream
1 cup powdered keto sweetener
2 teaspoons vanilla extract
1 teaspoon espresso powder
Ingredients for the Cocoa Topping
3 tablespoons unsweetened cocoa powder
2 tablespoons finely grated sugar-free dark chocolate
Optional sugar-free chocolate curls
Optional roasted coffee beans for decoration
Understanding the Components of the Cake
Before beginning, it is helpful to understand the role of each component.
The sponge cake serves as the foundation. Traditional tiramisu uses ladyfingers, but this keto sponge creates a similar light texture while keeping carbohydrates low.
The espresso soak is responsible for the signature tiramisu flavor. The cake absorbs the coffee mixture, becoming moist and aromatic.
The mascarpone cream provides richness and balances the bold coffee notes.
The cocoa powder topping adds slight bitterness and completes the classic tiramisu experience.
Each component is important, and none should be rushed.
Preparing the Cake Pans
Preheat the oven to 350°F (175°C).
Grease two 8-inch round cake pans thoroughly with butter.
Line the bottoms with parchment paper circles.
Grease the parchment paper lightly as well.
Proper pan preparation prevents sticking and ensures clean cake layers.
Set the prepared pans aside.
Mixing the Dry Ingredients
In a large mixing bowl combine:
Almond flour
Coconut flour
Baking powder
Sea salt
Whisk thoroughly for several minutes.
The goal is to distribute the baking powder evenly and remove any lumps.
Almond flour can sometimes clump together during storage, so taking extra time here improves the final texture.
Set aside.
Preparing the Egg Yolks
Separate the eggs carefully.
Place the yolks into a large bowl.
Reserve the whites in a separate clean bowl.
Add half of the sweetener to the yolks.
Using an electric mixer, beat for approximately 4 to 5 minutes.
The mixture should become pale yellow and significantly lighter in texture.
This step introduces air into the batter and contributes to the softness of the sponge.
Add:
Melted butter
Almond milk
Vanilla extract
Almond extract
Continue mixing until completely incorporated.
The mixture should appear smooth and creamy.
Combining Dry and Wet Ingredients
Gradually add the dry ingredients to the yolk mixture.
Mix slowly.
Do not add everything at once.
Continue stirring until a thick batter forms.
The batter will appear denser than traditional cake batter because almond flour absorbs moisture differently than wheat flour.
Do not worry if it seems thick.
The whipped egg whites will lighten it considerably.
Whipping the Egg Whites
Using clean beaters, whip the egg whites until frothy.
Gradually add the remaining sweetener.
Continue beating until stiff glossy peaks form.
When the beaters are lifted, the peaks should stand upright without collapsing.
Properly whipped egg whites are one of the most important steps in this recipe.
They create structure, lightness, and volume.
Without them, the cake may become dense.
Folding the Batter
Add one-third of the whipped whites into the almond batter.
Mix gently to loosen the mixture.
Next, add the remaining egg whites.
Using a spatula, fold carefully with slow upward motions.
Rotate the bowl frequently.
Avoid vigorous stirring.
The objective is to preserve as much trapped air as possible.
Continue folding only until no white streaks remain.
The final batter should appear light and fluffy.
Filling the Cake Pans
Divide the batter evenly between the prepared pans.
Use a spatula to spread the batter gently.
Tap the pans lightly on the counter once or twice to release large air bubbles.
Do not overdo this step.
Too much tapping can remove valuable air from the batter.
Baking the Cake
Place both pans on the center rack.
Bake for approximately 22 to 25 minutes.
The cakes are finished when:
The tops are lightly golden.
The center springs back when touched.
A toothpick inserted into the center comes out clean.
Avoid overbaking.
Almond flour cakes can dry out if left in the oven too long.
Remove from the oven and place on cooling racks.
Allow the cakes to cool in the pans for 15 minutes.
Carefully remove them and continue cooling completely.
Making the Espresso Soak
While the cakes cool, prepare the coffee mixture.
In a bowl combine:
Fresh espresso
Espresso powder
Sweetener
Vanilla extract
Whisk thoroughly until dissolved.
Allow the mixture to cool completely.
The coffee flavor is one of the defining characteristics of tiramisu.
Using high-quality espresso dramatically improves the finished dessert.
The aroma alone should be rich and inviting.
Preparing the Mascarpone Filling
Place mascarpone cheese into a large bowl.
Add softened cream cheese.
Beat until smooth.
Add powdered sweetener gradually.
Mix until creamy.
Add vanilla extract and espresso powder.
Continue mixing until fully combined.
In another bowl whip the heavy cream until medium-stiff peaks form.
Do not overwhip.
The cream should be smooth and stable.
Gradually fold the whipped cream into the mascarpone mixture.
Work slowly.
The finished filling should be airy, silky, and luxurious.
It should hold its shape while remaining soft enough to spread easily.
Leveling the Cake Layers
Inspect the cooled cakes.
If the tops have domed significantly, trim them gently with a serrated knife.
Flat layers create a more professional appearance.
Save any trimmed pieces for tasting.
The scraps are delicious with leftover mascarpone cream.
Beginning Assembly
Place one cake layer onto a serving plate or cake stand.
Brush the surface generously with half of the espresso soak.
Work slowly to allow the liquid to absorb.
Do not flood the cake.
The goal is deep coffee flavor without making the sponge soggy.
Allow several minutes for absorption.
Adding the First Layer of Filling
Spread approximately one-third of the mascarpone filling over the cake.
Use an offset spatula to create an even layer.
Take your time.
The filling should reach nearly to the edges.
The creamy layer provides contrast to the coffee-soaked sponge.
Smooth the surface carefully.
Adding the Second Cake Layer
Place the second cake layer on top.
Press gently.
Brush the remaining espresso soak over the surface.
Allow the coffee mixture to absorb fully.
The aroma at this stage should resemble a traditional Italian café.
Coffee, vanilla, mascarpone, and cocoa begin blending together into the classic tiramisu profile.
Frosting the Cake
Use the remaining mascarpone filling to frost the entire cake.
Cover the top first.
Then frost the sides.
Work slowly for a smooth finish.
Alternatively, create decorative swirls using the back of a spoon.
Rustic textures often look beautiful on tiramisu cakes.
Once frosted, refrigerate for approximately 30 minutes.
This helps stabilize the cream.
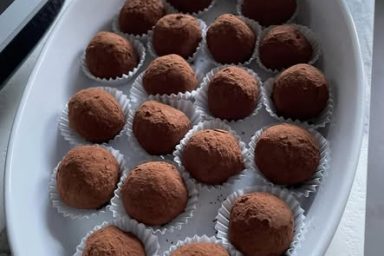
Creating the Classic Tiramisu Finish
Place cocoa powder into a fine-mesh sieve.
Dust generously over the entire top surface.
The cocoa layer should be even and attractive.
Sprinkle grated sugar-free dark chocolate over the cocoa.
For additional elegance, decorate with chocolate curls.
A few coffee beans arranged around the edge create a sophisticated presentation.
The finished cake should look rich, dramatic, and inviting.
Chilling the Cake
This step is absolutely essential.
Place the assembled cake into the refrigerator.
Chill for at least 6 hours.
For the best flavor and texture, chill overnight.
During this time:
The sponge absorbs additional moisture.
The coffee flavor deepens.
The mascarpone filling firms slightly.
The cocoa topping melds into the cream.
The individual components transform into a unified dessert.
Many bakers agree that tiramisu is significantly better the day after it is assembled.
Serving the Cake
Remove the cake from the refrigerator approximately 15 minutes before serving.
Use a sharp knife.
Wipe the blade clean between slices.
Each slice should reveal beautiful layers of coffee-soaked sponge and creamy mascarpone filling.
Serve with:
Fresh espresso
Cappuccino
Latte made with unsweetened almond milk
Sugar-free mocha
Black coffee
Unsweetened tea
Professional Tips for Success
Always use room-temperature mascarpone.
Cold mascarpone can become lumpy.
Never overwhip the heavy cream.
Overwhipped cream may create a grainy filling.
Use finely ground almond flour rather than almond meal.
The texture difference is significant.
Choose a sweetener you enjoy.
Different keto sweeteners have different flavor profiles.
Taste the filling before assembly and adjust sweetness if needed.
Allow plenty of chilling time.
Patience greatly improves the final result.
Flavor Variations
Chocolate Keto Tiramisu Cake
Add ¼ cup cocoa powder to the cake batter.
Increase sweetener slightly if desired.
The result is a chocolate-coffee dessert with extraordinary richness.
Hazelnut Tiramisu Cake
Add 1 teaspoon hazelnut extract.
Sprinkle chopped toasted hazelnuts between the layers.
The flavor resembles a luxurious coffeehouse dessert.
Mocha Tiramisu Cake
Mix melted sugar-free chocolate into the mascarpone filling.
The combination of coffee and chocolate creates incredible depth.
Cinnamon Tiramisu Cake
Add ½ teaspoon cinnamon to the cocoa topping.
The warm spice pairs beautifully with espresso.
Caramel Coffee Tiramisu
Drizzle keto caramel sauce between the layers.
The caramel notes enhance the mascarpone and coffee flavors.
Storage Instructions
Store covered in the refrigerator for up to 5 days.
The flavor often improves after the first day.
For freezing, wrap individual slices tightly.
Store for up to 2 months.
Thaw overnight in the refrigerator.
Avoid microwaving because the mascarpone filling may separate.
Nutritional Benefits
Compared with traditional tiramisu cake, this keto version contains dramatically fewer carbohydrates.
Almond flour contributes healthy fats and a moist crumb.
Mascarpone provides richness without excess carbohydrates.
Heavy cream helps maintain the ketogenic macronutrient balance.
Coffee and cocoa deliver intense flavor with minimal sugar impact.
The result is a dessert that feels luxurious enough for special occasions while remaining compatible with a ketogenic lifestyle.
Rich, creamy, coffee-infused, and beautifully layered, this Keto Tiramisu Cake captures everything people love about classic tiramisu while offering a low-carb alternative that is every bit as satisfying as the original. Every forkful delivers silky mascarpone cream, aromatic espresso-soaked sponge, and a delicate cocoa finish that lingers pleasantly long after the last bite.