Introduction
There are few meals in traditional home cooking that deliver the same level of comfort, satisfaction, and rich flavor as a slow-cooked rustic garlic herb meat roast. This classic dish has been prepared in country kitchens for generations, relying on simple ingredients, patience, and gentle heat to transform a tough cut of meat into something incredibly tender and deeply flavorful. The long cooking process allows the meat to absorb the aromas of garlic, herbs, vegetables, and savory stock while gradually breaking down connective tissues until the roast becomes fork-tender and succulent.
This recipe is intentionally detailed and comprehensive, designed for cooks who appreciate traditional methods and want to create a memorable meal for family gatherings, special occasions, Sunday dinners, or holiday celebrations. The finished roast is infused with layers of flavor from fresh garlic, rosemary, thyme, oregano, parsley, onions, carrots, celery, and a rich braising liquid that eventually becomes a luxurious gravy.
The beauty of this recipe lies in its simplicity. Although the ingredient list is extensive and the cooking time is long, the actual preparation is straightforward. Most of the work is done by the slow cooking process itself. As the roast cooks, your kitchen fills with an inviting aroma that signals a truly special meal is on the way.
Yield and Timing
Serves 8 to 10 people generously
Preparation Time: Approximately 45 minutes
Cooking Time: 6 to 8 hours
Resting Time: 30 minutes
Total Time: Approximately 8 to 9 hours
Choosing the Best Cut of Meat
The success of a slow-cooked roast begins with selecting the proper cut of meat. Tougher cuts that contain connective tissue and marbling are ideal because they become exceptionally tender during long cooking periods.
Suitable cuts include:
Beef chuck roast
Beef shoulder roast
Rump roast
Brisket
Bottom round roast
Cross rib roast
Boneless short rib roast
A roast weighing between 3 and 5 pounds is ideal for this recipe. Look for visible marbling throughout the meat. These streaks of fat melt during cooking and contribute moisture, richness, and flavor.
Avoid very lean cuts because they can become dry and less flavorful during extended cooking.
Ingredients for the Roast
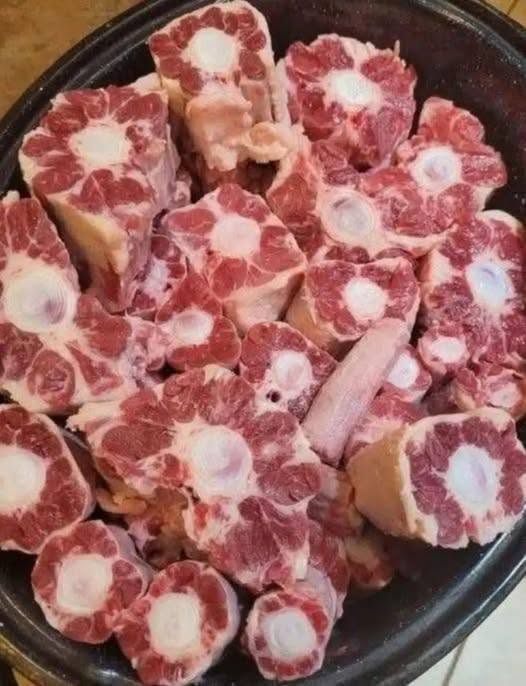
4 pounds beef chuck roast
2 tablespoons coarse sea salt
1 tablespoon freshly ground black pepper
2 teaspoons smoked paprika
2 teaspoons onion powder
2 teaspoons garlic powder
1 teaspoon dried mustard powder
2 tablespoons olive oil
Ingredients for the Garlic Herb Paste
15 large garlic cloves
3 tablespoons fresh rosemary leaves
3 tablespoons fresh thyme leaves
2 tablespoons fresh oregano leaves
3 tablespoons fresh parsley leaves
2 tablespoons olive oil
1 teaspoon salt
½ teaspoon black pepper
Ingredients for the Vegetable Base
4 large onions sliced thickly
5 large carrots cut into large chunks
4 celery stalks chopped
2 parsnips chopped
1 whole garlic bulb cut in half
2 leeks sliced
8 ounces mushrooms quartered
Ingredients for the Braising Liquid
3 cups beef stock
1 cup water
1 cup unsweetened grape juice
3 tablespoons Worcestershire sauce
2 tablespoons tomato paste
2 bay leaves
1 teaspoon dried thyme
1 teaspoon dried rosemary
1 teaspoon dried oregano
1 tablespoon soy sauce
1 teaspoon black pepper
Ingredients for the Gravy
3 tablespoons butter
3 tablespoons flour
2 to 3 cups cooking liquid
Salt to taste
Black pepper to taste
Optional roasted garlic from cooking pot
Preparing the Roast
Remove the roast from the refrigerator approximately one hour before cooking. Allowing the meat to approach room temperature promotes more even cooking and better browning.
Place the roast on a large tray and pat it completely dry using paper towels. Moisture on the surface can interfere with proper browning.
In a small bowl combine the salt, black pepper, smoked paprika, onion powder, garlic powder, and mustard powder. Stir thoroughly until evenly mixed.
Rub the seasoning mixture generously over every surface of the roast. Press firmly to ensure the seasonings adhere well. Take your time during this step because this initial seasoning forms the first layer of flavor.
Allow the seasoned roast to rest while preparing the herb mixture.
Preparing the Rustic Garlic Herb Paste
Place the garlic cloves, rosemary, thyme, oregano, parsley, olive oil, salt, and black pepper into a food processor.
Pulse repeatedly until a thick, fragrant paste forms.
If a food processor is unavailable, finely chop all ingredients and crush them together using a mortar and pestle until they create a rough paste.
Spread this mixture generously over every side of the roast. Massage it into the meat thoroughly.
The garlic and herbs will gradually penetrate the surface of the roast during cooking and contribute to its distinctive rustic flavor.
Allow the roast to sit for approximately twenty minutes.
Searing the Meat
Heat a large Dutch oven over medium-high heat.
Add olive oil and allow it to become hot but not smoking.
Carefully place the roast into the pot.
Sear the first side for approximately five minutes without moving it.
Turn and sear the second side for another five minutes.
Continue browning all remaining sides and edges.
The objective is to develop a deep golden-brown crust. This crust contains concentrated flavor compounds that greatly enhance the finished dish.
Once browned, transfer the roast to a plate.
Building the Vegetable Foundation
Reduce the heat slightly.
Add onions to the same pot.
Cook for approximately five minutes.
Add carrots, celery, parsnips, leeks, and mushrooms.
Cook for another ten minutes while stirring occasionally.
The vegetables should begin softening and developing light caramelization.
Add the halved garlic bulb.
Cook for two additional minutes.
The vegetables create a flavorful foundation beneath the roast while also enriching the cooking liquid.
Preparing the Braising Liquid
In a large bowl combine beef stock, water, grape juice, Worcestershire sauce, tomato paste, soy sauce, dried thyme, dried rosemary, dried oregano, and black pepper.
Whisk until smooth.
Pour the liquid into the pot with the vegetables.
Use a wooden spoon to scrape the bottom thoroughly.
The browned bits attached to the pot contain valuable flavor and should be incorporated into the liquid.
Add the bay leaves.
Bring everything to a gentle simmer.
Combining Everything
Return the roast to the pot.
Nestle it on top of the vegetables.
The liquid should reach approximately halfway up the sides of the roast.
Do not completely submerge the meat.
The upper portion of the roast develops rich roasted flavors while the lower portion braises gently in the liquid.
Cover tightly with a lid.
Slow Cooking in the Oven
Preheat the oven to 300°F (150°C).
Place the covered pot in the center of the oven.
Cook for approximately six to eight hours.
Avoid opening the lid frequently because each opening releases valuable heat and moisture.
After about six hours, begin testing the roast for tenderness.
A fork should slide into the meat with very little resistance.
If the roast still feels firm, continue cooking and test again every thirty minutes.
Slow Cooker Alternative
If using a slow cooker, transfer vegetables, liquid, and roast into the slow cooker insert.
Cook on low for eight to ten hours.
For faster cooking, cook on high for five to six hours.
The low setting generally produces superior texture and flavor.
Understanding the Science of Slow Cooking
During slow cooking, collagen within the connective tissues gradually transforms into gelatin.
This process is responsible for the luxurious texture associated with well-prepared roasts.
At first, the meat may seem tough.
As cooking continues, connective tissues soften.
Eventually, the roast becomes tender enough to pull apart effortlessly.
Patience is one of the most important ingredients in this recipe.
Monitoring During Cooking
Every two to three hours, check the roast briefly.
Spoon some cooking liquid over the exposed surface.
Inspect liquid levels.
If necessary, add a small amount of stock or water.
The environment should remain moist throughout the cooking process.
Determining Doneness
A properly cooked roast should exhibit the following characteristics:
Fork-tender texture
Rich brown exterior
Moist interior
Deep savory aroma
Easily separated muscle fibers
Juicy appearance
If the meat remains tough, continue cooking.
In most cases, toughness indicates insufficient cooking time rather than overcooking.
Resting the Roast
Carefully remove the roast from the pot.
Place it on a serving platter.
Cover loosely with foil.
Allow it to rest for thirty minutes.
Resting allows juices to redistribute throughout the meat.
This step contributes significantly to moisture retention.
Making the Gravy
Strain the cooking liquid into a large bowl.
Reserve approximately three cups.
In a saucepan melt butter over medium heat.
Add flour.
Whisk continuously for three minutes.
Gradually pour in the reserved cooking liquid while whisking.
Continue whisking until smooth.
Bring to a gentle simmer.
Cook for approximately ten minutes.
The gravy should become silky and slightly thickened.
For additional richness, squeeze softened roasted garlic from the cooked bulb into the gravy.
Season with salt and black pepper.
Taste frequently and adjust as necessary.
Slicing the Roast
Identify the direction of the muscle fibers.
Using a sharp carving knife, slice against the grain.
This shortens muscle fibers and improves tenderness.
For a more rustic presentation, shred the roast into large chunks using two forks.
Mix lightly with some cooking juices before serving.
Serving Suggestions
This roast pairs beautifully with numerous side dishes.
Creamy mashed potatoes absorb the rich gravy exceptionally well.
Roasted potatoes provide crisp contrast.
Buttered green beans contribute freshness.
Steamed peas add sweetness.
Creamy polenta offers a smooth accompaniment.
Rustic bread helps soak up flavorful juices.
Roasted root vegetables complement the earthy herb profile.
Rice pilaf provides a lighter alternative.
Yorkshire pudding creates a traditional presentation.
Advanced Flavor Enhancements
For cooks seeking even deeper flavor, consider the following additions:
Caramelized onions
Roasted shallots
Additional garlic cloves
Fresh sage
Fresh marjoram
A splash of balsamic vinegar
Extra mushrooms
Roasted carrots
Celery root
Turnips
These ingredients can contribute additional complexity while preserving the rustic character of the dish.
Storing Leftovers
Allow the roast to cool completely.
Transfer meat and cooking liquid into airtight containers.
Store in the refrigerator for up to four days.
For longer storage, freeze portions for up to three months.
Keeping the meat submerged in cooking liquid helps preserve moisture.
Reheating Instructions
Place meat into a covered baking dish.
Add several tablespoons of reserved cooking liquid.
Cover tightly.
Heat at 325°F (165°C) until warmed through.
Gentle reheating helps maintain tenderness.
Avoid overheating because excessive heat may dry the meat.
Why This Recipe Works
This recipe succeeds because every component contributes flavor at multiple stages.
The seasoning blend penetrates the meat surface.
The garlic herb paste infuses aromatic depth.
The searing process develops rich roasted notes.
The vegetables enrich the braising liquid.
The long cooking time transforms tough connective tissues into silky gelatin.
The resting period preserves moisture.
The final gravy captures every layer of flavor created during cooking.
The result is a magnificent slow-cooked rustic garlic herb meat roast that is deeply savory, intensely aromatic, exceptionally tender, and worthy of being the centerpiece of a memorable family meal. Every bite delivers a combination of rich beef flavor, sweet cooked vegetables, fragrant herbs, mellow garlic, and luxurious gravy that reflects the timeless appeal of traditional slow cooking.