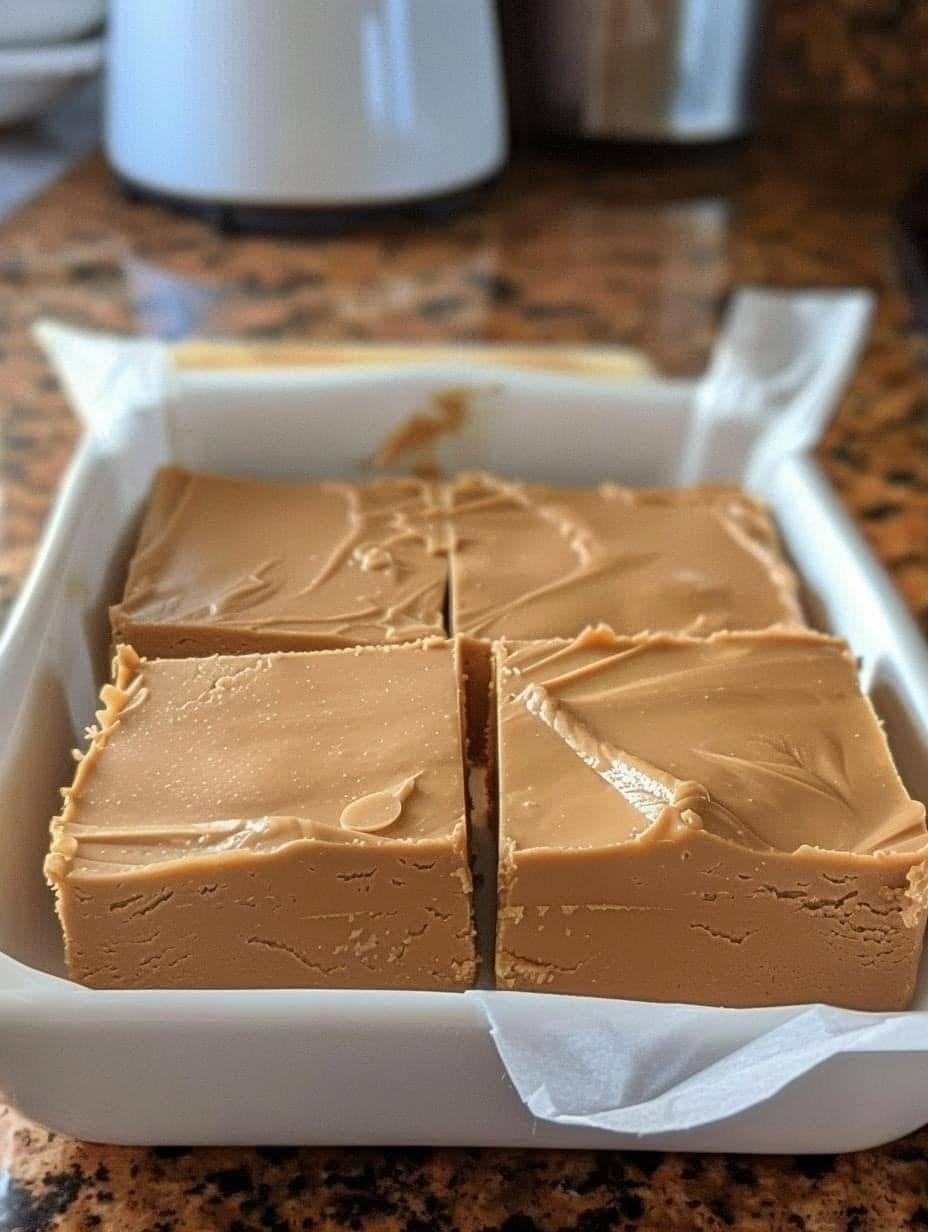
Two-Ingredient Peanut Butter Fudge is one of the most surprisingly delicious desserts ever created. Many people assume that excellent fudge requires candy thermometers, boiling sugar, condensed milk, marshmallow creme, chocolate, butter, and a lengthy cooking process. Traditional fudge recipes can indeed be complicated and often require careful temperature control. However, this simplified version proves that wonderful homemade fudge can be made with only two simple ingredients and a few minutes of preparation.
The result is a smooth, rich, creamy, peanut-butter-packed confection that melts in your mouth. The texture is dense enough to hold its shape when sliced but soft enough to provide the luxurious eating experience that fudge lovers expect. It is ideal for holidays, birthdays, family gatherings, bake sales, gift boxes, dessert trays, office parties, school events, or simply satisfying a craving for something sweet and comforting.
One reason this recipe has become so popular is that it eliminates many of the common challenges associated with traditional candy making. There is no need to monitor temperatures, worry about sugar crystallization, or spend long periods stirring a hot mixture on the stove. Instead, the recipe relies on the natural structure of peanut butter combined with the sweetness and stabilizers found in prepared frosting. Together, these ingredients create a perfectly balanced fudge that firms beautifully when chilled.
This extensive guide explores every aspect of making Two-Ingredient Peanut Butter Fudge, from ingredient selection and preparation methods to storage techniques, serving suggestions, flavor science, troubleshooting, presentation ideas, gifting methods, and numerous variations.
What Makes This Recipe Special?
Many desserts advertise themselves as easy, but few are genuinely effortless while still delivering impressive results. This recipe succeeds because it offers several advantages:
Only two ingredients are required.
No special baking skills are necessary.
No oven is needed.
No candy thermometer is required.
Preparation takes only a few minutes.
The ingredients are easy to find.
The recipe is highly adaptable.
The finished product looks elegant and professional.
The fudge stores well.
The recipe can easily be doubled or tripled.
Because of these benefits, it has become a favorite among beginner cooks and experienced bakers alike.
The History of Fudge
Before diving into the recipe itself, it is interesting to understand a bit about fudge.
Fudge originated in the United States during the late nineteenth century. While the exact origins remain uncertain, many food historians believe it was first developed accidentally when a batch of caramel or another sugar confection was “fudged” or made incorrectly. Rather than discarding the failed candy, creative cooks discovered that the resulting sweet mixture was delicious in its own right.
Traditional fudge eventually evolved into a beloved treat made by heating sugar, milk, butter, and flavorings to a specific temperature before cooling and beating the mixture until smooth and creamy.
The simplified peanut butter version represents a modern adaptation that preserves the rich flavor and creamy texture while removing much of the complexity.
Yield Information
Makes approximately 36 to 49 small pieces depending on cutting size.
Preparation Time: 10 minutes
Mixing Time: 5 minutes
Chilling Time: 2 to 4 hours
Total Time: Approximately 4 hours
Difficulty Level: Extremely Easy
Skill Level: Beginner Friendly
Ingredients
16 ounces creamy peanut butter
16 ounces vanilla frosting
That is all.
The simplicity of the ingredient list is part of the recipe’s charm.
Understanding the Role of Each Ingredient
Peanut Butter
Peanut butter serves as the foundation of the fudge.
It provides:
Flavor
Richness
Protein
Fat
Structure
Creaminess
Density
The natural oils and proteins found in peanuts contribute significantly to the texture of the finished dessert.
Vanilla Frosting
The frosting contributes:
Sweetness
Smoothness
Stability
Volume
Creamy texture
A subtle vanilla flavor
Prepared frosting contains sugar and emulsifiers that help bind the mixture together and create the characteristic texture associated with fudge.
Choosing the Best Peanut Butter
Not all peanut butters behave exactly the same way.
Creamy Peanut Butter
Creamy peanut butter is generally the preferred choice because it creates a smooth and silky texture.
Advantages include:
Uniform consistency
Easy mixing
Classic fudge texture
Smooth mouthfeel
Professional appearance
Crunchy Peanut Butter
Crunchy peanut butter introduces small pieces of peanuts throughout the fudge.
Advantages include:
Additional texture
Pleasant crunch
More pronounced peanut flavor
Rustic appearance
Natural Peanut Butter
Natural peanut butter can also be used.
However, it often contains more oil separation.
If using natural peanut butter:
Stir thoroughly before measuring.
Mix until completely smooth.
Expect a slightly softer final texture.
Choosing the Best Frosting
Most store-bought vanilla frostings work successfully.
Different brands may produce slightly different results.
Some frostings create:
A firmer fudge
A sweeter fudge
A softer fudge
A creamier fudge
Experimenting with different brands can help you discover your personal favorite texture.
Equipment Needed
Large microwave-safe mixing bowl
Silicone spatula
Mixing spoon
8-inch square baking pan
Parchment paper
Sharp knife
Cutting board
Airtight storage container
Measuring scale (optional)
Offset spatula (optional)
None of these tools are specialized or difficult to obtain.
Preparing Your Workspace
Successful cooking begins with organization.
Before starting:
Clear the counter.
Gather all ingredients.
Prepare the pan.
Line the pan with parchment paper.
Place all equipment within easy reach.
Read through the entire recipe.
Having everything ready allows the process to proceed smoothly.
Preparing the Pan
Line an 8-inch square pan with parchment paper.
Allow excess paper to extend over the sides.
These overhanging edges will later function as handles.
The parchment serves several important purposes:
Prevents sticking
Simplifies removal
Makes cutting easier
Improves presentation
Reduces cleanup
Press the paper firmly into the corners for best results.
Step 1: Combining Ingredients
Place the peanut butter into a large microwave-safe bowl.
Add the vanilla frosting.
At this stage, the ingredients may appear difficult to combine.
This is completely normal.
The warming process will help soften both components.
Step 2: Gentle Heating
Microwave the mixture for 30 seconds.
Remove and stir.
Continue heating in short intervals.
Stir after each interval.
The goal is not to cook the ingredients.
The goal is simply to soften them enough to blend smoothly.
Avoid overheating.
Excessive heat can cause:
Oil separation
Texture problems
Greasiness
Difficulty setting
Most batches require between 45 and 90 seconds total.
Step 3: Thorough Mixing
This step is crucial.
Using a sturdy spoon or spatula, stir continuously.
Initially, streaks may appear.
Continue mixing.
The mixture will gradually become:
Uniform
Glossy
Smooth
Creamy
Thick
The final consistency should resemble a dense batter.
No streaks should remain visible.
Proper mixing ensures an even texture throughout the fudge.
Step 4: Transferring to the Pan
Pour the warm mixture into the prepared pan.
Work fairly quickly because the mixture begins thickening as it cools.
Spread evenly using a spatula.
Press into corners.
Smooth the surface carefully.
For an especially professional appearance:
Tap the pan gently against the countertop.
Use an offset spatula to create a flat top.
Rotate the pan occasionally while smoothing.
The more care taken during this stage, the more attractive the finished fudge will appear.
Step 5: Chilling
Place the pan in the refrigerator.
Allow the fudge to chill for at least two hours.
Four hours is even better.
During this period:
The fats solidify.
The structure stabilizes.
The texture develops.
The flavors blend together.
Patience during chilling greatly improves the final result.
Step 6: Removing the Fudge
Once fully chilled:
Lift the fudge using the parchment paper handles.
Transfer to a cutting board.
The slab should feel firm but not rock hard.
If it still feels soft, return it to the refrigerator for additional chilling.
Step 7: Cutting
Use a large sharp knife.
For cleaner cuts:
Wipe the blade between slices.
Warm the knife slightly if desired.
Cut carefully and evenly.
Popular cutting options include:
Small squares
Large squares
Rectangles
Diamonds
Gift-sized cubes
Mini bites
Uniform pieces create the most professional presentation.
Understanding the Texture
A properly prepared batch should have:
Smooth consistency
Creamy mouthfeel
Dense body
Rich flavor
Clean slices
Slight firmness
Soft bite
The texture should not be crumbly.
It should not be runny.
It should not be excessively sticky.
Instead, it should balance firmness and creaminess.
Flavor Profile
The flavor of this fudge is intensely peanut buttery.
Expect notes of:
Roasted peanuts
Sweet vanilla
Creamy richness
Candy-like sweetness
Buttery smoothness
The peanut butter remains the dominant flavor while the frosting contributes sweetness and balance.
Serving Suggestions
Serve chilled for maximum firmness.
Serve slightly softened for extra creaminess.
This fudge pairs wonderfully with:
Coffee
Tea
Milk
Hot chocolate
Espresso
Cappuccino
Vanilla ice cream
Chocolate ice cream
Salted caramel ice cream
It also works beautifully as part of a dessert buffet.
Holiday Uses
This fudge is particularly popular during holidays.
It can be prepared for:
Christmas
Eid celebrations
Thanksgiving
New Year’s parties
Birthdays
Family reunions
Office events
School functions
Gift exchanges
Its simple preparation makes it ideal during busy holiday seasons.
Packaging as Gifts
Homemade fudge makes a thoughtful gift.
Place pieces in decorative boxes.
Layer between sheets of parchment paper.
Use holiday tins.
Add personalized labels.
Tie with ribbon.
Include storage instructions.
The result is an attractive homemade present that many recipients appreciate.
Storage Guide
Refrigerator
Store in an airtight container.
Shelf life: approximately 2 weeks.
Separate layers with parchment paper.
Freezer
Wrap tightly.
Store in freezer-safe containers.
Shelf life: approximately 3 months.
Thaw gradually before serving.
Common Mistakes
Overheating
Too much heat can cause:
Oil separation
Greasiness
Texture problems
Insufficient Mixing
Poor mixing may lead to:
Streaks
Uneven sweetness
Inconsistent texture
Incorrect Measurements
Too much peanut butter may create dry fudge.
Too much frosting may create soft fudge.
Insufficient Chilling
Cutting too early can result in messy slices.
Advanced Tips for Perfect Results
Use room-temperature ingredients.
Mix thoroughly.
Line the pan carefully.
Smooth the top completely.
Chill fully before slicing.
Store properly.
Use quality ingredients.
Measure accurately.
These small details can significantly improve the final product.
Flavor Variations
Chocolate Peanut Butter Fudge
Substitute chocolate frosting.
Creates a rich chocolate-peanut combination.
Double Chocolate Peanut Butter Fudge
Use chocolate frosting and drizzle melted chocolate over the top.
White Chocolate Peanut Butter Fudge
Use white chocolate frosting.
Produces an extra creamy dessert.
Maple Peanut Butter Fudge
Use maple frosting.
Creates warm autumn flavors.
Cinnamon Peanut Butter Fudge
Mix in cinnamon.
Produces a cozy dessert with subtle spice.
Honey Peanut Butter Fudge
Use honey-roasted peanut butter.
Provides deeper sweetness.
Dark Chocolate Version
Use dark chocolate frosting.
Creates a less sweet and more sophisticated flavor profile.
Frequently Asked Questions
Can I make this recipe without a microwave?
Yes.
Warm the ingredients gently in a saucepan over low heat.
Can I use homemade frosting?
Yes.
The texture may vary.
Can I double the recipe?
Absolutely.
Use a larger pan.
Is natural peanut butter acceptable?
Yes.
Stir thoroughly first.
Can I use crunchy peanut butter?
Yes.
Many people enjoy the added texture.
How long does it last?
Approximately two weeks refrigerated.
Can it be frozen?
Yes.
Up to three months.
Why is my fudge soft?
Usually because of insufficient chilling or excess oil.
Why is my fudge oily?
Most often due to overheating.
Why is my fudge crumbly?
Too much peanut butter can sometimes cause dryness.
Final Thoughts
Two-Ingredient Peanut Butter Fudge demonstrates that outstanding desserts do not always require lengthy ingredient lists or complicated techniques. By combining peanut butter and vanilla frosting, you can create a remarkably rich, creamy, satisfying confection with minimal effort and virtually no specialized equipment. Whether prepared for holidays, family gatherings, gifts, celebrations, or everyday enjoyment, this recipe consistently delivers delicious results. Its simplicity, reliability, versatility, and rich peanut flavor have made it a favorite among home cooks around the world, proving that sometimes the most memorable desserts come from the simplest combinations imaginable.