Fresh homemade tortillas have a way of making any meal feel a little more special. Whether they are filled with grilled vegetables, chicken, beef, beans, cheese, or simply enjoyed warm with a little butter, soft tortillas are incredibly versatile. Making them at home also means you can control every ingredient that goes into them, creating tortillas that taste fresh and have a wonderfully tender texture.
This gluten free flour tortilla recipe has become one of my favorite kitchen staples because it delivers everything I look for in a tortilla. They are soft enough to fold without cracking, thin enough for wraps and burritos, and sturdy enough to hold generous fillings. Instead of becoming dry or crumbly like many gluten free breads, these tortillas stay pleasantly flexible from the moment they leave the pan.
One of the best things about this recipe is how uncomplicated it is. There are only five pantry-friendly ingredients, yet they work together beautifully to create dough that is surprisingly easy to handle. There is no need for complicated techniques or difficult shaping methods. Once the dough is mixed, it behaves much like traditional dough, making the entire process enjoyable from start to finish.
Because these tortillas are made fresh at home, they have a clean, wholesome flavor that works with almost any cuisine. They can become taco shells, wraps, quesadillas, burritos, breakfast rolls, or even homemade chips after baking. Having a batch ready in the kitchen makes preparing quick lunches and dinners incredibly convenient.
Why I Love Making These Tortillas
- Homemade gluten free tortillas have several advantages over packaged varieties. Fresh tortillas have a soft texture that is difficult to find in store-bought options, especially those that have been sitting on supermarket shelves for weeks.
- Another reason I return to this recipe regularly is its consistency. Every batch turns out tender, pliable, and easy to roll. They don’t become stiff within minutes of cooking, and they remain pleasant to work with even after cooling.
- The recipe also keeps preparation simple. There are no lengthy resting periods or complicated rising stages because there is no yeast involved. From mixing the dough to cooking the final tortilla, everything comes together in less than an hour.
Five Simple Ingredients
The beauty of this recipe lies in its simplicity. Every ingredient has an important role, and none of them are unnecessary.
- Gluten Free Flour Blend
- The flour blend creates the structure of the tortillas. Using a quality plain gluten free flour blend produces consistent results and makes the dough easier to work with. If preferred, a homemade flour blend can also be prepared using white rice flour, potato starch, and maize flour in the correct proportions.
- Psyllium Husk
- Psyllium husk is one ingredient that should not be skipped. Once mixed with warm water, it forms a thick gel that replaces much of the elasticity normally provided by gluten.
- Without psyllium, gluten free dough often crumbles and tears easily. The gel holds moisture inside the dough, helping each tortilla remain soft, flexible, and easy to fold.
- Salt
- Even though only a small amount is used, salt enhances the overall flavor of the tortillas. It keeps them from tasting flat and helps balance the mild flavor of the flour blend.
- Sunflower Oil
- Oil adds tenderness and improves flexibility. It also helps keep the tortillas soft after they have cooled. A neutral oil works best because it allows the natural flavor of the tortillas to shine without overpowering other ingredients.
- Warm Water
- Warm water activates the psyllium husk and hydrates the flour blend. Gluten free flour absorbs considerably more moisture than wheat flour, making adequate hydration one of the most important factors in achieving soft tortillas.
Preparing the Psyllium Gel
The first step is creating the psyllium gel. Warm water is mixed thoroughly with the psyllium husk until everything is evenly combined.
Within seconds, the mixture begins to thicken into a gel-like consistency. This transformation happens quickly, so it is helpful to have the remaining ingredients measured and ready beforehand.
Allowing the gel to sit while preparing the dry ingredients gives it enough time to fully develop.
Mixing the Dough
- In a separate bowl, the gluten free flour blend and salt are whisked together until evenly combined.
- A small well is made in the center before adding the sunflower oil and prepared psyllium gel.
- At first, the mixture looks rough and uneven, but once stirred with a wooden spoon, the ingredients gradually come together into a soft dough.
- Hand kneading finishes the process. Instead of using quick motions, I gently squeeze the dough between my fingers while pressing everything together. This method ensures every bit of flour becomes fully hydrated.
- The finished dough should feel springy and moist without being sticky. Although the surface may not appear perfectly smooth, it should feel uniform throughout with no dry flour remaining.
Dividing the Dough
- Once mixed, the dough is transferred onto a lightly floured work surface.
- Using a kitchen scale helps divide it into twelve equal portions. Equal portions cook evenly and create tortillas of matching size.
- Each piece is gently rolled into a ball before being covered with a clean kitchen towel.
- Keeping the dough covered is especially important because gluten free dough loses surface moisture more quickly than traditional wheat dough. Even a few minutes of exposure can cause the outer layer to dry.
Rolling Beautiful Thin Tortillas
- Rolling the tortillas is one of the most satisfying parts of the process.
- Each dough ball is lightly coated with flour before placing it on the work surface.
- Using a rolling pin, the dough is rolled outward from the center while rotating frequently to maintain an even thickness.
- Perfect circles are not necessary. Slightly uneven edges disappear once the tortillas puff during cooking.
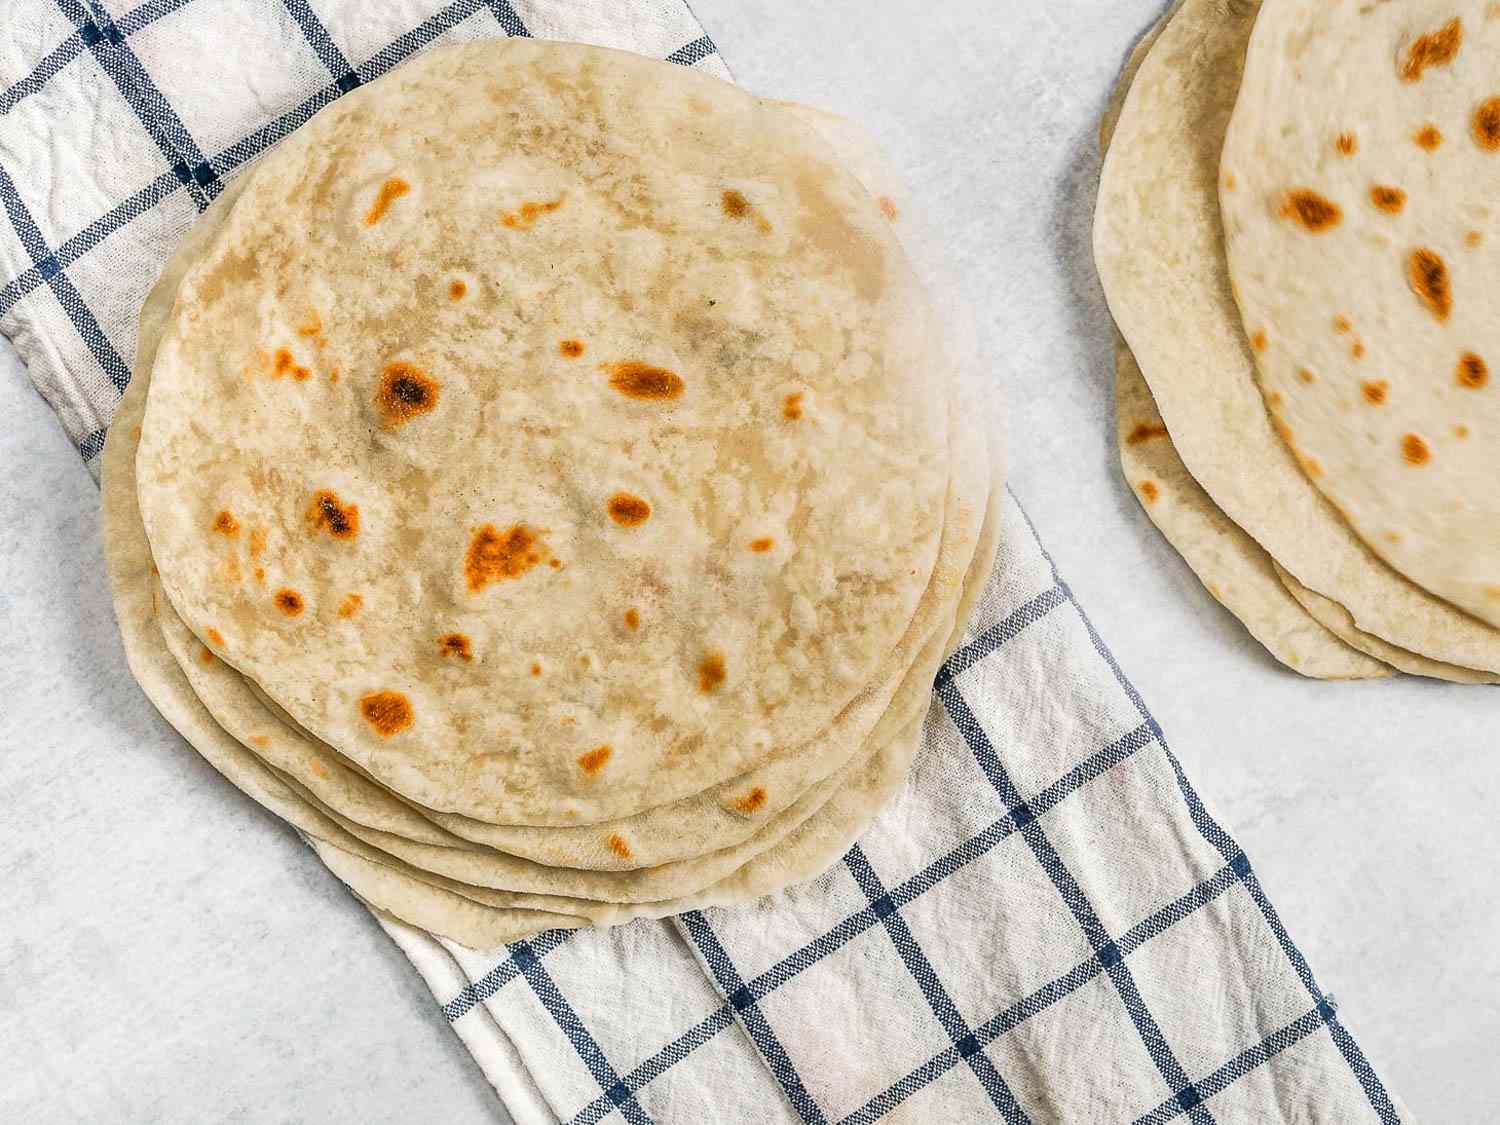
- The finished tortilla should measure approximately nine inches across while remaining extremely thin—around one millimeter thick.
- Thin tortillas cook more evenly, develop attractive brown spots, and remain wonderfully flexible after cooking.
Cooking the Tortillas
- A large non-stick frying pan produces the best results.
- Before cooking begins, the pan should be thoroughly heated over medium to medium-high heat until a drop of water immediately sizzles on contact.
- The tortilla is gently placed into the hot pan without adding oil.
- After roughly forty-five seconds, bubbles begin appearing across the surface while the underside develops light golden spots.
- Once flipped, the tortilla continues cooking for another minute. During this time, larger air pockets form, creating the characteristic puffed appearance associated with freshly cooked tortillas.
- When dark brown spots appear underneath, the tortilla is ready to be removed.
Keeping Every Tortilla Soft
- Immediately after cooking, each tortilla is transferred onto a clean kitchen towel and completely covered.
- This simple step traps steam released from the hot tortilla.
- Rather than escaping into the air, that moisture is absorbed back into the tortilla, producing an incredibly soft texture.
- As additional tortillas finish cooking, they are stacked together inside the towel, allowing the entire batch to remain warm and flexible.
- Skipping this step often results in tortillas that cool too quickly and become firmer than desired.
Achieving the Best Texture
- Several small details contribute to consistently soft tortillas.
- Using enough water ensures the flour remains fully hydrated.
- Psyllium husk provides elasticity while preventing cracks.
- Oil keeps the finished tortillas tender.
- Cooking on properly heated cookware creates attractive brown spots without drying the dough.
- Finally, wrapping the cooked tortillas immediately preserves their moisture.
- Together, these simple techniques create tortillas that fold beautifully without tearing.
Helpful Tips for Success
- Work with one dough ball at a time while keeping the remaining pieces covered.
- Avoid adding excessive flour during rolling because too much extra flour can make the tortillas slightly dry.
- If the tortillas brown before bubbles develop, reduce the heat slightly.
- If cooking takes much longer than one minute per side, increase the heat a little.
- Rotate the dough frequently while rolling to help maintain a round shape.
- A non-stick frying pan generally provides better results than heavier cookware because the tortillas release easily and puff more consistently.
Storage and Reheating
- Fresh tortillas are always the most enjoyable, but leftovers store very well.
- Once completely cooled, stack them and place them inside a zip-top bag or wrap them tightly.
- They remain fresh for two to three days.
- When ready to use again, lightly mist each tortilla with water before warming it in a covered non-stick pan for about one minute per side.
- After reheating, wrap the tortillas inside a clean towel for several minutes. The trapped steam restores much of their original softness, making them almost identical to freshly cooked tortillas
Serving Ideas
- These tortillas fit naturally into countless meals.
- Fill them with grilled chicken and crisp vegetables for lunch.
- Use them for breakfast wraps with eggs and cheese.
- Turn them into quesadillas with melted cheese and herbs.
- Wrap roasted vegetables with hummus for a light meal.
- Serve alongside soups, stews, or curries instead of bread.
- Slice leftover tortillas into triangles, bake until crisp, and enjoy them as homemade tortilla chips with salsa or guacamole.
Soft Gluten-Free Tortillas Easy 5 Ingredient Recipe
These gluten-free flour tortillas are everything you could want in a tortilla—soft, pliable, and perfect for folding or wrapping.
12
servings20
minutes20
minutes250
kcal40
minutesIngredients
5 tbsp 5 (24g) whole psyllium husk (use 20g if using psyllium husk powder)
2 cups 2 (480g) warm water
3 cups 3 (360g) gluten-free flour blend (plus extra for dusting)
Tip: Use a store-bought blend like Doves Farm Freee or mix your own (50% white rice flour, 30% potato starch, 20% maize/corn flour by weight).
1 tsp 1 salt
¼ cup (50g) sunflower oil or other neutral-tasting oil
Directions
- Whisk psyllium husk with warm water and let it sit for 15-20 seconds until a gel forms.
- In a large bowl, mix gluten-free flour and salt.
- Add psyllium gel and oil to the dry ingredients, mix, and knead until smooth.
- Divide the dough into 12 balls and cover them with a dish towel.
- Roll each ball into a thin, round tortilla on a floured surface.
- Preheat a non-stick pan over medium-high heat.
- Cook each tortilla for 45 seconds per side until golden brown spots appear.
- Keep cooked tortillas covered in a dish towel to stay soft.
Notes
- Whole psyllium husk provides the best texture and flexibility.
- Roll the tortillas very thin for the softest results.
- Keep unused dough covered while rolling to prevent drying.
- A non-stick frying pan works better than a cast iron skillet for this recipe.
- If the tortillas brown too quickly, reduce the heat slightly.
- If they take longer than one minute per side to cook, increase the heat a little.
- Cook the tortillas in a dry pan without adding oil.
- Fresh tortillas have the best texture, but they reheat very well using the method above.
Nutrition Facts
- Total number of serves: 13
- Calories: 250kcal
- Fat: 4g
- Saturated Fat: 0.4g
- Trans Fat: 0g
- Polyunsaturated Fat: 2.2g
- Monounsaturated Fat: 1.1g
- Cholesterol: 0mg
- Sodium: 195mg
- Potassium: 35mg
- Carbohydrates: 24g
- Fiber: 4g
- Sugar: 0g
- Protein: 2g
- Calcium: 8mg
- Iron: 0.7mg
- Vitamin D: 0mcg