POACHED EGGS
1. Introduction: What makes a poached egg “perfect”?
A perfect poached egg is defined by:
- A smooth, compact oval white
- A fully encased yolk
- A soft, custard-like interior
- No wispy strands floating in water
- A clean surface without ragged edges
In professional kitchens, consistency is more important than speed. A poached egg is considered “correct” only when it holds shape naturally without rubbery texture or broken structure.
2. Understanding of poached eggs
To master poached eggs, you need to understand what is happening physically and chemically.
Egg white composition
Egg whites contain two major proteins:
- Ovalbumin (sets at moderate heat)
- Conalbumin (sets at slightly higher heat)
At:
- 60°C → whites start thickening
- 65°C → soft gel formation begins
- 70–80°C → firm set
- 90°C+ → rubbery, tough texture
Egg yolk behavior
- 60°C → yolk thickens slightly
- 65°C → creamy custard texture
- 70°C+ → starts becoming chalky
Why poaching works
Poaching uses:
- Water as a gentle heat conductor
- No shell barrier
- Controlled temperature instead of direct frying heat
The goal is:
- Whites fully set at ~70–80°C
- Yolks kept below overcooking threshold
3. Choosing the right eggs
Fresh eggs (best choice)
Characteristics:
- Thick whites
- Compact structure
- Less spreading in water
Medium-aged eggs
- Slightly runny whites
- Require vinegar or straining
- Still usable with technique adjustment
Old eggs (not recommended)
- Very watery whites
- Spread uncontrollably
- Only usable if strained + swirl method is used
4. Equipment deep guide
Pot type
Best:
- Deep saucepan (at least 10–15 cm depth)
Why:
- Depth helps egg float and form shape
- Prevents sticking to base
Slotted spoon
Purpose:
- Drains water immediately
- Prevents soggy egg
Ramekin or small bowl
Purpose:
- Controlled egg release
- Prevents yolk breakage
Thermometer
Used for:
- Maintaining exact temperature range 80–85°C
5. Water preparation
Water depth
Ideal:
- 1.5 to 3 liters water for 1–4 eggs
Temperature control
Perfect poaching temperature:
- 80°C to 85°C
Visual indicators:
- Small bubbles at bottom
- Occasional gentle rise of bubbles
- No rolling boil
Why boiling is bad:
- Breaks egg structure instantly
- Creates stringy whites
- Causes uneven cooking
6. Vinegar: chemistry and function
Vinegar is optional but widely used in kitchens.
What it does:
- Lowers pH of water
- Accelerates protein coagulation
- Helps whites stick together
Recommended amount:
- 1 teaspoon per liter of water
Downsides:
- Slight aroma if overused
- Can slightly tighten texture if excessive
7. Core method
Step 1: Egg preparation
- Crack egg into small bowl
- Inspect yolk integrity
- Remove thin watery whites if needed
- Let egg rest 10–20 seconds (reduces shock into water)
Why this matters:
- Direct cracking into water causes fragmentation
- Bowl method gives precision
Step 2: Water stabilization
- Bring water to simmer
- Turn heat slightly down before adding egg
- Ensure movement is minimal
Goal:
- Stable heat environment
Step 3: Optional swirl technique
How to swirl:
- Stir water gently in one direction
- Create soft vortex
- Immediately add egg into center
Physics behind it:
- Water motion wraps egg white around yolk
- Reduces dispersion area
Step 4: Egg insertion technique
Correct method:
- Lower bowl close to surface (1–2 cm above water)
- Slide egg gently into water
- Avoid dropping from height
Wrong method:
- Dropping from high distance → breaks structure
Step 5: Cooking phases
Phase 1: 0–30 seconds
- White turns translucent
- Outer layer begins coagulating
Phase 2: 30–90 seconds
- Egg starts forming shape
- Loose strands still exist
Phase 3: 90–180 seconds
- White fully wraps yolk
- Egg becomes stable
Phase 4: Final stage
- Texture sets depending on timing
8. Timing master chart
Soft poached egg (runny center)
- 2:30 to 3:30 minutes
- Texture: silky white, liquid yolk
Medium poached egg
- 3:30 to 4:30 minutes
- Texture: soft custard yolk
Firm poached egg
- 5:00 to 6:00 minutes
- Texture: semi-solid yolk
Extra firm (rare use)
- 6:30+ minutes
- Texture: fully set yolk
9. Professional kitchen batch
Restaurants often cook multiple eggs at once.
Method:
- Large pot (10–15 liters water)
- Maintain constant temperature (82°C ideal)
- Add vinegar
- Cook eggs one after another quickly
- Use slotted spoon rotation system
Holding method:
- Poached eggs stored in ice water after partial cooking
- Reheated in hot water for 30 seconds before serving
10. Straining
This is used in fine dining.
Steps:
- Crack egg into fine mesh sieve
- Let watery whites drain for 20–30 seconds
- Transfer to bowl
- Poach normally
Result:
- Clean oval shape
- No trailing whites
- Perfect presentation
11. Sous-vide style poached egg
Method:
- Cook egg in shell
- Temperature: 63°C to 64°C
- Time: 45–75 minutes
Result:
- Uniform texture
- Almost custard-like consistency
- Extremely stable yolk
12. Microwave
Steps:
- Fill bowl with water
- Crack egg into water
- Cover loosely
- Microwave 45–75 seconds
Risks:
- Exploding yolk
- Uneven cooking
- Rubber texture
13. Common failures
Problem: Egg spreads like clouds
Cause:
- Old egg
- Cold water
- No vinegar
Fix:
- Use fresh eggs
- Strain whites
- Add vinegar
- Use swirl technique
Problem: Stringy egg whites
Cause:
- Water too turbulent
Fix: - Reduce heat
- Maintain gentle simmer
Problem: Egg sticks to bottom
Cause:
- Pot too shallow
- Water too hot initially
Fix:
- Increase water depth
- Lower heat before adding egg
Problem: Broken yolk
Cause:
- Rough handling
Fix: - Always use bowl method
- Never crack directly into pot from height
Problem: Rubbery texture
Cause:
- Overcooking
Fix: - Strict timing control
- Remove immediately after cooking
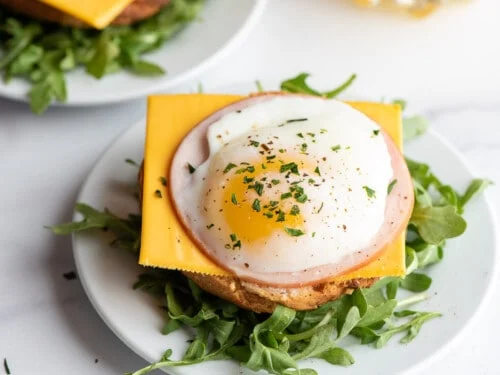
14. Serving
Breakfast plate system
- Poached egg on toast base
- Butter or oil layer
- Salt + pepper finish
Protein bowl system
- Rice base
- Vegetables
- Poached egg on top
Sauce integration system
- Hollandaise-style creamy sauces
- Yogurt-based sauces
- Light butter emulsions
15. Flavor
In water:
- Vinegar (structure)
- Salt (minor flavor impact)
After cooking:
- Black pepper (aroma activation)
- Chili flakes (heat contrast)
- Butter (fat coating)
- Soy sauce (umami boost)
16. Regional adaptations
South Asian style
- Served on paratha or roti
- With cumin, chili, and butter
Western style
- Eggs Benedict base
- Toast + hollandaise
Asian style
- Rice bowls
- Soy + sesame oil
17. Pro-level mastery tips
- Always test water temperature before cooking multiple eggs
- Keep first egg as “test egg” if unsure
- Never overcrowd pot
- Use timer, not guesswork
- Maintain consistency in egg size
- Practice swirl vs still-water method separately