
Before getting into complicated artisan bread recipes, I always like making this simple air fryer bread because it delivers a soft interior and a beautifully crisp crust with very little effort. There is no kneading involved, no stand mixer is required, and the ingredients are all pantry staples. The dough comes together with a spoon, rises until light and airy, and then bakes into a golden loaf that looks and tastes like something from a neighborhood bakery. Using the air fryer also shortens the baking time, making homemade bread much more practical for busy days.
Why This Air Fryer Bread Works So Well
- Making bread at home often sounds intimidating, but this method keeps everything straightforward. The dough is mixed in one bowl, left to rise naturally, shaped into a round loaf, and baked directly in a pan that fits inside the air fryer basket. The circulating hot air creates a crisp, golden crust while keeping the inside tender and fluffy.
- Because the recipe uses strong white bread flour and yeast, the loaf develops a pleasant structure without requiring complicated techniques. The olive oil helps create a softer crumb while adding a subtle richness that makes every slice enjoyable on its own or with a variety of toppings.
- Another reason I return to this recipe often is its consistency. As long as the dough has enough time to rise properly, the bread turns out dependable every time. It is an excellent option for beginners who want to learn bread making without investing in special equipment.
Simple Pantry Ingredients
- One of the best parts of this bread is that every ingredient has a specific purpose, yet the ingredient list stays refreshingly short.
- Strong white bread flour provides the structure needed for a light loaf with a chewy texture. It contains more protein than regular flour, helping develop gluten naturally while the dough rises. If bread flour is unavailable, all-purpose flour can also be used. Whole wheat flour works as well, although it usually requires slightly more water because it absorbs moisture differently.
- Fast-acting yeast gives the dough its rise, creating the tiny air pockets that make the finished loaf soft and light. Instant yeast, active dry yeast, or other quick-rise varieties all work well when used in the proper amount.
- A small quantity of sugar helps feed the yeast during the rising process. It also contributes slightly to the golden color that develops during baking.
- Salt balances the flavor while strengthening the dough structure. Even though only a teaspoon is used, it makes a noticeable difference in the final taste.
- Extra virgin olive oil keeps the crumb soft while adding moisture. It also creates a dough that is easier to handle after the first rise. If preferred, melted butter or ghee can be used instead without changing the overall method.
- Warm water brings all the ingredients together into a soft dough. The water should feel comfortably warm rather than hot, allowing the yeast to activate without damaging it.
Mixing the Dough
- One reason this recipe is so approachable is that there is no kneading involved. Everything comes together with nothing more than a mixing bowl and a sturdy spoon or spatula.
- The flour, sugar, salt, and yeast are first combined so the dry ingredients are evenly distributed. Once mixed, the warm water and olive oil are added gradually. Stirring continues until every bit of flour has been incorporated and a rough, slightly sticky dough forms.
- At this stage, the dough does not need to look perfectly smooth. A rustic, shaggy appearance is exactly what you want. During the resting and rising period, the gluten develops naturally, reducing the need for traditional kneading.
- This simple mixing method saves time while still producing bread with a soft interior and excellent texture.
Allowing the Dough to Rise
- After mixing, the dough is transferred to a lightly oiled bowl and covered with a clean kitchen towel. It then rests in a warm place until it doubles in size, which usually takes between one and two hours depending on the temperature of the kitchen.
- The rising period is one of the most important stages because this is when the yeast produces air bubbles throughout the dough. Those tiny pockets eventually become the light, airy crumb inside the baked loaf.
- During cooler weather, finding a warm place for the dough helps encourage steady fermentation. Patience is important here because rushing the rise can result in a denser loaf. Waiting until the dough has visibly expanded rewards you with bread that bakes evenly and slices beautifully.
- Once fully risen, the dough becomes noticeably puffier and softer. Pressing it gently reveals plenty of trapped air, showing that the yeast has done its job. At this point, it is ready for shaping before its final rise and eventual baking in the air fryer.
Shaping the Dough for the Best Results
- Once the dough has completed its first rise, it is time to gently remove the excess air without overworking it. A light press with your hands is enough to deflate the dough while still preserving plenty of the air bubbles that contribute to a soft crumb. The dough is then transferred onto a lightly floured work surface where it can be shaped.
- For this recipe, I shape the dough into a smooth round ball, often called a boule. Forming a tight, rounded shape helps the loaf rise evenly during baking and gives it an attractive bakery-style appearance. There is no need for complicated shaping techniques. Simply pull the edges of the dough toward the center several times, then gently rotate it until the surface becomes smooth.
- After shaping, the dough is placed into a lightly oiled 7-inch round baking pan or springform pan that comfortably fits inside the air fryer basket. Choosing the correct pan size is important because the dough needs enough room to expand while still allowing hot air to circulate around the pan.
The Second Rise Makes a Difference
- Although much shorter than the first rise, the second proof should not be skipped. Once the shaped dough is in the pan, it rests for another 15 to 20 minutes. During this time, the dough relaxes, becomes slightly puffier, and prepares for baking.
- Just before the loaf goes into the air fryer, the surface is lightly brushed with the reserved olive oil. This simple step encourages an evenly browned crust while giving the finished bread a gentle sheen.
- If desired, shallow cuts can be made across the top of the loaf using a sharp knife or bread lame. Scoring is optional, but it allows the bread to expand in a controlled way while baking and creates a classic homemade appearance.
Baking in the Air Fryer
- The air fryer should be preheated to 200°C (400°F) for about five minutes before the bread is added. Starting with a fully heated appliance helps the loaf rise quickly during the first stage of baking, creating better volume and a lighter texture.
- Place the baking pan carefully into the warm air fryer basket. The bread begins baking at the higher temperature for approximately ten minutes. This initial burst of heat encourages oven spring, allowing the loaf to expand before the crust fully sets.
- After the first stage, reduce the temperature to 170°C (350°F) and continue baking for about twenty more minutes. Lowering the temperature allows the center of the loaf to cook thoroughly without over-browning the crust.
- Since every air fryer cooks a little differently, it is worth checking the bread occasionally during the final baking time. If the loaf appears to be browning too quickly or is getting close to the heating element, monitor it closely until baking is complete.
- The finished bread should have a rich golden-brown crust with a firm exterior. One of the easiest ways to check for doneness is by tapping the bottom or side of the loaf. A hollow sound indicates that the interior has baked properly.
Cooling Before Slicing
- Fresh bread smells wonderful straight out of the air fryer, but allowing it to cool is an important final step. Carefully remove the loaf from the pan and transfer it to a cooling rack. Air circulating around the bread prevents condensation from forming underneath, helping maintain a crisp crust.
- Although it is tempting to slice immediately, waiting until the loaf has cooled allows the crumb to finish setting. Cutting into hot bread too soon may compress the interior and make it appear slightly gummy. A little patience results in cleaner slices and a much better texture.
- Once cooled, the loaf slices easily and has a crisp crust surrounding a soft, light center that is perfect for everyday meals.
Helpful Tips for Consistent Results
- Every air fryer model performs a little differently, so slight adjustments to cooking time may be necessary. Larger air fryers often bake more evenly, while compact models may require closer monitoring during the final minutes.
- If the bottom of the loaf appears lighter than the top and sides after baking, carefully remove the bread from the pan, turn it upside down, and air fry it for an additional five minutes. This helps brown the base, although it may slightly flatten the top of the loaf.
- Using warm—not hot—water is another small detail that makes a noticeable difference. Water that is too hot can affect the yeast, while water that is too cool may slow the rising process.
- Measuring the flour accurately also helps produce consistent results. Too much flour can create a dry, dense loaf, while the correct amount keeps the dough soft enough to rise properly.
Serving Ideas
- Fresh homemade bread is incredibly versatile and works well throughout the day. Warm slices spread with butter and fruit jam make a simple breakfast, while toasted slices topped with peanut butter and banana create a filling snack.
- The bread is equally suitable for sandwiches, whether filled with fresh vegetables, cheese, grilled meats, or classic lunch ingredients. It can also be transformed into homemade garlic bread by brushing slices with olive oil, garlic, and herbs before toasting.
- For lighter meals, serve thick slices alongside soup or stew, where the bread can soak up flavorful broths. Toasted bread topped with diced tomatoes, garlic, basil, olive oil, salt, and pepper creates an easy appetizer, while leftover slices can be used for bread sauce or other recipes that call for day-old bread.
- Proper storage also helps maintain freshness. Keep the loaf in an airtight container or bread box at room temperature if it will be enjoyed within two days. For longer storage, slice the bread before freezing so individual portions can be removed as needed. Frozen slices can be thawed at room temperature, toasted directly from frozen, warmed in the oven, or briefly heated in the microwave when a quick serving is needed.
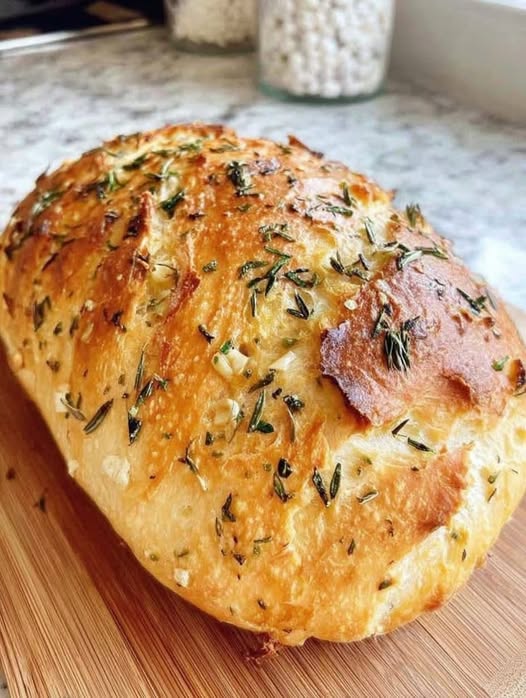
Air Fryer Bread
This Air Fryer Bread is a simple no-knead white bread recipe made with everyday pantry ingredients. The dough is mixed in one bowl, left to rise until light and airy, then baked in the air fryer for a beautifully golden crust and a soft, fluffy center. It is perfect for breakfast, sandwiches, toast, garlic bread, or serving alongside soups and stews.
4
servings10
minutes30
minutes463
kcal40
minutesIngredients
3 cups strong white bread flour (390 g)
1 teaspoon sugar
1 teaspoon salt
2¼ teaspoons yeast
¼ cup olive oil (reserve 1 tablespoon for glazing)
1½ cups warm water
Directions
- In a large mixing bowl, combine the bread flour, sugar, salt, and yeast until evenly mixed.
- Pour in the warm water and olive oil, reserving 1 tablespoon of the oil for brushing the loaf before baking.
- Stir everything together with a wooden spoon or spatula until a rough, sticky dough forms. No kneading is required.
- Lightly oil a clean bowl and transfer the dough into it. Cover with a clean kitchen towel and let it rise in a warm place for 1 to 2 hours, or until doubled in size.
- Once risen, gently press down the dough to release the trapped air.
- Place the dough on a lightly floured surface and shape it into a smooth round ball.
- Lightly grease a 7-inch baking pan or springform pan that fits inside your air fryer basket, then place the shaped dough inside.
- Allow the dough to rise again for 15–20 minutes.
- Brush the top with the reserved olive oil. If desired, score the surface with a sharp knife.
- Preheat the air fryer to 200°C (400°F) for 5 minutes.
- Place the pan into the preheated air fryer basket and cook at 200°C (400°F) for 10 minutes.
- Reduce the temperature to 170°C (350°F) and continue cooking for about 20 minutes, checking occasionally to prevent over-browning or contact with the heating element.
- The bread is ready when the crust is golden brown and the loaf sounds hollow when tapped.
- Remove the bread from the pan and cool completely on a wire rack before slicing and serving.
Notes
- Strong white bread flour produces the best texture, but all-purpose flour can also be used.
- If using whole wheat flour, additional warm water may be needed because it absorbs more moisture.
- Instant yeast, fast-acting yeast, active dry yeast, or quick-rise yeast can all be used.
- Melted butter or ghee can replace the olive oil glaze if preferred.
- Air fryer models vary, so cooking times may need slight adjustments.
- If the bottom of the loaf is not fully browned, carefully flip the bread over and air fry for an additional 5 minutes.
- Store bread in an airtight container or bread box at room temperature for up to 2 days.
- For longer storage, slice the bread, wrap it well, and freeze. Thaw at room temperature or toast directly from frozen.
Nutrition Facts
- Total number of serves: 4
- Calories: 463kcal
- Fat: 15g
- Saturated Fat: 2g
- Polyunsaturated Fat: 2g
- Monounsaturated Fat: 10g
- Sodium: 584mg
- Potassium: 98mg
- Carbohydrates: 69g
- Fiber: 2g
- Sugar: 1g
- Protein: 11g
- Vitamin A: 2mcg
- Calcium: 15mg
- Iron: 2mg