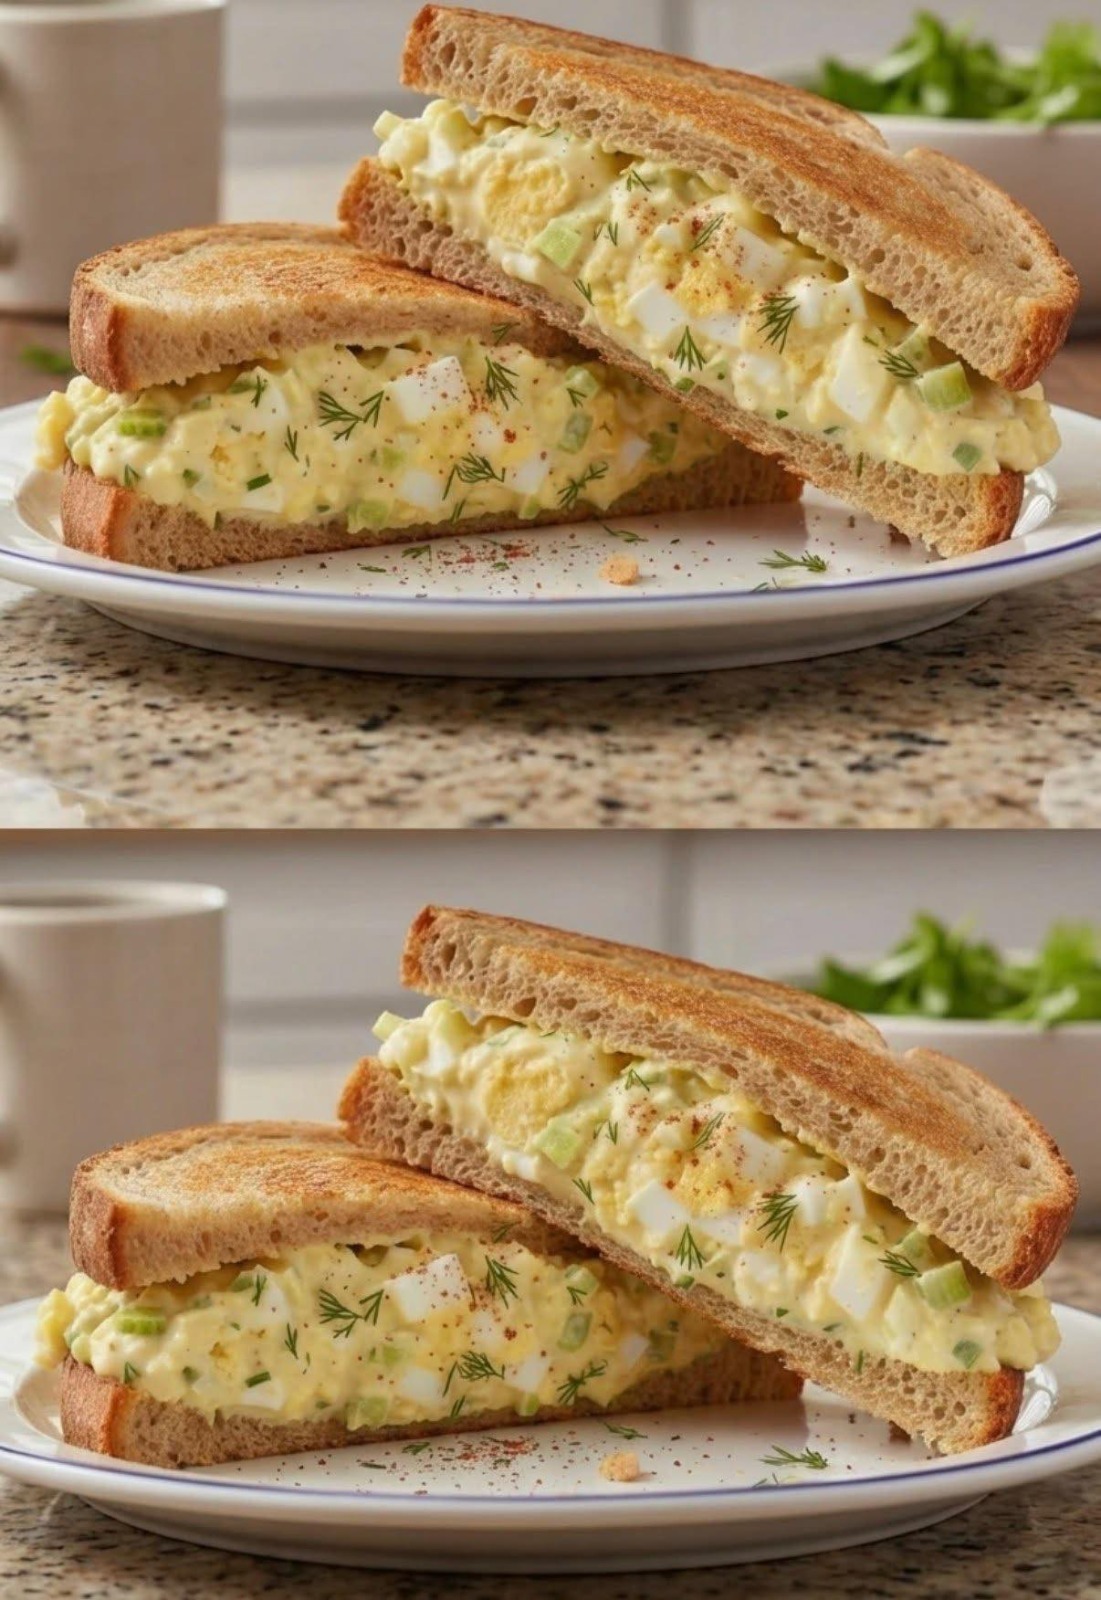
Creamy Egg Salad is one of the most beloved and versatile dishes in home cooking. It is simple enough for a quick lunch, yet satisfying enough to serve at picnics, family gatherings, brunches, afternoon teas, potlucks, and meal-prep sessions. The secret to an outstanding egg salad is not merely mixing eggs and mayonnaise together. A truly memorable egg salad requires careful attention to egg preparation, texture, seasoning balance, ingredient quality, mixing technique, chilling time, and serving method.
This extensive recipe has been written to provide a highly detailed, restaurant-quality approach to making exceptionally creamy egg salad. Every step, ingredient, and technique is explained thoroughly so that even a beginner can achieve excellent results.
Introduction to Creamy Egg Salad
Egg salad is traditionally made from hard-boiled eggs combined with a creamy dressing, often based on mayonnaise. Over the years, countless variations have appeared around the world, including versions with herbs, pickles, mustard, onions, celery, bacon, avocado, and many other ingredients.
The ideal creamy egg salad should have:
- Tender, properly cooked eggs
- Rich and smooth dressing
- Balanced acidity
- Gentle crunch from vegetables
- Mild sweetness
- Pleasant seasoning
- Soft, spreadable texture
- Fresh aroma
- Consistent flavor throughout
A poorly made egg salad may taste bland, watery, overly acidic, excessively salty, or dry. This recipe focuses on avoiding those common problems while maximizing flavor and creaminess.
Yield
Serves 8 to 10 people
Preparation Time
- Ingredient preparation: 20 minutes
- Egg cooking: 12 minutes
- Cooling time: 20 minutes
- Mixing time: 15 minutes
- Chilling time: 2 hours
- Total time: Approximately 3 hours
Ingredients
Main Ingredients
- 16 large eggs
- Water for boiling
- Ice for cooling
Creamy Dressing Base
- 1¼ cups high-quality mayonnaise
- 3 tablespoons sour cream
- 2 tablespoons plain Greek yogurt
- 1 tablespoon Dijon mustard
- 1 tablespoon yellow mustard
- 1 teaspoon white vinegar
- 2 teaspoons fresh lemon juice
- 1 teaspoon sugar
- ½ teaspoon honey
- ¾ teaspoon fine sea salt
- ½ teaspoon freshly ground black pepper
- ½ teaspoon garlic powder
- ½ teaspoon onion powder
- ¼ teaspoon paprika
Vegetables and Herbs
- ½ cup finely diced celery
- ¼ cup finely diced red onion
- 3 tablespoons finely chopped chives
- 2 tablespoons finely chopped parsley
- 1 tablespoon finely chopped dill
- 2 tablespoons finely chopped pickles
Flavor Enhancers
- 1 teaspoon pickle juice
- 1 teaspoon Worcestershire sauce
- 1 teaspoon capers, finely chopped
- 1 tablespoon softened cream cheese
Optional Garnishes
- Additional paprika
- Chopped chives
- Chopped parsley
- Sliced green onions
- Cracked black pepper
- Thin cucumber slices
- Tomato slices
Understanding the Role of Each Ingredient
Eggs
Eggs are the foundation of the recipe. Their quality significantly affects flavor and texture. Large eggs provide a good balance of whites and yolks. The yolks contribute richness while the whites provide structure.
Mayonnaise
Mayonnaise creates the signature creamy texture. Full-fat mayonnaise generally produces the richest result. Reduced-fat versions can be used, but the final texture may be less luxurious.
Sour Cream
Sour cream introduces a subtle tanginess while adding smoothness. It helps prevent the salad from becoming overly heavy.
Greek Yogurt
Greek yogurt contributes freshness and a slight tang while increasing creaminess without excessive richness.
Mustards
Using both Dijon and yellow mustard creates complexity. Dijon provides depth while yellow mustard contributes traditional egg salad flavor.
Lemon Juice and Vinegar
Acidity brightens the entire dish and balances the richness of the eggs and mayonnaise.
Celery
Celery provides freshness and a gentle crunch that contrasts beautifully with the creamy base.
Onion
Red onion offers mild sharpness and complexity.
Herbs
Fresh herbs provide brightness, aroma, and visual appeal.
Step 1: Selecting the Eggs
The quality of your eggs affects the final product significantly.
Look for:
- Clean shells
- No visible cracks
- Fresh but not extremely fresh eggs
- Uniform size
Eggs that are several days old often peel more easily than eggs that were laid very recently.
Remove the eggs from the refrigerator approximately 10 minutes before cooking. This helps reduce temperature shock and minimizes shell cracking during cooking.
Step 2: Preparing the Cooking Water
Place the eggs in a large saucepan.
Arrange them in a single layer.
Avoid stacking eggs because uneven cooking may occur.
Fill the saucepan with enough cold water to cover the eggs by approximately one inch.
Some cooks add a teaspoon of salt or a splash of vinegar to the water. While not essential, these additions may help reduce leakage if an egg cracks during cooking.
Step 3: Cooking the Eggs Perfectly
Place the saucepan over medium-high heat.
Allow the water to come gradually to a boil.
As soon as a rolling boil is reached:
- Turn off the heat.
- Cover the pan tightly.
- Leave the eggs in the hot water.
Timing guide:
- Soft-set yolks: 8–9 minutes
- Traditional hard-boiled eggs: 10–11 minutes
- Firm yolks for egg salad: 11–12 minutes
For this recipe, 11 minutes is ideal.
Proper timing prevents overcooking.
Overcooked eggs often develop:
- Dry yolks
- Sulfur smell
- Green-gray rings around yolks
- Rubbery texture
Step 4: Ice Bath Cooling Method
While the eggs cook, prepare a large bowl filled with ice and cold water.
Once cooking is complete, transfer the eggs immediately into the ice bath.
Allow them to cool for at least 15–20 minutes.
The ice bath:
- Stops cooking
- Preserves texture
- Improves color
- Makes peeling easier
Do not skip this step.
It greatly improves the quality of the final egg salad.
Step 5: Peeling the Eggs
Remove the cooled eggs from the ice bath.
Tap each egg gently against a hard surface.
Create small cracks across the shell.
Roll the egg gently beneath your palm.
Begin peeling from the wider end.
Many eggs contain a small air pocket at this end, making shell removal easier.
Rinse lightly under cool running water if necessary.
Pat dry after peeling.
Step 6: Separating Yolks and Whites
Cut each egg in half lengthwise.
Carefully remove the yolks.
Place yolks in one bowl.
Place whites in another bowl.
This technique is extremely important because it allows the yolks to become part of the dressing, creating exceptional creaminess.
Step 7: Creating a Smooth Yolk Base
Using a fork, mash the yolks thoroughly.
Continue mashing until they resemble a fine powder.
Take your time.
The finer the yolks become, the smoother the dressing will be.
Professional kitchens often press yolks through a fine mesh sieve for an ultra-smooth result.
If desired, use this method for maximum creaminess.
Step 8: Preparing the Ultimate Creamy Dressing
In a large bowl combine:
- Mayonnaise
- Sour cream
- Greek yogurt
- Dijon mustard
- Yellow mustard
- Lemon juice
- Vinegar
- Sugar
- Honey
- Garlic powder
- Onion powder
- Salt
- Pepper
- Paprika
- Worcestershire sauce
Whisk vigorously.
Continue whisking until completely smooth.
Add the mashed yolks.
Whisk again.
The dressing should become thick, silky, rich, and creamy.
Add softened cream cheese.
Continue whisking until fully incorporated.
At this stage, the dressing should have no lumps whatsoever.
Step 9: Chopping the Egg Whites
Place the egg whites on a cutting board.
Use a sharp knife to chop them.
Texture options:
Fine Chop:
Produces a smooth sandwich-style salad.
Medium Chop:
Produces a classic deli-style texture.
Large Chop:
Produces a chunkier salad.
For this recipe, a medium chop is recommended.
The pieces should be small enough to mix evenly while still remaining visible.
Step 10: Preparing the Vegetables
Wash and dry all vegetables thoroughly.
Dice celery very finely.
Dice onion extremely finely.
Finely chop:
- Chives
- Parsley
- Dill
- Pickles
- Capers
Uniform size improves texture and appearance.
Large chunks can disrupt the creamy consistency.
Step 11: Combining Components
Place chopped egg whites into a large mixing bowl.
Add:
- Celery
- Onion
- Herbs
- Pickles
- Capers
Mix gently.
Pour the creamy dressing over the ingredients.
Using a rubber spatula, fold the mixture carefully.
Avoid vigorous stirring.
Aggressive mixing can break the eggs excessively and create a paste-like consistency.
Continue folding until every ingredient is coated.
Step 12: Flavor Evaluation
Taste a small spoonful.
Evaluate:
- Salt level
- Acidity
- Sweetness
- Creaminess
- Herb balance
Adjust as needed.
Possible adjustments:
If too rich:
Add more lemon juice.
If too tangy:
Add a small amount of mayonnaise.
If bland:
Add additional salt.
If too thick:
Add a spoonful of yogurt.
If too loose:
Add another chopped egg.
Step 13: Chilling Period
Transfer the salad to a covered container.
Refrigerate for at least two hours.
Many people notice a dramatic improvement after chilling.
During this time:
- Flavors blend together
- Herbs infuse the dressing
- Texture becomes more cohesive
- Overall taste becomes more balanced
For best results, chill overnight.
Step 14: Final Mixing Before Serving
Remove the egg salad from the refrigerator.
Stir gently.
Check consistency.
The dressing may have thickened slightly.
If needed, add:
- 1 tablespoon mayonnaise
- Or 1 tablespoon sour cream
Mix carefully.
Taste once more.
Adjust seasoning if necessary.
Serving Ideas
Creamy egg salad can be served in numerous ways.
Classic Sandwich
Spread generously between slices of soft bread.
Popular bread choices include:
- White bread
- Whole wheat bread
- Rye bread
- Multigrain bread
- Sourdough bread
Croissant Sandwich
Fill buttery croissants with egg salad.
Add lettuce and tomato for additional freshness.
Lettuce Wraps
Use large lettuce leaves instead of bread.
This creates a lighter meal.
Crackers
Serve as a dip or spread.
Tea Sandwiches
Spread between thin slices of bread.
Remove crusts and cut into small triangles.
Stuffed Tomatoes
Hollow out tomatoes and fill with egg salad.
Baked Potatoes
Use egg salad as a topping for baked potatoes.
Avocado Boats
Fill avocado halves with chilled egg salad.
Cucumber Cups
Scoop out thick cucumber slices and fill with salad.
Pita Pockets
Stuff into pita bread with lettuce and vegetables.
Professional Tips for Maximum Creaminess
Use room-temperature mayonnaise before mixing.
Mash yolks separately.
Add a small amount of cream cheese.
Allow adequate chilling time.
Use fresh lemon juice.
Avoid overcooking eggs.
Dice vegetables finely.
Mix gently.
Store properly.
Taste repeatedly throughout preparation.
Storage Instructions
Store in an airtight container.
Keep refrigerated at all times.
Best consumed within 3 days.
Never leave egg salad unrefrigerated for extended periods.
If serving outdoors:
- Keep chilled
- Use ice trays beneath serving bowls
- Return leftovers to refrigeration promptly
Approximate Nutrition Per Serving
Based on 10 servings:
- Calories: 320
- Protein: 12 grams
- Fat: 27 grams
- Carbohydrates: 5 grams
- Fiber: 1 gram
- Sugar: 2 grams
- Sodium: 450 milligrams
- Cholesterol: 290 milligrams
Conclusion
A truly exceptional creamy egg salad depends on careful preparation rather than complicated ingredients. Properly cooked eggs, a silky yolk-based dressing, balanced acidity, fresh herbs, and adequate chilling time transform a simple mixture into a rich and satisfying dish. Whether served in sandwiches, wraps, croissants, lettuce cups, or as part of a buffet spread, this ultra-creamy egg salad delivers a smooth texture, balanced flavor, and classic comfort-food appeal that has remained popular for generations. By following each detailed step carefully, you can consistently produce a luxurious, flavorful egg salad suitable for everyday meals as well as special occasions.