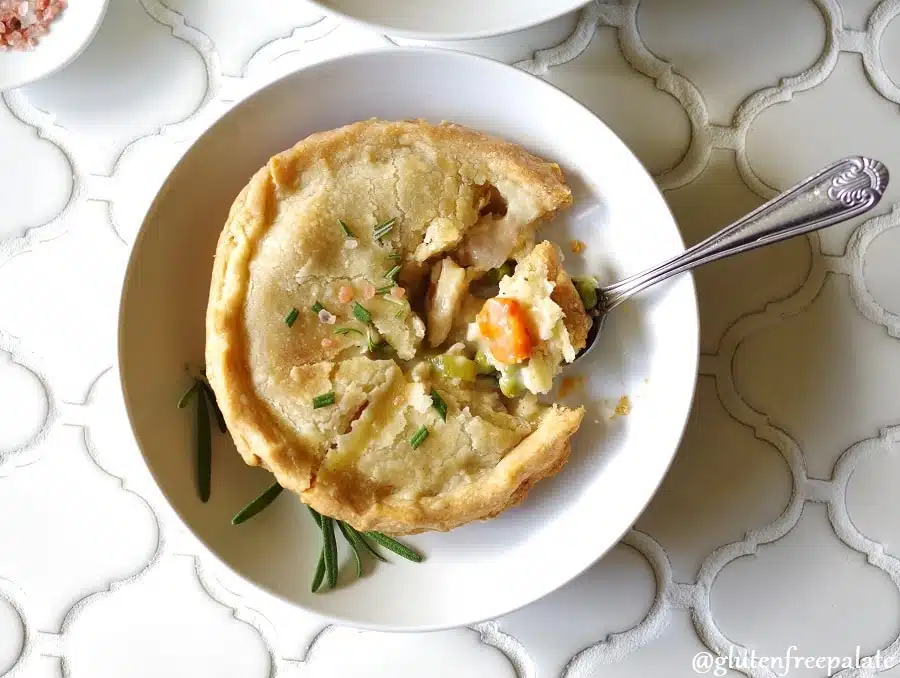
This recipe delivers a delectable Gluten-Free Chicken Pot Pie, crafted from scratch with tender chicken, a medley of carrots, onions, and peas, and a luxuriously creamy gravy. You’ll absolutely adore this gluten-free pot pie. This recipe utilizes my simple Gluten-Free Pie Crust, and you can easily customize it with your favorite vegetables or chopped Roasted Red Potatoes. If you prefer biscuits, my Gluten-Free Chicken and Biscuits recipe is a must-try. Explore my Gluten-Free Recipes section for more easy and delicious gluten-free dishes.
Why This Pot Pie is a Must-Try
- Homemade Goodness: Made from scratch with fresh ingredients, guaranteeing exceptional flavor.
- Perfectly Gluten-Free: Utilizes my easy Gluten-Free Pie Crust recipe for a flaky and delicious foundation.
- Customizable Filling: Add your preferred vegetables or Roasted Red Potatoes for a personalized touch.
- Freezable for Convenience: Bake now and freeze for later, or freeze the unbaked pot pie for ultimate ease.
Frequently Asked Pot Pie Questions
- Freezing: Yes, both baked and unbaked pot pies can be frozen. Be aware that baked pies might have a slightly softer crust after freezing.
- Gluten-Free Chicken: Chicken is naturally gluten-free. However, it’s crucial to check labels for any added fillers or flavorings, as some might not be gluten-free.
- Large Pot Pie Option: You can easily adapt this recipe to make one large pot pie instead of individual servings (instructions provided below).
Step-by-Step Guide to Pot Pie Perfection
- Crafting the Crust: Combine cold butter with gluten-free flour, then incorporate milk to form the dough. Chill the dough before rolling.
- Preparing the Filling: Sauté your chosen vegetables and chicken in a saucepan until tender.
- Creating the Gravy: In the same saucepan, prepare a creamy gravy using onions, butter, gluten-free flour, chicken broth, and milk.
- Assembling the Pot Pies: Place the filling in the prepared pie crusts (either mini or large), top with the creamy gravy, and cover with the remaining crust. Make sure to cut slits in the top crust to allow steam to escape during baking.
- Baking to Golden Perfection: Bake the pot pies until the crust is beautifully golden brown and flaky.
Essential Tips for Pot Pie Success
- The Magic of Cold Butter: For a truly flaky crust, use very cold butter. Cut the butter into small, pea-sized pieces for easy blending.
- Rolling with Ease: Roll the dough between two sheets of wax paper for effortless handling and a smooth, even crust.
- Sautéing the Vegetables: Sauté the vegetables until they are tender-crisp, retaining a slight bite.
- Achieving Gravy Perfection: The gravy should be thick and creamy, not runny. Adjust the cooking time as needed to achieve the perfect consistency.
- The Glossy Touch: For a beautiful, glossy crust, brush the top with an egg wash before baking.
Creating One Large Gluten-Free Chicken Pot Pie
To make a single large pot pie, divide the dough in half and roll each half into a 10-inch circle. Place one circle in a 10-inch pie pan, add the filling and gravy, and top with the other crust circle. Bake for 30-35 minutes, or until the crust is a rich golden brown and flaky.
A Note on Gluten-Free Chicken Broth
It’s important to be aware that not all chicken broths are gluten-free. Some brands may contain gluten-containing additives for flavor or color enhancement. Always double-check the label to ensure that the chicken broth you choose is certified gluten-free.
Savor Your Homemade Gluten-Free Chicken Pot Pie
This recipe is a guaranteed hit with family and friends. The combination of the warm, savory filling and the flaky, buttery crust creates a truly comforting and satisfying meal. I sincerely hope you enjoy it as much as my family does! Please share your thoughts and experiences in the comments below – I’d love to hear how your pot pies turn out.
Gluten-Free Chicken Pot Pie
6
servings20
minutes50
minutes250
kcalThis recipe delivers a delectable Gluten-Free Chicken Pot Pie, crafted from scratch with tender chicken, a medley of carrots, onions, and peas, and a luxuriously creamy gravy
Ingredients
For the Crust (Makes Two 10-inch Crusts)
3 cups 3 gluten-free all-purpose flour blend
½ teaspoon salt (omit if using salted butter)
2 teaspoons 2 xanthan gum (omit if your flour blend contains it)
1 cup 1 cold butter, cut into small pieces
8 8 -10 tablespoons cold milk
For the Filling
1 lb 1 boneless, skinless chicken breast, cubed
1 cup 1 sliced carrots
1 cup 1 frozen green peas
⅓ cup butter
⅓ cup chopped yellow or white onion
⅓ cup gluten-free flour blend (or 3 tbsp cornstarch)
½ teaspoon salt
¼ teaspoon black pepper
1 1 ¾ cups chicken broth
⅔ cup milk
Directions
- Prepare the Crust: Preheat oven to 425°F (220°C). In a bowl, whisk together gluten-free flour, salt, and xanthan gum. Cut in the cold butter using a pastry cutter until the mixture resembles small peas. Gradually add cold milk, mixing until the dough holds together. Divide in half and roll out each portion on a floured surface to 10 inches. Place one crust in a pie pan and trim the edges.
- Cook the Filling: In a saucepan, add chicken, carrots, and peas. Cover with water and boil for 15 minutes. Drain and set aside. If using pre-cooked chicken, boil just the vegetables before combining.
- Make the Gravy: In the same pan, melt butter over medium heat and sauté onions until translucent. Stir in flour, salt, and pepper. Gradually add chicken broth and milk, whisking until thickened. Remove from heat.
- Assemble the Pie: Spread the chicken and vegetable mixture into the prepared crust, filling halfway. Pour the gravy over it, filling ¾ of the way. Cover with the second crust, seal edges, and cut small slits for steam to escape.
- Bake: Bake for 30-35 minutes until the crust is golden brown and the filling is bubbling. Let cool for 15 minutes before serving.
- Storage: Store leftovers in the refrigerator for up to 3 days. Reheat in the oven for best results.