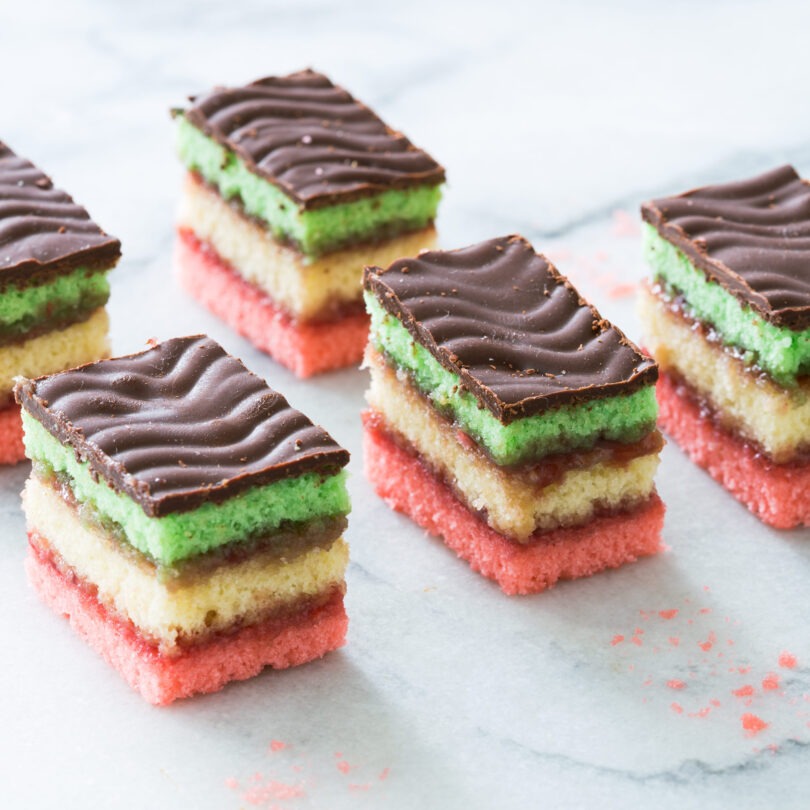
Italian Rainbow Cookies, also known as Venetian cookies, Italian flag cookies, or 7-layer cookies, are a visually stunning and flavorful addition to any holiday dessert table. These colorful confections are a delightful combination of moist almond-flavored cake, fruity jam, and a smooth chocolate coating, offering a symphony of textures and tastes in every bite.
Why You’ll Love These Cookies
- A Medley of Flavors: The nutty almond cake, tart fruit jam, and rich chocolate create a harmonious flavor profile that tantalizes the taste buds.
- Eye-Catching Appearance: The vibrant red, white, and green layers, reminiscent of the Italian flag, make these cookies a showstopper at any gathering.
- Perfect for Sharing: This recipe yields a generous amount of cookies, ideal for sharing with family and friends.
Tips for Success
- Thorough Mixing is Key: Use an electric mixer for the initial steps, but gently fold in ingredients by hand for a uniform texture. Scrape the bowl regularly.
- Patience is Rewarded: This recipe is best spread over two days. Prepare and assemble the layers on day one, then add the chocolate coating on day two.
- Use a Sharp Knife: A sharp knife, dipped in hot water before each slice, will ensure clean, even cuts.
Ingredients
Here’s what you’ll need:
Key Components:
- Cooking spray
- All-purpose flour (or gluten-free blend)
- 8 oz almond paste
- Granulated sugar (divided)
- Unsalted butter (room temperature)
- 4 large eggs (separated)
- Almond extract
- Gel food coloring (red and green)
- Apricot jam (or raspberry)
- Semi-sweet or bittersweet chocolate chips
Helpful Tools:
- Three 9×13 inch baking pans
- Offset spatula
- Heavy cans (for compression)
- Sharp knife
Step-by-Step Instructions
Preparing the Cake Layers:
- Prep: Preheat oven to 325℉. Spray three 9×13-inch pans with nonstick spray, line with parchment paper, and spray again.
- Cream: Combine almond paste, sugar (reserving 2 tablespoons), and 1 stick of butter in a mixing bowl. Beat until smooth.
- Combine: Add remaining butter, egg yolks, milk, and almond extract. Mix in flour at low speed.
- Whip: In a separate bowl, beat egg whites with reserved sugar until stiff peaks form. Gently fold into the batter.
- Divide and Color: Divide batter into three bowls. Leave one plain, tint one red, and one green.
- Bake: Spread each batter into a prepared pan. Bake for 10-12 minutes until set. Cool completely.
Assembling the Layers:
- Layer: Spread apricot jam over the red layer. Top with the plain layer, spread with more jam, and finish with the green layer.
- Compress: Wrap layers in plastic wrap, top with a sheet pan, and weigh down with cans. Refrigerate for at least 4 hours (or overnight).
Adding the Chocolate Coating:
- Melt: Melt half the chocolate and spread over the top layer. Chill for 30 minutes.
- Flip and Coat: Flip the layers, remove parchment, and spread with remaining chocolate. Chill again.
- Cut: Trim edges and slice into squares or rectangles.
Storage Tips
- Short-Term: Store in an airtight container at room temperature for 2 days, or refrigerate for up to 5 days.
- Long-Term: Freeze for up to 2 months. Thaw overnight before serving.
Frequently Asked Questions
Where can I find almond paste?
Almond paste is typically found in the baking aisle near nuts or in the international foods section.
Why aren’t my egg whites stiffening?
Ensure your bowl is clean and free of any yolks or grease. Room-temperature eggs are also recommended.
Nutrition Facts
40 servings per container
- Amount Per ServingCalories188
- % Daily Value *
- Total Fat
12g
16%
- Saturated Fat 6g 30%
- Cholesterol 37mg 13%
- Sodium 40mg 2%
- Total Carbohydrate
19g
7%
- Dietary Fiber 1g 4%
- Total Sugars 11g
- Protein 2g 4%
- Calcium 23mg 2%
- Iron 1mg 6%
* The % Daily Value tells you how much a nutrient in a serving of food contributes to a daily diet. 2,000 calories a day is used for general nutrition advice.
