There is something especially comforting about fresh bread rolls coming out of the oven. The outside turns beautifully golden while the inside stays soft, airy, and tender. These soft bread rolls are made with basic ingredients and a straightforward dough method, so there is no need for complicated bread-making techniques.
The key is giving the yeast enough time to work and keeping the dough soft rather than loading it with extra flour. Once the dough is prepared properly, the rest of the process is simply letting it rise, shaping it, giving it another short rise, and baking until golden.
This recipe uses warm water, sugar, dry yeast, sunflower oil, all-purpose flour, and salt. Poppy seeds or sesame seeds can be added if desired. The ingredient list is simple, but the result is soft rolls that can be served in many different ways.
What Makes These Rolls Soft?
- The texture of homemade bread depends heavily on the dough. For these rolls, the dough should be soft and slightly sticky when it is first mixed. It should not feel dry or stiff.
- Flour gives the dough its structure, while the water provides the moisture needed for gluten development. The sunflower oil helps keep the finished rolls tender and prevents them from becoming dry too quickly.
- Yeast is responsible for the airy texture. When it is mixed with warm water and sugar, it becomes active and begins producing gas. That gas gets trapped within the developing dough, allowing it to expand during proofing.
- The sugar also adds a mild sweetness while helping the yeast become active. Salt balances the flavor and keeps the finished rolls from tasting flat.
Start With the Yeast
- The first step is activating the yeast. Place the warm water in a mixing bowl, then add the sugar and dry yeast.
- The water should be warm rather than hot. Very hot water can damage the yeast, while water that is too cool may take much longer to activate it.
- Let the mixture stand for about five minutes. During this time, the yeast should begin forming foam on the surface. That foamy appearance is a useful indication that the yeast is active and ready to use.
- This small step is worth doing carefully because yeast is what gives these rolls their light texture.
Making the Dough
- Once the yeast mixture is ready, add the sunflower oil and salt. Begin adding the all-purpose flour gradually instead of putting it all in at once.
- As the flour is incorporated, the mixture will become thicker and eventually turn into a dough. At this stage, pay attention to the texture rather than trying to make the dough completely dry.
- A soft dough is what helps produce soft rolls.
- If too much flour is added during mixing or kneading, the finished bread can become heavy and dense. The dough should remain manageable while retaining some softness.
Kneading the Dough
- Transfer the dough to a lightly floured work surface if necessary and knead it until it becomes smoother and more elastic.
- Kneading helps develop the gluten in the flour. This gives the dough enough strength to hold the air produced by the yeast.
- There is no need to aggressively work the dough. The goal is simply to develop a smooth, elastic texture. If the dough feels slightly tacky, that is not necessarily a problem. Adding large amounts of extra flour just to make it easier to handle can result in firmer rolls.
- Once the dough has reached the right consistency, place it in a suitable bowl and prepare it for its first rise.
The First Rise
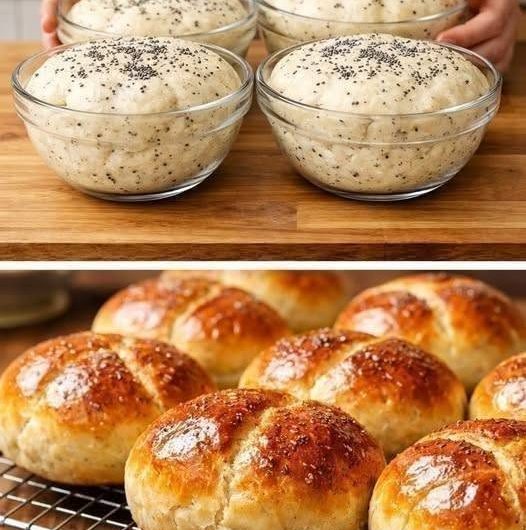
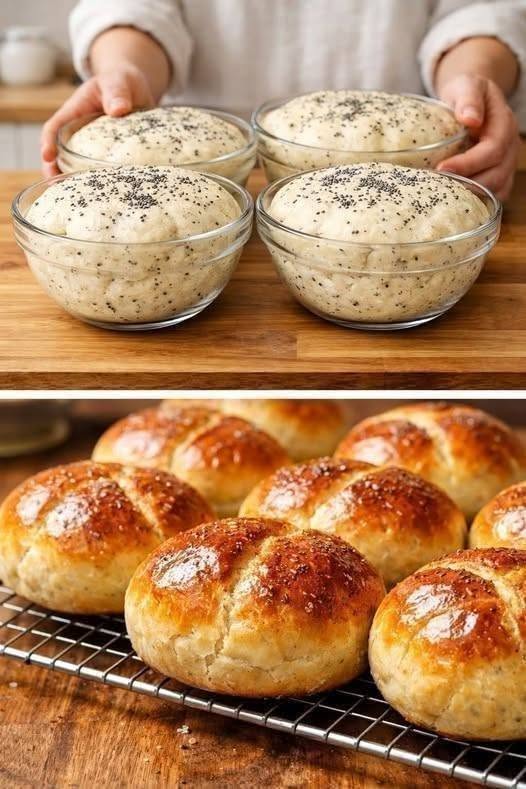
- Cover the dough and leave it in a warm place for approximately one hour, or until it has doubled in size.
- The exact time can vary depending on the temperature of the room. A warm environment generally allows the yeast to work faster, while a cooler kitchen may require more time.
- Rather than relying only on the clock, look at the dough. It should visibly expand and become noticeably larger.
- This first rise is important because it gives the yeast time to create the air pockets that contribute to the soft texture of the finished rolls.
Shaping the Rolls
- Once the dough has doubled in size, gently punch it down to release some of the accumulated air.
- Divide the dough into portions of roughly equal size. Keeping the portions similar helps the rolls bake evenly.
- Take each portion and shape it into a smooth ball. Tuck the edges underneath as you shape it so the surface becomes neat and rounded.
- Place the shaped rolls on a suitable baking tray, leaving a little room between them. The rolls will expand again during the second rise and then puff further in the oven.
- This is also the stage where poppy seeds or sesame seeds can be used if desired. They can be added as a topping before baking.
The Second Rise
- After shaping, cover the rolls again and allow them to rise for another 20 to 30 minutes.
- This second rise is shorter than the first one, but it makes a noticeable difference to the final texture.
- The rolls should look puffier and lighter before they go into the oven. Avoid rushing this step because under-proofed dough can produce rolls that are heavier than expected.
- At the same time, there is no need to leave them rising indefinitely. Once they have become visibly puffy, they are ready for baking.
Getting the Oven Ready
- While the rolls are completing their second rise, preheat the oven to 230°C (446°F).
- A properly preheated oven gives the rolls the strong initial heat they need when they go inside. This helps the dough rise further during the early stage of baking.
- Do not place the rolls into a cold oven and expect the same result. The oven should already be at the required temperature before baking begins.
Baking the Rolls
- Place the risen rolls in the preheated oven and bake for approximately 30–40 minutes, or until they are golden brown.
- Keep an eye on the surface as they bake. The finished rolls should have a golden exterior and should look fully baked rather than pale or doughy.
- Baking time can vary slightly depending on the oven and the size of the rolls, so use the color and overall appearance as useful guides.
- Overbaking can take away some of the softness, so there is no advantage in leaving the rolls in the oven longer than necessary once they have reached a good golden color.
Cooling Before Serving
- When the rolls are finished, remove them from the oven and allow them to cool slightly.
- They can be enjoyed while still warm, which is especially good with butter. They also work well once cooled and can be used as sandwich rolls or served alongside a meal.
- Freshly baked bread can be quite delicate straight from the oven, so giving the rolls a short resting period makes them easier to handle.
Keeping the Dough Soft
- One of the most important things to remember with this recipe is not to add excessive flour.
- It can be tempting to keep adding flour whenever the dough feels sticky, but that can change the final texture. A softer dough generally gives softer bread.
- The water should also be warm, not hot. This helps the yeast activate properly without damaging it.
- Another important point is allowing enough time for both rises. The first rise develops the dough, while the second rise gives the shaped rolls their lighter structure before baking.
Simple Topping Options
- The rolls are delicious without any topping, but poppy seeds and sesame seeds can be used for extra texture.
- Sesame seeds give the surface a light nutty flavor, while poppy seeds add a delicate crunch. They are both simple additions that do not require changing the dough itself.
- If using either topping, apply it before baking so it can remain on the surface as the rolls cook.
Ways to Serve Soft Bread Rolls
- These rolls are flexible enough to fit almost any meal.
- Serve them warm with butter, honey, or jam for breakfast. They can also be placed beside soup, curry, stew, or a salad as a simple bread side.
- For lunch, split the rolls and use them for sandwiches. Their soft interior makes them particularly useful when you want a homemade alternative to packaged bread.
- They can also be served with dinner instead of sliced bread. Because their flavor is mild, they work with both savory and slightly sweet foods.
Common Problems With Homemade Rolls
- If the rolls do not rise properly, the yeast may not have been active. Water that is too hot can affect yeast, so always use warm water.
- Another common issue is adding too much flour. A very firm dough may produce bread that is dense rather than light.
- Insufficient rising time can have a similar effect. The dough needs enough time to expand before shaping, and the shaped rolls need another short rise before baking.
- Overbaking is another thing to watch. Bread that stays in the oven too long can lose moisture and become dry.
A Few Simple Baking Tips
- Use fresh yeast whenever possible and check that it becomes foamy after being mixed with warm water and sugar. Keep the dough soft during preparation and avoid adding unnecessary flour.
- Allow the dough to complete its first rise until it has doubled in size. After shaping, give the rolls another 20–30 minutes to become puffy.
- The oven should be fully preheated before baking. For a slightly glossy surface, the source recipe also suggests brushing the rolls with a little water or oil before baking.
Storing the Finished Rolls
- These rolls are best when freshly baked, but leftovers can be kept for later.
- Once cooled, store them in an airtight container. When you want to serve them again, gently warming them can bring back some of their softness.
- For longer storage, the baked rolls can be frozen and reheated when needed. This makes it convenient to prepare a batch ahead of time and have homemade bread available for another meal.
Keto Soft Bread Rolls
Soft, fluffy homemade bread rolls with a lightly golden crust. They are made with simple ingredients and are ideal for breakfast, sandwiches, or serving alongside soups, curries, stews, and other meals.
4
servings30
minutes40
minutes300
kcal1
hour10
minutesIngredients
350 ml warm water
1 tablespoon sugar
8 grams dry yeast
25 ml sunflower oil
500 grams all-purpose flour
1 teaspoon salt
Directions
- Activate the yeast: Add warm water, sugar, and dry yeast to a bowl. Stir gently and leave for 5 minutes, until foamy.
- Prepare the dough: Add sunflower oil and salt. Gradually mix in the flour until a soft dough forms.
- Knead: Knead the dough until it becomes smooth and elastic. Avoid adding too much extra flour.
- First rise: Cover the dough and leave it in a warm place for about 1 hour, or until doubled in size.
- Shape: Gently punch down the dough and divide it into equal portions. Shape each portion into a smooth ball.
- Second rise: Arrange the rolls on a baking tray, cover, and let them rise for 20–30 minutes.
- Bake: Preheat the oven to 230°C (446°F). Bake for 30–40 minutes, until the rolls are golden brown.
- Finish: Remove from the oven and allow the rolls to cool slightly before serving.
Notes
- Use warm, not hot, water for activating the yeast.
- Do not add excessive flour, as this can make the rolls dense.
- Allow both rises to finish properly for a lighter texture.
- Poppy seeds or sesame seeds can be used as optional toppings.
- Serve warm with butter, honey, or jam, or use the rolls for sandwiches.
Nutrition Facts
- Calories: 200kcal
- Fat: 14g
- Sodium: 250mg
- Carbohydrates: 7g
- Fiber: 2g
- Sugar: 1g
- Protein: 8g