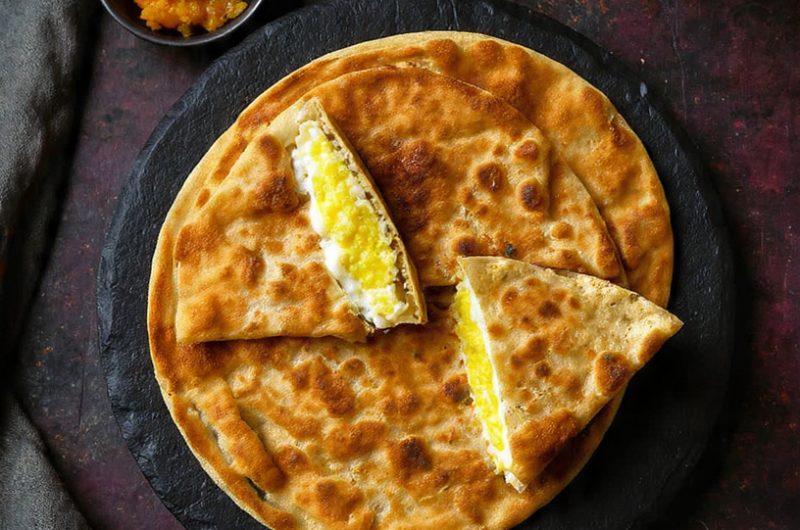
Anda Paratha is a delicious, filling, and popular South Asian breakfast made by combining flaky paratha with seasoned eggs. It is loved for its crispy exterior, soft interior, and rich flavor. This detailed recipe will guide you through every step to create a restaurant-style Anda Paratha at home.
Preparation Time
Preparation Time: 30 minutes
Resting Time: 20 minutes
Cooking Time: 25 minutes
Total Time: Approximately 1 hour 15 minutes
Servings: 4 large Anda Parathas
Ingredients for the Paratha Dough
3 cups all-purpose flour
1 teaspoon salt
1 tablespoon oil or melted ghee
1 cup warm water, or as needed
Extra flour for dusting
2 tablespoons ghee or oil for layering
Ingredients for the Egg Filling
4 large eggs
1 small onion, finely chopped
2 green chilies, finely chopped
2 tablespoons fresh coriander leaves, finely chopped
½ teaspoon red chili powder
¼ teaspoon turmeric powder
½ teaspoon crushed black pepper
½ teaspoon salt, or according to taste
1 tablespoon milk (optional, for softer eggs)
Additional Ingredients for Cooking
4 to 6 tablespoons ghee, butter, or oil
Extra coriander leaves for garnish
Step 1: Preparing the Dough
In a large mixing bowl, add the flour and salt. Mix well so the salt is evenly distributed. Add one tablespoon of oil or melted ghee and rub it into the flour using your fingertips.
Gradually pour warm water into the flour while mixing. Add the water little by little and begin forming a soft dough. The dough should be smooth, pliable, and slightly soft but not sticky.
Transfer the dough to a clean surface and knead it for about 8 to 10 minutes. Proper kneading develops gluten, resulting in soft and flaky parathas.
Once kneaded, shape the dough into a ball and lightly coat it with a few drops of oil. Cover the bowl with a damp cloth and allow the dough to rest for at least 20 minutes. Resting helps relax the gluten and makes rolling easier.
Step 2: Preparing the Egg Mixture
Crack the eggs into a large bowl.
Add the finely chopped onion, green chilies, fresh coriander, red chili powder, turmeric powder, black pepper, and salt.
If desired, add one tablespoon of milk to make the eggs softer and fluffier.
Whisk everything together thoroughly until the mixture becomes smooth and well combined.
Set aside while preparing the parathas.
Step 3: Dividing the Dough
After the dough has rested, knead it briefly for one minute.
Divide the dough into four equal portions.
Roll each portion into a smooth ball.
Keep the dough balls covered with a cloth to prevent them from drying out.
Step 4: Creating Flaky Layers
Take one dough ball and dust it lightly with flour.
Roll it into a thin circle approximately 8 to 10 inches in diameter.
Spread a thin layer of ghee or oil over the surface.
Sprinkle a little flour on top.
Starting from one side, fold the dough repeatedly into pleats, similar to folding a fan.
Roll the pleated strip into a spiral shape.
Tuck the end underneath and gently flatten it.
Repeat the same process with the remaining dough balls.
Allow the prepared dough spirals to rest for another 10 minutes.
This layering process creates the classic flaky texture that makes paratha special.
Step 5: Rolling the Parathas
Take one layered dough spiral and place it on a lightly floured surface.
Roll it gently into a round shape about 7 to 8 inches wide.
Avoid pressing too hard, as excessive pressure can destroy the layers.
Roll all parathas and keep them covered.
Step 6: Cooking the First Side
Heat a tawa or flat skillet over medium heat.
Place one rolled paratha onto the hot tawa.
Cook for about 30 to 40 seconds until small bubbles begin to appear.
Flip the paratha.
Cook the second side for another 30 to 40 seconds.
Apply a small amount of ghee or oil around the edges.
Cook until light golden spots appear.
Step 7: Adding the Egg Mixture
Reduce the heat slightly.
Pour approximately one-quarter of the prepared egg mixture onto the partially cooked side of the paratha.
Spread the egg mixture evenly using the back of a spoon.
Allow the egg to set slightly for about 30 seconds.
Carefully flip the paratha so the egg side touches the tawa.
Add a little ghee or oil around the edges.
Cook for 2 to 3 minutes until the egg is fully cooked and golden.
Flip again and cook the opposite side until crisp and beautifully browned.
Repeat the process for the remaining parathas.
Step 8: Achieving Perfect Texture
Cook each Anda Paratha on medium heat rather than high heat.
Medium heat allows the layers to become crisp while ensuring the egg cooks completely.
Press gently with a spatula around the edges to encourage even browning.
The finished paratha should be crispy on the outside, flaky in the middle, and packed with flavorful egg filling.
Traditional Serving Suggestions
Serve Anda Paratha hot with:
Plain yogurt
Mint chutney
Tomato ketchup
Pickle
Fresh salad
Masala tea
Lassi
A cup of hot chai alongside Anda Paratha creates a classic breakfast combination enjoyed across Pakistan and India.
Tips for the Best Anda Paratha
Use fresh eggs for the richest flavor.
Allow the dough to rest properly for softer parathas.
Do not make the dough too stiff.
Cook on medium heat to prevent burning.
Add extra coriander and green chilies for a stronger flavor.
Use ghee instead of oil for a richer and more authentic taste.
Always whisk the eggs thoroughly for a light texture.
Avoid overfilling the paratha with egg mixture.
Variations
You can customize Anda Paratha in many ways.
Add grated cheese for a cheesy version.
Mix shredded chicken into the egg mixture for extra protein.
Add finely chopped bell peppers and tomatoes for a vegetable version.
Use minced meat for a hearty stuffed Anda Paratha.
Sprinkle chaat masala before serving for additional flavor.
Storage and Reheating
Cooked Anda Parathas can be stored in an airtight container in the refrigerator for up to 2 days.
To reheat, place them on a hot skillet and cook for a few minutes on each side until warmed through. Avoid microwaving if possible, as it may soften the crispy layers.
Conclusion
Anda Paratha is one of the most satisfying breakfast dishes, combining the richness of eggs with the flaky goodness of freshly made paratha. With its crisp golden exterior, tender layers, and flavorful egg topping, it is perfect for breakfast, brunch, lunch, or even a quick dinner. By following this detailed recipe and taking time with the dough and cooking process, you can create a homemade Anda Paratha that rivals the best street-food and restaurant versions. Serve it fresh and hot for the most delicious experience.