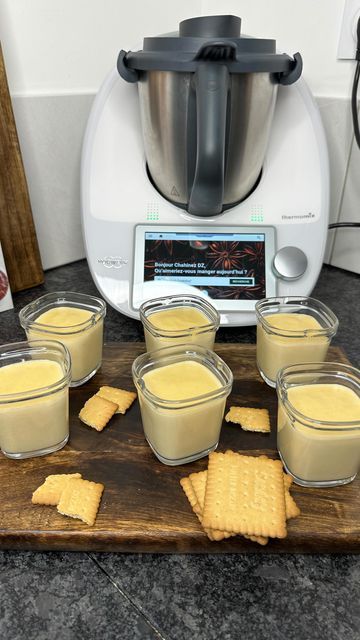
Thermomix biscuits are one of the most reliable and satisfying homemade baking options for anyone who loves fresh cookies with consistent results. Using a Thermomix makes the process faster, cleaner, and more precise by handling mixing, creaming, kneading, and blending in a single bowl. Whether you are aiming for classic butter biscuits, chocolate chip cookies, soft vanilla treats, or beautifully shaped holiday biscuits, this method delivers bakery-style quality with minimal kitchen stress.
Why Thermomix Biscuits Deliver Better Results
The secret to perfect biscuits is consistency. Traditional baking methods often require multiple bowls and tools, increasing the margin for error.
- Controlled Mixing: The Thermomix combines everything in one system, using precise speed settings to evenly incorporate ingredients.
- Uniform Texture: Consistent blade movement prevents overmixing, producing a smooth dough that bakes evenly every single time.
Different Types of Biscuits You Can Make
You can easily adapt a single Thermomix dough into several popular cookie styles:
- Crisp Biscuits: Thin and crunchy, baked slightly longer for a rich, golden finish.
- Soft Biscuits: Tender in the center—ideal for chocolate chip variations.
- Shortbread: High butter content for a delicate, crumbly texture.
- Decorative Biscuits: Firmer dough that holds its shape perfectly, making it excellent for detailed cookie cutters and icing.
Essential Ingredients for Classic Thermomix Biscuits
This recipe relies on simple, high-quality pantry staples. The balance between these ingredients determines how your biscuits spread, rise, and taste.
Unsalted Butter and Its Role in Texture
Unsalted butter is the foundation of this recipe, providing richness and a tender crumb.
- Pro-Tip: Always use softened butter (not melted, and not too cold). It should yield slightly when pressed. This ensures proper creaming and prevents the biscuits from spreading too thin in the oven.
Caster Sugar for Smooth Sweetness
Caster sugar dissolves rapidly, yielding a fine, even texture. During the creaming stage, the sugar creates tiny air pockets in the butter, contributing to a lighter biscuit structure.
Eggs for Structure and Moisture
Eggs act as a binding agent, adding essential moisture and structure.
- Pro-Tip: Use room-temperature eggs so they emulsify smoothly without curdling the butter.
Vanilla Extract for Classic Flavor
A splash of high-quality vanilla extract balances the sweetness and provides that classic, warm bakery aroma.
Plain Flour and Cornflour Combination
While plain flour builds the biscuit’s structure, a touch of cornflour softens the gluten network to ensure a delicate, melt-in-the-mouth texture.
Baking Powder and Salt Balance
- Baking Powder: Gives a subtle lift so the biscuits do not turn out overly dense.
- Salt: Enhances the natural flavors and balances the sweetness.
Optional Flavor Additions and Variations
You can easily customize this versatile base dough:
- Chocolate: Substitute 30g of flour with high-quality cocoa powder, or fold in chocolate chips.
- Citrus: Add the freshly grated zest of a lemon or orange.
- Spice: Incorporate a teaspoon of ground cinnamon or ginger for cozy warmth.
- Texture: Mix in desiccated coconut or finely chopped nuts (like pistachios, almonds, or walnuts).
Preparing Your Workspace Efficiently
Before starting, practice mise en place to keep the process seamless:
- Measure all ingredients in advance.
- Line your baking trays with parchment paper.
- Preheat your oven so it is ready the moment your dough is shaped.
Step 1: Creaming Butter and Sugar
Place the softened butter and caster sugar into the Thermomix bowl. Mix for 40 seconds on Speed 4. Scrape down the sides of the bowl with a spatula, then mix again for 30 seconds on Speed 4 until the mixture is pale and fluffy.
Step 2: Adding Eggs and Vanilla
Add the eggs and vanilla extract to the creamed mixture. Mix for 20 seconds on Speed 4. Scrape down the sides and blend briefly again if needed. Do not overmix at this stage.
Step 3: Incorporating Dry Ingredients
Add the plain flour, cornflour, baking powder, and salt. Mix for 20 seconds on Speed 5, then switch to Dough Mode for 40 seconds until a soft dough forms. Stop mixing as soon as it comes together to avoid developing too much gluten, which can make the biscuits tough.
Step 4: Chilling the Dough
Wrap the dough tightly in plastic wrap and refrigerate for 30 to 60 minutes. Chilling firms up the butter, intensifies the flavors, and prevents the biscuits from spreading excessively while baking.
Step 5: Rolling and Cutting
Lightly flour your work surface and roll the dough to a thickness of 5–6 mm. Cut into your desired shapes using biscuit cutters. Press straight down firmly without twisting to keep the edges clean and sharp.
Step 6: Baking for Perfect Texture
Preheat your oven to 170°C (fan-forced) or 180°C (conventional). Arrange the biscuits on the prepared trays, leaving a small gap between each. Bake for 12–15 minutes or until the edges are just lightly golden.
Cooling and Setting Properly
Biscuits will still be soft when they first come out of the oven. Let them rest on the baking tray for a few minutes to firm up before transferring them to a wire cooling rack.
Important: Never stack warm biscuits, as the trapped steam will make them soft and soggy.
Decorating Ideas for Homemade Biscuits
Once completely cool, you can elevate your biscuits with simple finishes:
- Glaze: Drizzle with a simple icing sugar and milk glaze.
- Chocolate: Dip half of each biscuit into melted dark, milk, or white chocolate.
- Sandwiches: Spread jam, lemon curd, or chocolate hazelnut spread between two biscuits and dust the top with icing sugar.
Storage and Freshness Tips
- Airtight Storage: Store your cooled biscuits in an airtight container to keep them crisp.
- Separate Textures: Avoid storing soft cookies and crisp biscuits together, as the moisture from the soft cookies will soften the crisp ones.
- Freezing: You can freeze the raw, wrapped dough for up to 3 months. Simply thaw it in the fridge overnight before rolling.
Troubleshooting Common Biscuit Problems
| Issue | Likely Cause | Solution |
| Dough is too sticky | Warm kitchen or soft butter | Chill the dough in the fridge for an extra 30 minutes. |
| Dough is too dry/crumbly | Excess flour or dry environment | Gently knead in a teaspoon of milk at a time until it holds together. |
| Biscuits spread too much | Butter was too hot or dough wasn’t chilled | Ensure the dough is thoroughly chilled before it goes into the oven. |
| Biscuits are hard/tough | Overmixing the flour or overbaking | Mix the dry ingredients just until combined, and keep a close eye on baking times. |
Serving and Gifting Ideas
These biscuits pair beautifully with a fresh cup of tea, coffee, or hot chocolate. Because they hold their shape so well, they also make beautiful, thoughtful gifts. Simply arrange them in decorative glass jars, metal tins, or clear gift bags tied with a ribbon.
Classic Thermomix Butter Biscuits
This foolproof recipe yields beautifully structured, deliciously buttery biscuits every time.
| Active Prep Time | Chilling Time | Baking Time | Total Time |
| 20 minutes | 30–60 minutes | 12–15 minutes | ~1 hour 30 minutes |
Ingredients
- 250 g unsalted butter, softened
- 180 g caster sugar
- 2 large eggs (room temperature)
- 2 tsp vanilla extract
- 500 g plain flour
- 40 g cornflour
- 1 tsp baking powder
- 1 pinch salt
Step-by-Step Instructions
- Preheat & Prep: Preheat your oven to 170°C (fan) or 180°C (conventional). Line two large baking trays with baking paper.
- Cream: Add the softened butter and caster sugar to the Thermomix bowl. Mix for 40 seconds / Speed 4. Scrape down the sides of the bowl, then mix for another 30 seconds / Speed 4 until light and fluffy.
- Emulsify: Add the eggs and vanilla extract. Mix for 20 seconds / Speed 4. Scrape down the sides of the bowl and blend briefly again if needed.
- Mix Dry Ingredients: Add the plain flour, cornflour, baking powder, and salt. Mix for 20 seconds / Speed 5, then immediately switch to Dough Mode (Knead) for 40 seconds until a cohesive dough forms.
- Chill: Tip the dough out, shape it into a flat disc, wrap it tightly in cling film, and refrigerate for 30–60 minutes.
- Shape: On a lightly floured surface, roll the chilled dough to a thickness of 5–6 mm. Cut out your shapes and transfer them to the prepared baking trays, leaving a small gap between each biscuit.
- Bake: Bake for 12–15 minutes until the edges are just starting to turn a pale golden color.
- Cool: Allow the biscuits to cool on the tray for 5 minutes, then carefully transfer them to a wire cooling rack to cool completely.
Nutritional Information
- Calories: 120–160 kcal
- Fat: 6–8 g
- Carbohydrates: 14–18 g
- Protein: 2 g
- Sugar: 6–9 g