There is something special about homemade potato chips that makes them hard to resist. They have a fresh potato flavor, a satisfying crunch, and just the right amount of seasoning. Making them in the air fryer is one of the easiest ways to enjoy this classic snack without using a large amount of oil. Instead of deep frying, the hot circulating air creates beautifully crisp chips while using only a tablespoon of olive oil.
These air fryer potato chips are perfect for busy days when a quick snack is needed or when preparing something homemade for family movie nights, picnics, or casual gatherings. The recipe is simple enough for beginners, yet the results taste like they came from a specialty snack shop. Every batch comes out with golden edges, crispy centers, and plenty of fresh potato flavor.
One of the best parts about this recipe is how few ingredients are required. A couple of russet potatoes, olive oil, salt, and optional black pepper are enough to create a delicious snack that everyone enjoys. Since there are no complicated ingredients or lengthy preparation steps, these chips can be made whenever the craving strikes.
Why the Air Fryer Works So Well
- The air fryer has become one of the most useful kitchen appliances because it delivers crispy food with much less oil than traditional frying. Potato chips are one of the recipes that truly benefit from this cooking method.
- Instead of sitting in hot oil, the thin potato slices cook in rapidly circulating hot air. This allows moisture to evaporate while the outside becomes crisp and lightly browned. The result is a chip that has the crunch people expect without feeling greasy.
- Another advantage is the cleaner cooking process. There is no pot filled with hot oil, no splattering grease, and cleanup takes only a few minutes. Once the chips finish cooking, the basket simply needs a quick wash before the next batch.
- Because the cooking time is relatively short, these homemade chips are also a practical choice whenever a fresh snack is preferred over opening a packaged bag from the pantry.
Choosing the Right Potatoes
- The type of potato plays an important role in how crispy the finished chips become.
- Russet potatoes, sometimes called Idaho potatoes, are ideal because they contain more starch and less moisture than many other varieties. Their texture allows them to become crisp while developing a light, delicate interior.
- Keeping the peels on adds extra texture and gives the chips a rustic appearance. After a good scrub under running water, the potatoes are ready to slice.
- If russet potatoes are unavailable, Yukon Gold potatoes can also work, although they usually produce chips with a slightly different texture because they contain a little more moisture. Waxy potatoes are generally not the best choice since they tend to stay softer after cooking.
Thin Slices Make the Difference
- One of the biggest secrets to successful potato chips is slicing every piece as thin as possible.
- A mandoline slicer makes this task much easier because every slice comes out nearly identical in thickness. Consistent slices cook at the same speed, giving an even golden color throughout the batch.
- The recommended thickness is about 1/16 inch. This may seem incredibly thin, but it is exactly what helps transform ordinary potatoes into crispy chips instead of soft potato slices.
- When slicing by hand, taking extra care to keep every slice uniform helps produce more consistent results.
Why Rinsing Matters
- After slicing the potatoes, the next important step is rinsing them thoroughly with cold water.
- Freshly cut potatoes release starch, and too much surface starch prevents the chips from becoming properly crisp. Instead of soaking the potatoes for a long period, simply rinsing them several times is enough.
- Place the slices into a large bowl filled with cold water, gently move them around, then drain. Repeat this process until the water stays clear rather than cloudy.
- This simple step removes excess starch while saving time compared to recipes that require lengthy soaking.
- Although it only takes a few extra minutes, rinsing greatly improves the final texture and helps every chip cook evenly.
Drying Before Cooking
- Once the potatoes have been rinsed, drying them thoroughly becomes just as important as washing away the starch.
- Any moisture left on the surface creates steam inside the air fryer, slowing the crisping process. Instead of crunchy chips, excess water can leave the potatoes soft or unevenly browned.
- Spread the slices over clean kitchen towels or paper towels in a single layer. Pat both sides dry until no visible moisture remains.
- Even the mixing bowl should be dried before returning the potato slices. This prevents leftover water from mixing with the olive oil and helps the seasoning coat every slice more evenly.
- Taking a little extra time during this step produces noticeably better results once the potatoes begin cooking.
Simple Seasoning That Lets the Potato Shine
- One reason homemade potato chips taste so fresh is their simple seasoning.
- A tablespoon of extra-virgin olive oil lightly coats the potato slices, helping them brown while preventing them from drying out during cooking. Since only a small amount is needed, the finished chips stay light instead of oily.
- Kosher salt brings out the natural flavor of the potatoes without overpowering them. Each slice receives an even coating as everything is tossed together in the bowl.
- Freshly ground black pepper is optional, but it adds a gentle warmth and a little extra depth of flavor. Even with just these basic seasonings, the finished chips are incredibly satisfying because the fresh potato remains the star of the recipe.
Cooking the Chips in the Air Fryer
- Once the potato slices are seasoned, preheating the air fryer is the next step. A temperature of 325°F gives the potatoes enough time to become crisp without browning too quickly. Cooking at a slightly lower temperature than many air fryer recipes allows the moisture to slowly evaporate while the edges turn beautifully golden.
- Arrange the potato slices in the basket as evenly as possible. A little overlapping is perfectly fine, but keeping the layers to no more than two helps the hot air circulate around each slice. Good airflow is one of the biggest reasons air fryers produce crisp food, so avoiding an overcrowded basket makes a noticeable difference.
- The chips cook for about 20 minutes, but they should not be left untouched. Every 5 to 7 minutes, gently toss the slices with tongs. This simple step exposes different sides of the potatoes to the circulating heat and encourages even browning.
- As the cooking continues, some slices may become crisp before others. This is completely normal because potatoes naturally vary slightly in size and thickness. Remove the finished chips as they become crisp and transfer them to a plate while the remaining slices continue cooking. Working this way ensures every chip reaches the perfect texture instead of allowing the thinner ones to become overcooked.
- If using two potatoes, expect to cook several batches. Although this takes a little extra time, every batch comes out fresh, crunchy, and evenly cooked.
What Makes These Chips So Crispy
- Several small techniques work together to create homemade potato chips with a satisfying crunch.
- The first is choosing russet potatoes. Their naturally starchy texture creates a lighter and crispier chip than waxier varieties.
- The second is slicing the potatoes extremely thin. Thick slices remain soft in the center, while paper-thin slices quickly lose moisture and become crisp.
- Removing the surface starch with repeated rinsing also improves the texture. Without that extra starch, the potatoes brown more evenly and develop a better crunch.
- Drying the slices thoroughly before adding oil is equally important. Moisture creates steam, and steam is the enemy of crispy potato chips.
- Finally, using only a small amount of olive oil allows the potatoes to crisp instead of becoming heavy. The oil lightly coats the surface, encouraging browning without making the chips greasy.
- When all of these simple steps come together, the result is a bowl of chips with crisp edges, delicate centers, and a fresh homemade flavor.
Easy Ways to Change the Flavor
- Classic salted potato chips are always a favorite, but this recipe also works well with a variety of seasonings.
- A little freshly ground black pepper creates a simple salt and pepper version that pairs well with burgers and sandwiches.
- For a ranch-inspired snack, ranch seasoning can be mixed with the potatoes before cooking, then lightly sprinkled over the finished chips for extra flavor.
- Those who enjoy spicy foods can season the slices with chili powder, garlic powder, and a small amount of cayenne pepper for gentle heat.
- A combination of buttermilk powder, onion powder, and garlic powder creates a rich sour cream and onion style seasoning.
- Barbecue lovers can add paprika, smoked paprika, onion powder, garlic powder, chili powder, and a little brown sugar to create a sweet and smoky coating.
- Fresh dill combined with onion and garlic powder gives the chips a flavor similar to dill pickle chips while still keeping the fresh potato taste.
- These variations all begin with the same simple potato chip recipe, making it easy to prepare different flavors depending on the occasion.
Serving Ideas
- Fresh potato chips are delicious straight from the air fryer while they are still warm and extra crisp.
- They also make an excellent side dish for homemade burgers, grilled sandwiches, wraps, and chicken recipes. Their light crunch pairs especially well with hearty meals where something crispy balances the plate.
- For casual gatherings, place the chips in a serving bowl alongside favorite dipping sauces. They pair nicely with creamy ranch dip, Greek yogurt-based dips, fresh guacamole, or classic onion dip.
- The chips can also be served as part of a snack board with vegetables, cheese, crackers, and fresh fruit. Their homemade appearance makes the entire platter feel more inviting.
- Even simple lunches become more enjoyable when a handful of fresh potato chips is served beside a sandwich instead of packaged chips.
Storing Leftovers
- If any chips remain after serving, allow them to cool completely before storing them.
- Transfer the cooled chips to an airtight container or a zip-top storage bag. Keeping moisture away helps preserve their crisp texture for several days. Properly stored, they stay fresh for up to one week.
- For longer storage, the chips can also be frozen in a freezer-safe container or bag with as much air removed as possible. They keep well for up to three months. Before serving, let them sit at room temperature for a few minutes so they regain their crisp texture.
Helpful Tips for the Best Results
- Making homemade potato chips becomes easier with each batch, and a few simple habits consistently produce better results.
- Always slice the potatoes as evenly as possible so every chip cooks at nearly the same speed.
- Continue rinsing until the water is completely clear instead of stopping after only one rinse. This small step greatly improves the final texture.
- Dry every slice thoroughly before adding the oil and seasoning. Even a little surface moisture can reduce crispiness.
- Use only the recommended amount of olive oil. Adding more does not make the chips better and may actually soften them during cooking.
- Avoid overcrowding the air fryer basket. Giving the hot air room to circulate creates evenly browned, crunchy chips from edge to center.
- Finally, keep an eye on the chips during the last few minutes of cooking. Remove the crisp ones as they are ready and continue cooking the remaining slices until every batch is perfectly golden and crunchy. With these simple techniques, homemade air fryer potato chips become an easy recipe that delivers fresh, flavorful results every time.
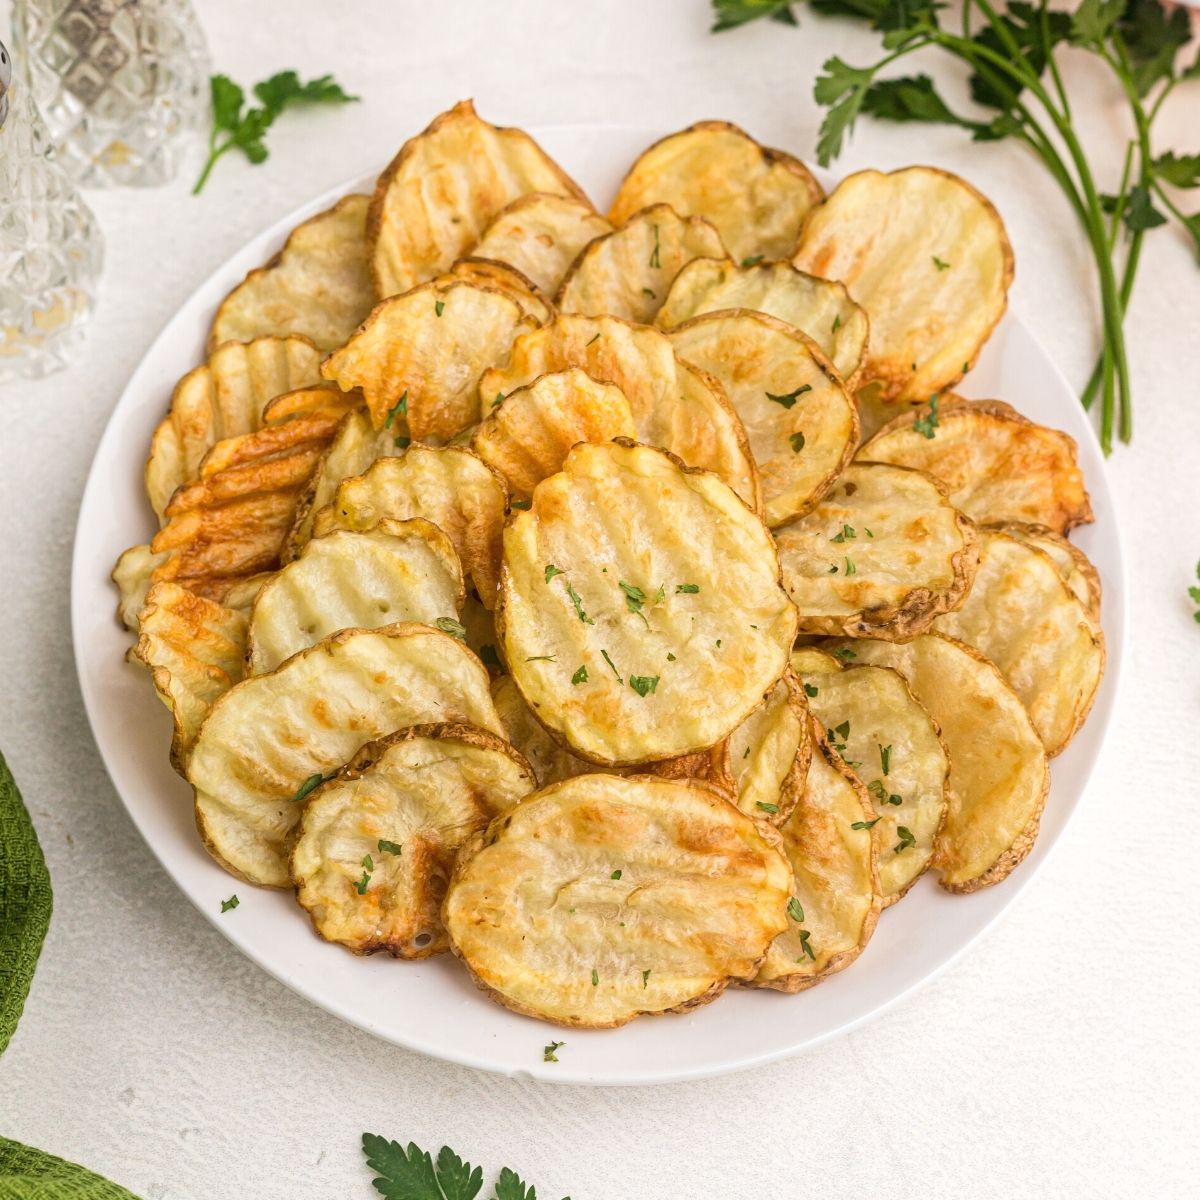
Air Fryer Potato Chips
These Air Fryer Potato Chips are light, crispy, and full of fresh potato flavor. Made with just a handful of ingredients and very little oil, they’re an easy homemade snack that’s perfect for serving with sandwiches, burgers, or your favorite dips. Thinly sliced russet potatoes cook into golden, crunchy chips without the need for deep frying.
4
servings15
minutes20
minutes98
kcal35
minutesIngredients
2 small Idaho (russet) potatoes (about 8 ounces each), scrubbed and peels left on
1 tablespoon extra-virgin olive oil
¾ teaspoon kosher salt
Freshly ground black pepper (optional)
Directions
- Wash the potatoes well, leaving the skins on. Using a mandoline, slice them into very thin rounds, about 1/16-inch thick.
- Place the potato slices in a large bowl filled with cold water. Swirl them around, drain, and repeat the rinsing process until the water becomes completely clear.
- Spread the potato slices over clean kitchen towels or paper towels. Pat them completely dry. Make sure the mixing bowl is dry before using it again.
- Return the dried potato slices to the bowl. Add the olive oil, kosher salt, and black pepper if using. Toss gently until every slice is lightly coated.
- Preheat the air fryer to 325°F (163°C).
- Arrange the potato slices in the air fryer basket in an even layer with no more than two overlapping layers.
- Air fry for 20 minutes, tossing the chips every 5 to 7 minutes to help them cook evenly.
- As the chips become dark golden and crisp, remove them from the basket. Continue cooking any remaining slices until they are all crispy.
- Repeat with the remaining potato slices. Two potatoes will usually require about four batches depending on the size of the air fryer.
- Let the chips cool for a minute before serving. They will become even crispier as they cool slightly.
Notes
- Russet potatoes produce the crispiest homemade chips.
- Slice the potatoes as evenly and thinly as possible for consistent cooking.
- Rinse the slices until the water is clear to remove excess starch.
- Dry the potatoes thoroughly before seasoning to achieve maximum crispiness.
- Avoid overcrowding the air fryer basket.
- Remove finished chips during cooking if they brown faster than the rest.
- Store cooled chips in an airtight container for up to 1 week.
- Freeze in a freezer-safe airtight container for up to 3 months. Thaw for a few minutes before serving.
Nutrition Facts
- Total number of serves: 4
- Calories: 98kcal
- Fat: 4g
- Saturated Fat: 1g
- Polyunsaturated Fat: 0.4g
- Monounsaturated Fat: 3g
- Potassium: 355mg
- Carbohydrates: 15g
- Fiber: 1g
- Sugar: 1g
- Protein: 2g
- Vitamin A: 1mcg
- Vitamin C: 5mg
- Calcium: 11mg
- Iron: 1mg